Officiating a Horizontal Event
Load the Round
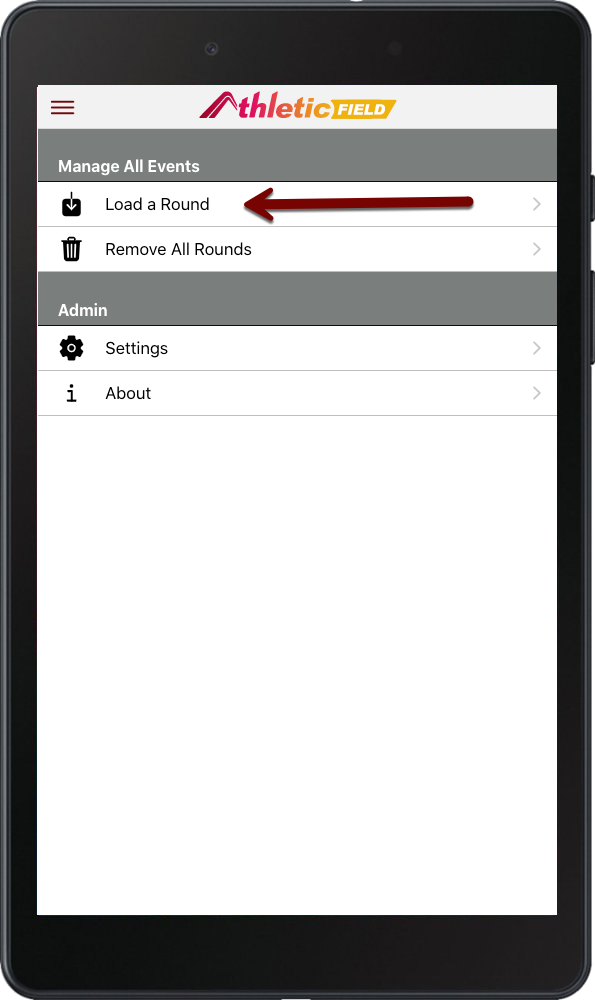
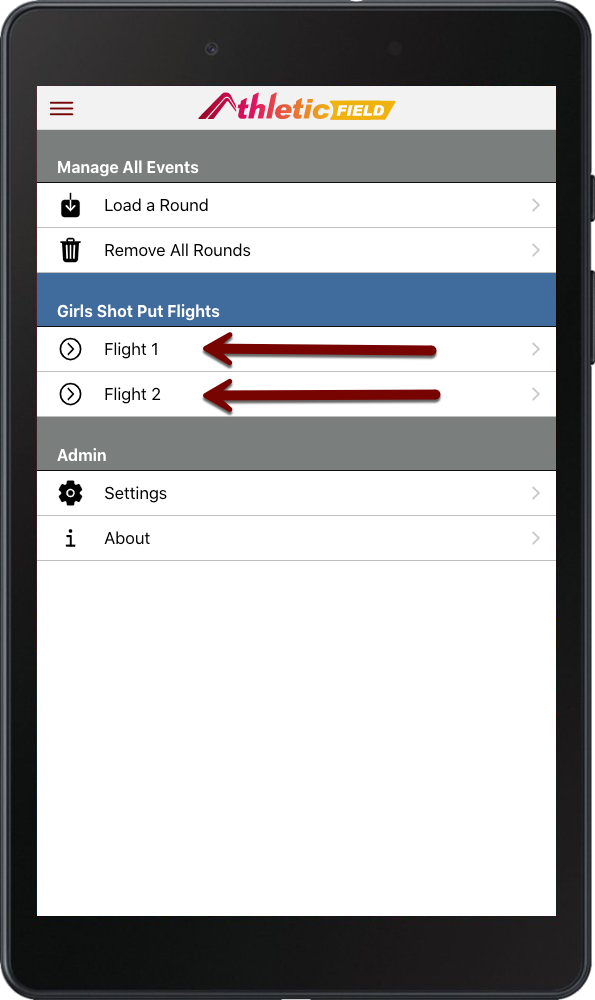
Depending on how your meet management has configured the meet, you'll either see a list of events or be asked to enter a 6 character code. Enter the code provided by meet management/timing staff for your event, or choose it from the list.
Jump Boards (Optional)
New in 1.5.10.
If you wish to track which athlete uses which jump board, follow these setup instructions. Otherwise, they are not necessary.
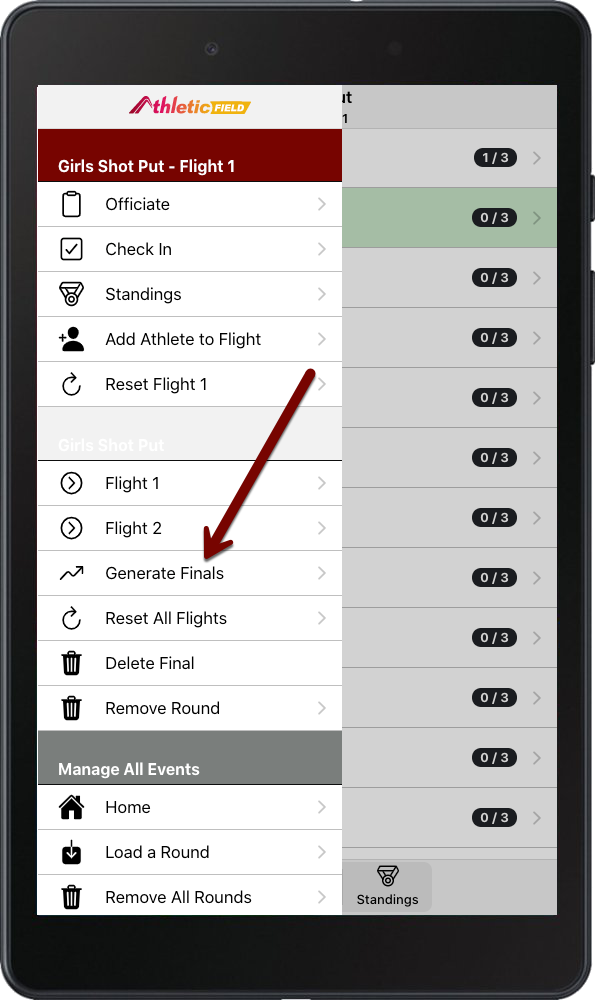
- From the home page, click the appropriate event.
- Click the top left hamburger menu.
- Click "Round Settings".
- Scroll to the bottom of the page and click "Add Jump Boards".
- Two boards will be added by default. Rename as desired.
- If more boards are needed, click "Add Board"
- Click "Save".
- Click "Save" again.
Learn how to use jump boards with a rail system >
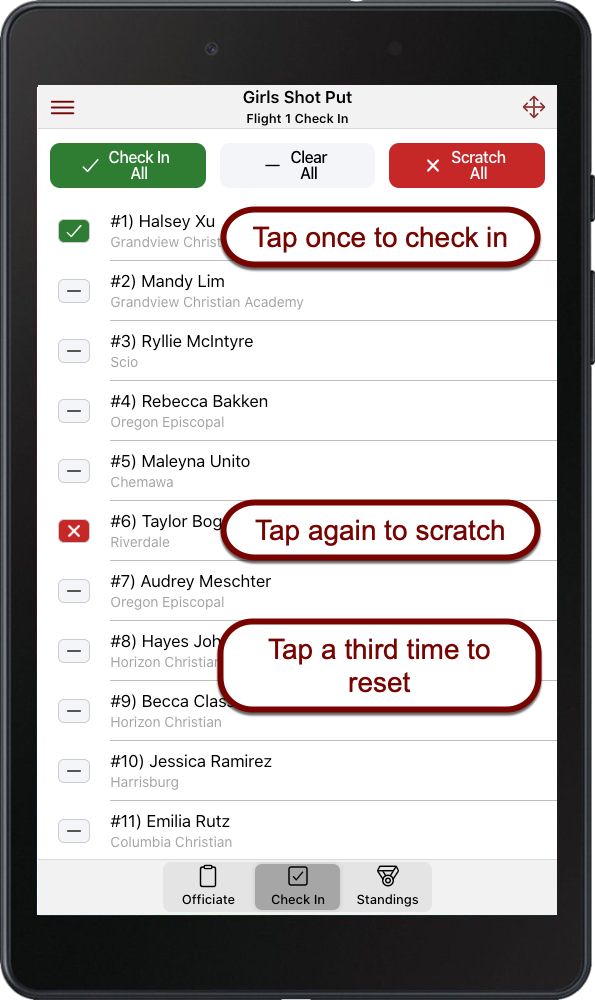
Checking In
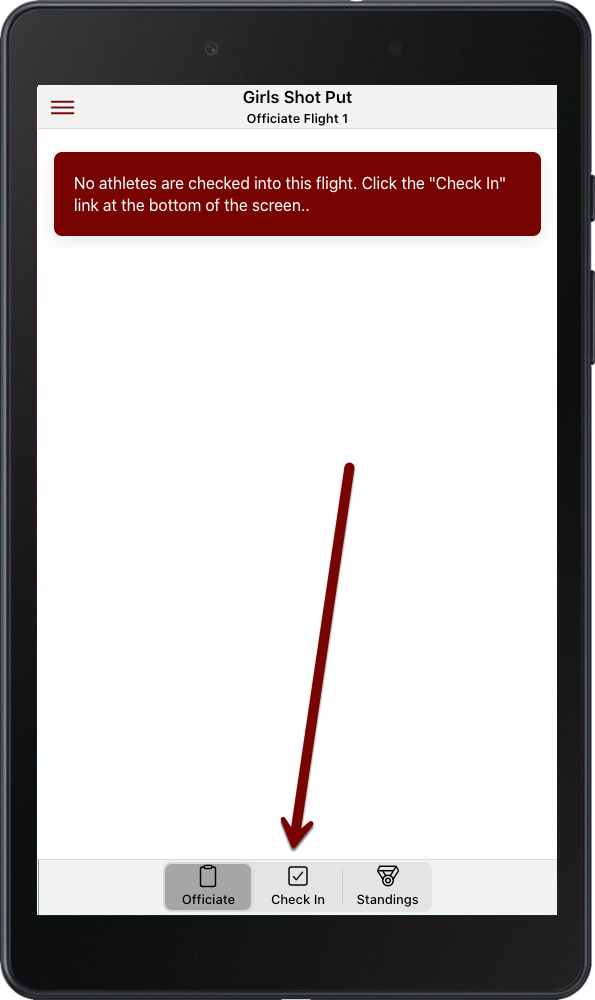
To check athletes in:
- Tap an athlete's name to check them in (noted with a green checkmark).
- Tap the name again to scratch them (noted with a red X).
- Tap the name a third time to erase their check-in status.
Assigning a Default Jump Board
- Once you check-in an athlete, click the "Select" button under the "Board" column to the right of the athlete's name.
- Select the appropriate board.
- Click "Save".
Re-ordering and Moving Athletes
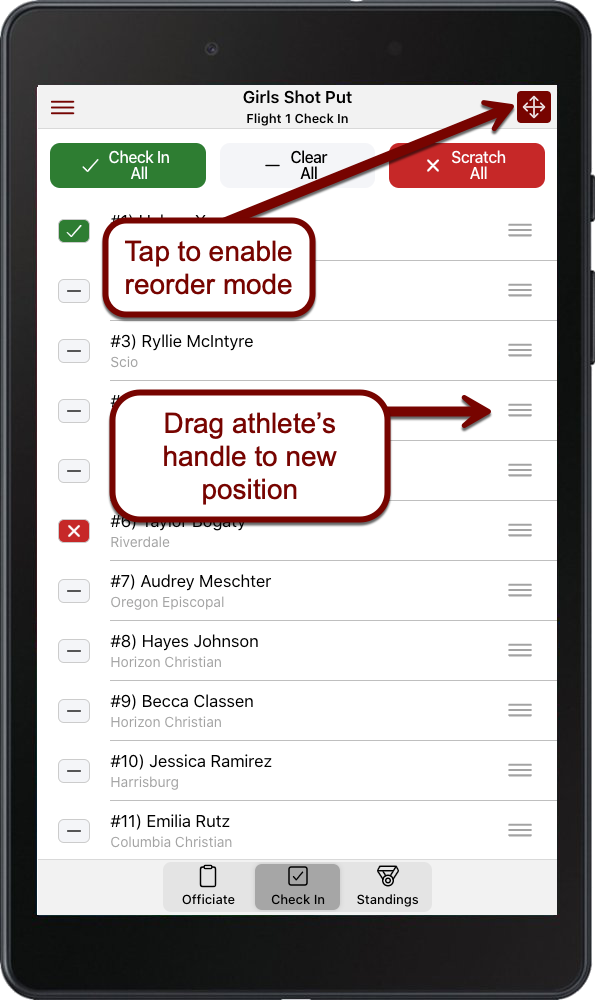
Once you're done, tap the Move icon again to exit Reorder Mode
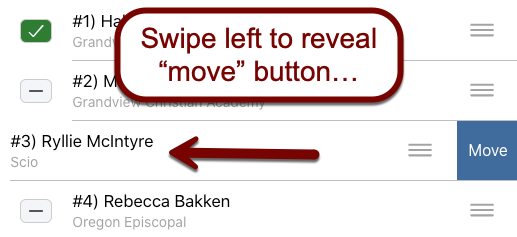
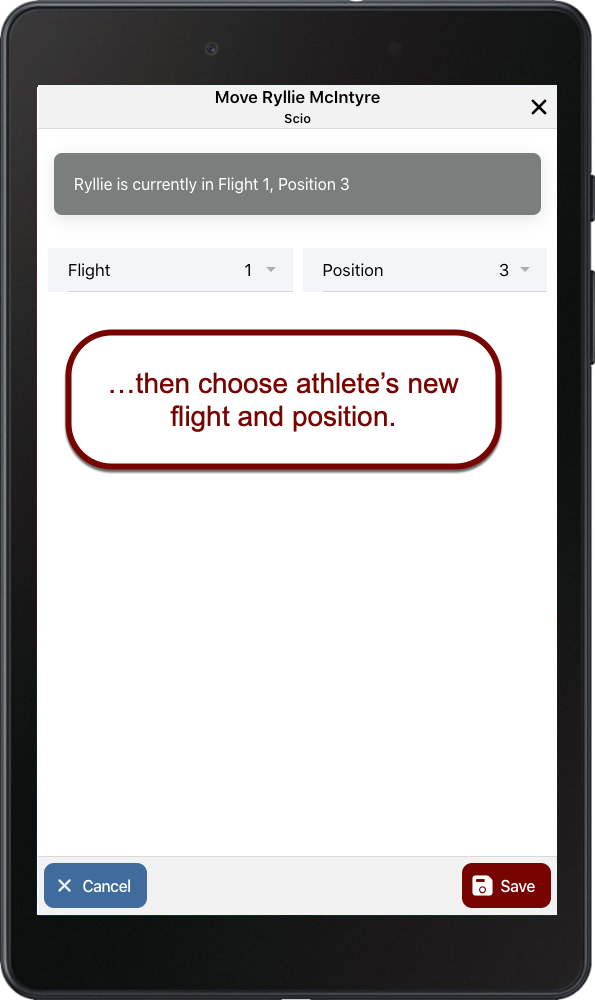
If you need to change an athlete's flight, swipe left on the athlete's name. Tap Move to set the athlete's new flight and position.
Officiating the Event
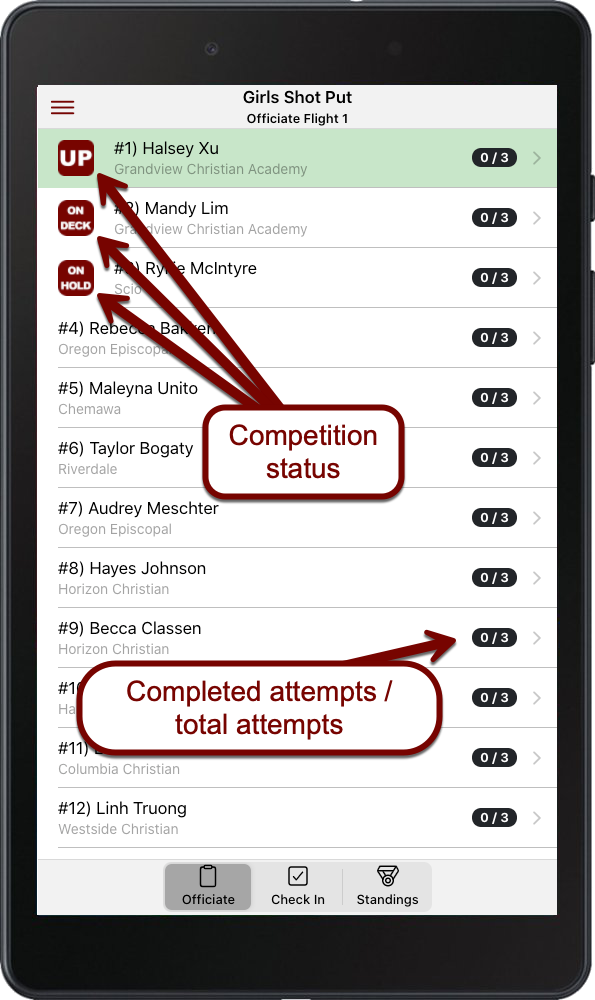
On the Officiate screen, athletes are indicated as “up,” “on deck,” or “on hold” with the icons on the left side of the screen. The “up” athlete is also highlighted in green for easy identification.
To officiate the event:
- As the athlete who's “up” steps to the line, tap on their name. The mark entry screen will appear.
- At the top of the mark entry page, you can select the appropriate attempt. The app will default to the next attempt.

- Enter the mark. The mark and its conversion will appear below. You may also choose Foul, Pass, or NM as the situation dictates.
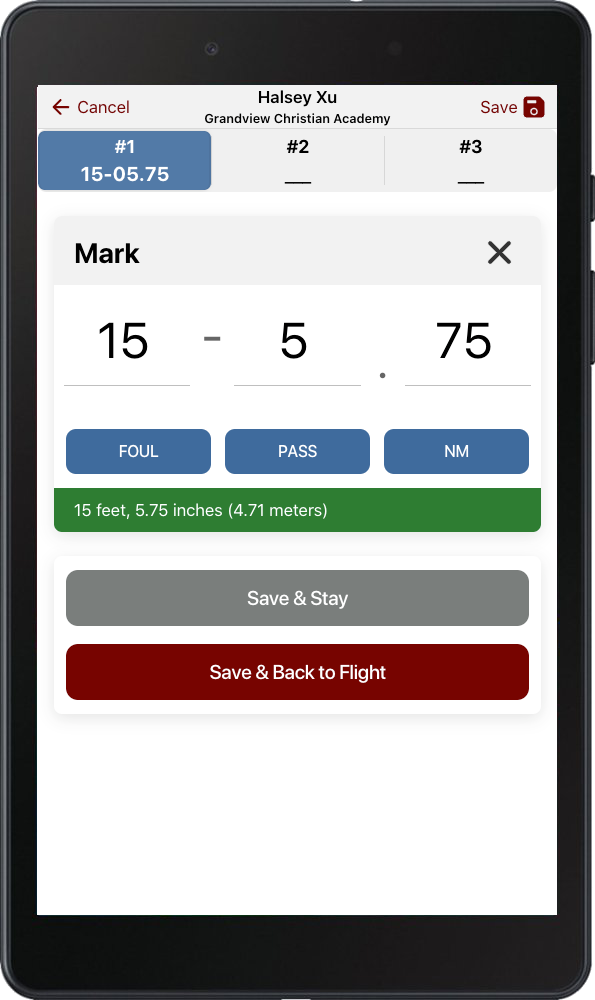
When you're done, choose Save & Back to Flight to return to the flight screen. The next athlete in the flight will now be indicated as “up”. You may also choose Save & Stay if you need to enter further marks for this athlete.
Checking in and out
If an athlete checks out of the competition, swipe left on an athlete and choose Check Out from the flight list. This removes them from the rotation and displays the time the athlete checked out.
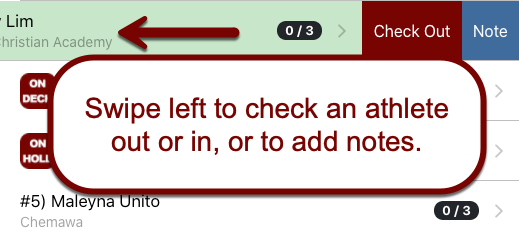
To check them back in, swipe left again and choose Check In.
Add a note
On the Officiate tab, swipe left on an athlete and choose Note. This will allow you to enter a note for the athlete. This could be useful for recording pole vault standard settings or noting where a checked-out athlete went.
Retire an Athlete
On the Officiate tab, swipe left on an athlete and click Retire. This removes the athlete from the rotation.
If an athlete retired prematurely, swipe left again and choose Un-Retire.
View Standings
Review Marks
Dark Marks
Sometimes, the official wants to record a mark within the app even if the athlete has fouled. Perhaps they think the foul could be overturned, and they don't want to write the mark on a piece of paper.
Within the horizontal entry screen, you can do this by clicking the "Dark" button once you have entered a mark. This will give the athlete a foul and save the dark mark for future reference.
If meet management determines that the dark mark can be used, click "Approve Dark Mark" to erase the foul and replace it with the dark mark.
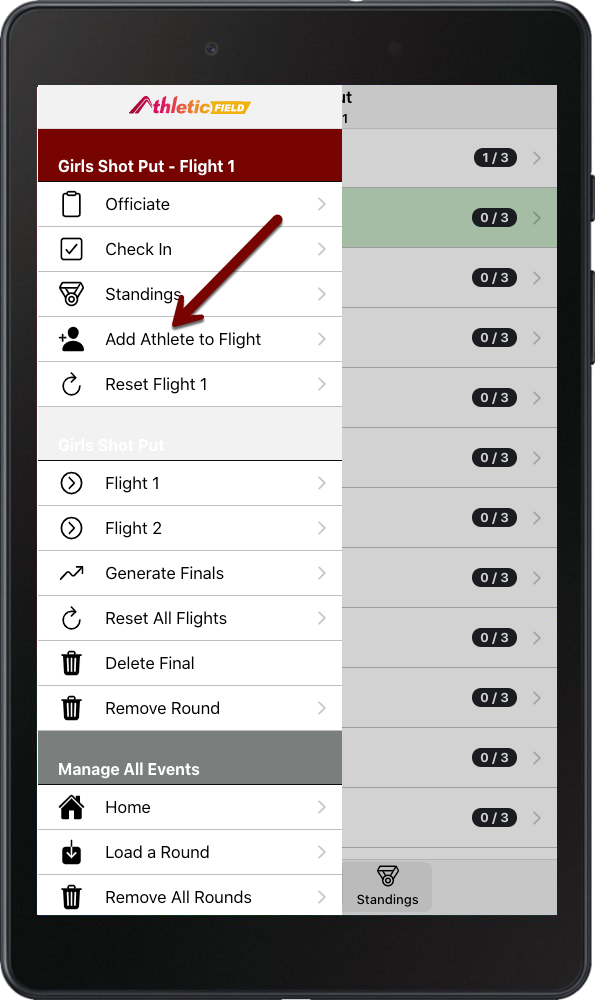
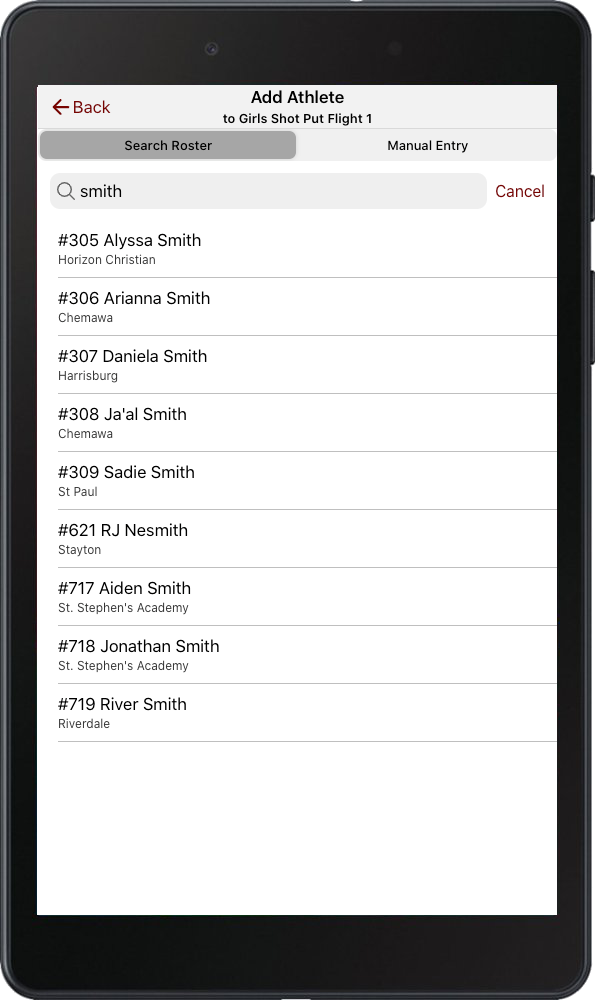
Add an Athlete
If the Search Roster tab is active, you can search for an athlete by number or name. If it's not active, or you need to add an athlete manually, move to the Manual Entry tab and enter the athlete's information.

Generating Finals
- The app will auto-select the number of people going to finals.
- The app will alert you if someone hasn't completed all of their attempts.
- The app will alert you if there is a tie for the final spot.
- Use the checkbox next to each name to manually include or exclude that athlete from finals.

When finished, click Create Final. You will be redirected to the Final flight with all athletes checked in.
Generating Finals from Multiple Devices
If your event runs multiple flights simultaneously, you are probably using at least two devices to enter results; one for each simultaneous flight.
What happens when you need to combine all results onto one device to create finals?
- Whenever you save a mark, all of your event's results get uploaded online.
- After all flights are done, choose one device to run finals on.
- Remove the round from that device.
- Reload the round onto that device. You will now have all marks from all flights.
- Generate finals as shown above.