AthleticRUNMEET Guest Access
RunMeet allows you to create guest users who can access limited versions of RunMeet through QR codes or links—without logging into AthleticNET.
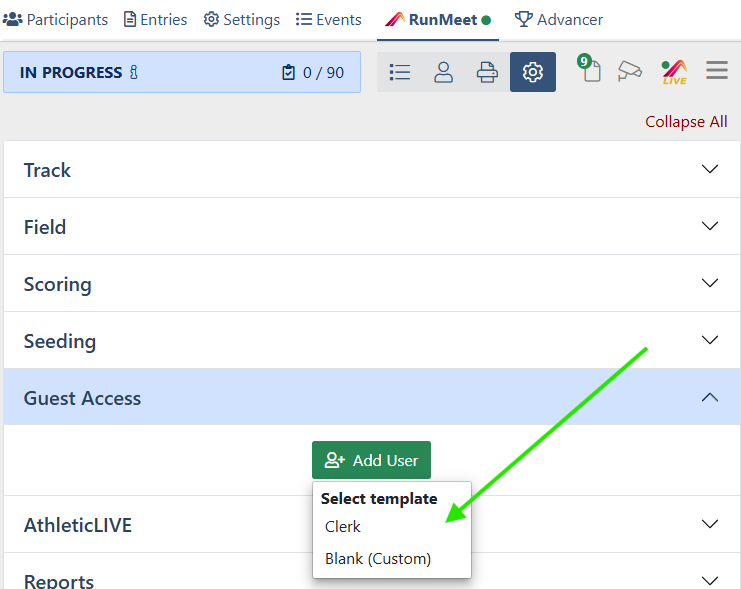
Adding Users
To add a guest user:
- Open the Guest Access section on the Settings page
- Click Add User
- Select a template from the list
Sharing and Previewing a User's RunMeet Page
Use the buttons on the right-hand side of the header to:
- View, copy, or download a QR code for the user's RunMeet page
- Copy a link to the user's RunMeet page
- Preview the user's RunMeet page in a new window
- Delete the user, by clicking Delete in the dropdown menu.
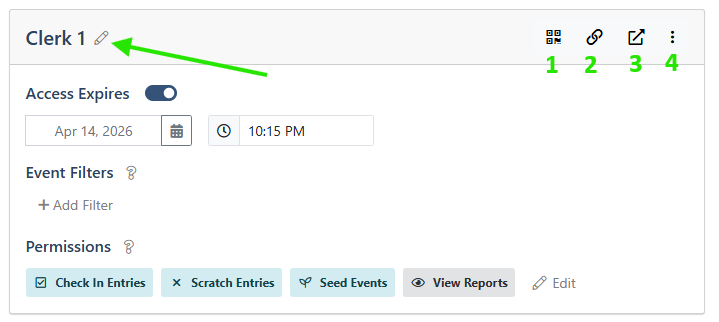
To edit the name of the guest user, click the pencil icon next to the user's name.
Limiting Guest User Access
Access to RunMeet can be limited in three ways:
By Time
Set an expiration date and time after which the user can no longer access RunMeet.
By Event
Add filters to limit which events the user can see on the main (Events) page
By Action
Add or remove permissions that control which actions the user can perform, such as seeding events or entering results.
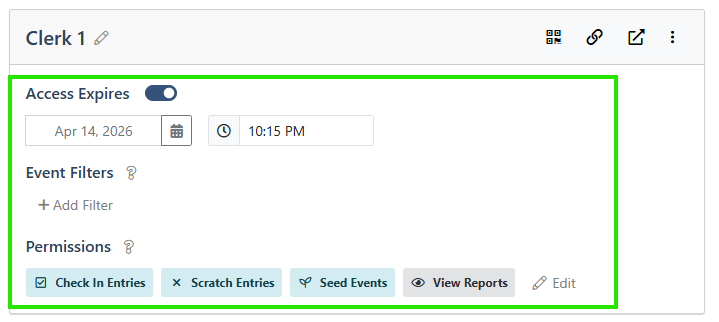
Setting an Expiration Date and Time
Under Access Expires, use the date picker and time inputs to set when the user’s access to RunMeet will end.
To grant the user indefinite access, turn off the switch next to Access Expires.

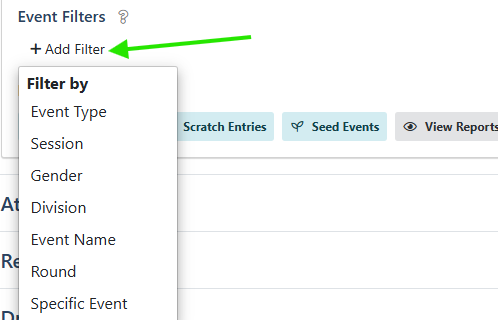
Limiting Events
To limit the events a guest user can access:
- Click Add Filter
- Select a filter from the dropdown menu
For example, if you select Event Type, an Event Types dropdown will appear.
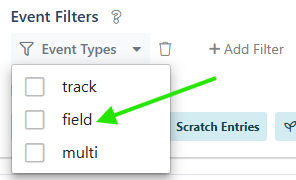
If you then select field, the guest user will only see field events.
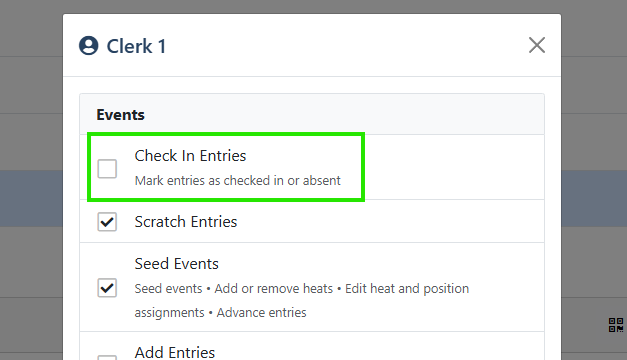
Limiting Actions
Under Permissions, you’ll see a list of actions the user is allowed to perform. Click Edit to add or remove permissions.

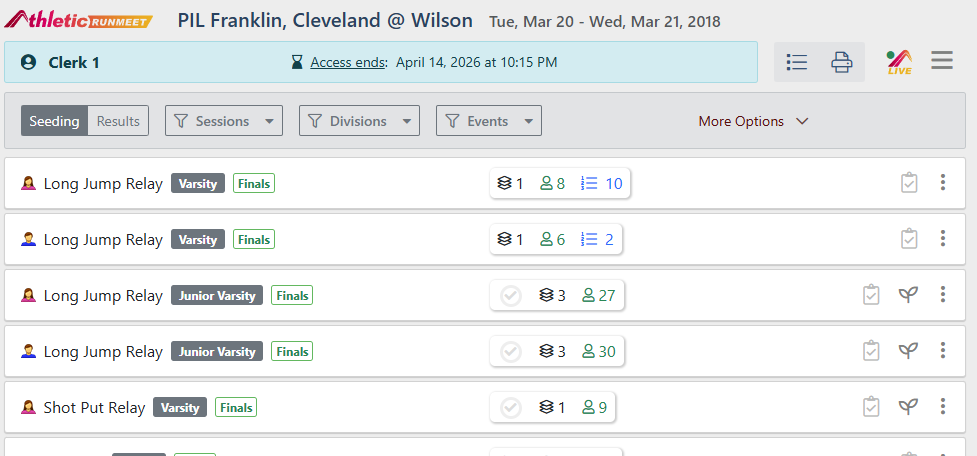
If a user lacks permission for a particular action, parts of RunMeet may become inaccessible. Elements may be hidden or disabled accordingly.
For example:
- If the user has permission to check in entries, they can access the Check-In view for an event
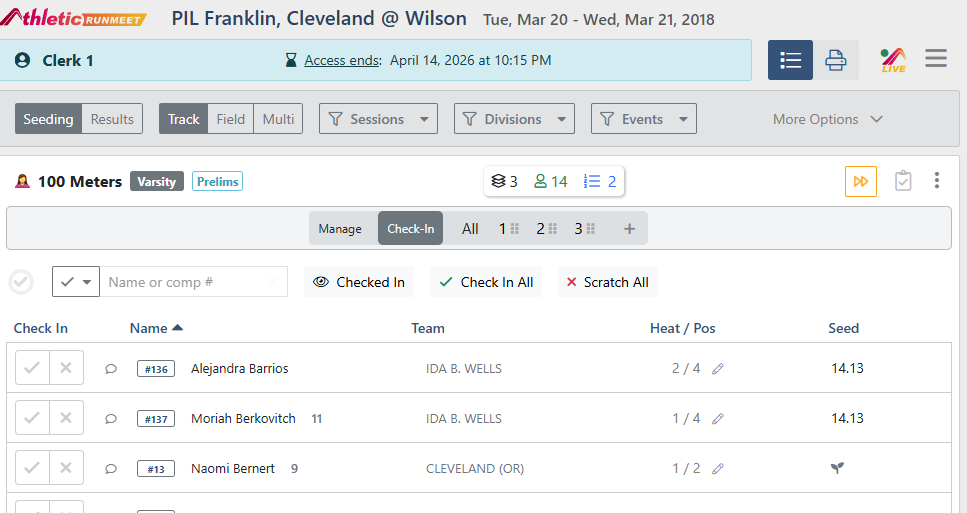
- If Check In Entries is disabled, the user will be redirected away from the Check-In view and will no longer be able to access it

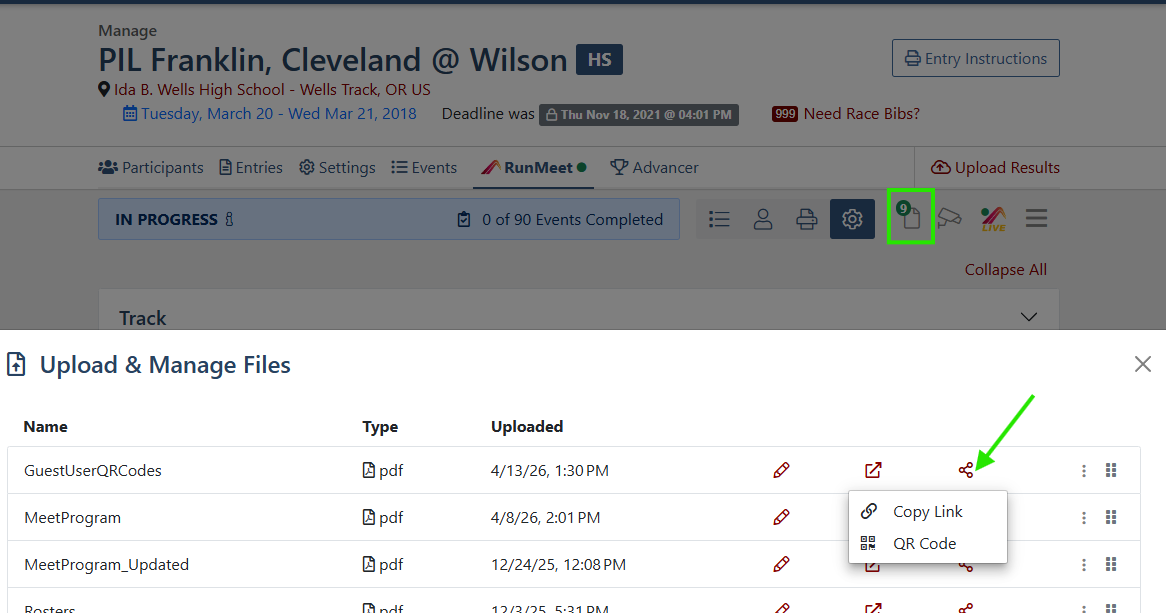
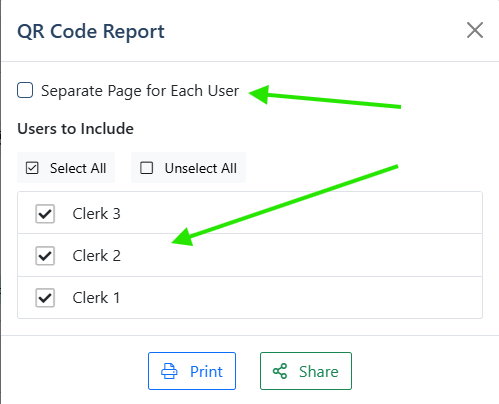
QR Code Report
To print or save a report with guest user QR codes, click the QR Codes button.

Check Separate Page for Each User if you want each user’s QR code on its own page. Then select the users you’d like to include in the report.
Click Print to open the report in a new window, or Share to upload the report.
Reports saved using the Share button can be viewed in the Upload & Manage Files section. From there, you can view the file or share it with others via QR code or link.