USATF Junior Olympic Championships TRACK AND FIELD Meet Setup Guide
Add Meet to Calendar
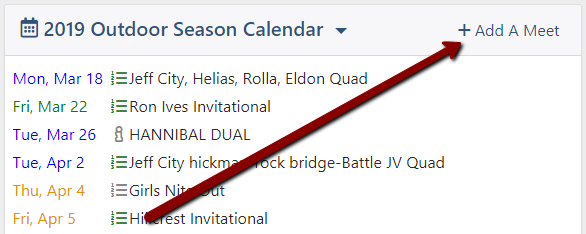
The first step in hosting a meet is to add it to the Athletic.net master calendar. In order to do this, you'll need to have the date and location decided, although these are both editable after the meet has been created. To begin, navigate to your association's homepage by clicking on the Menu Icon () in the top left corner and then clicking on your association's name. Ensure that you select TF or XC next to your association's name depending on which sport you're working with. Once you're on your association's homepage, click Add A Meet at the top of the calendar.
Before you create a meet, Athletic.net will walk you through a quick double-check to make sure that your meet isn't already listed. Select the date the meet will take place on as well as the state and zip code. Check the list on the right hand side to make sure your meet isn't already there. It may be that someone else knows about your meet and has added it to the Athletic.net master calendar, even if this person is not the meet host.
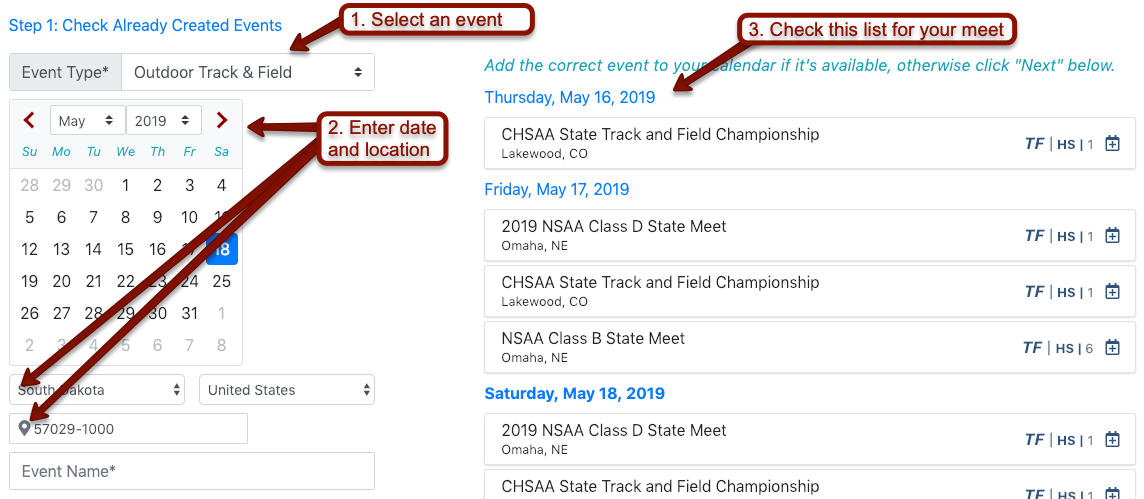
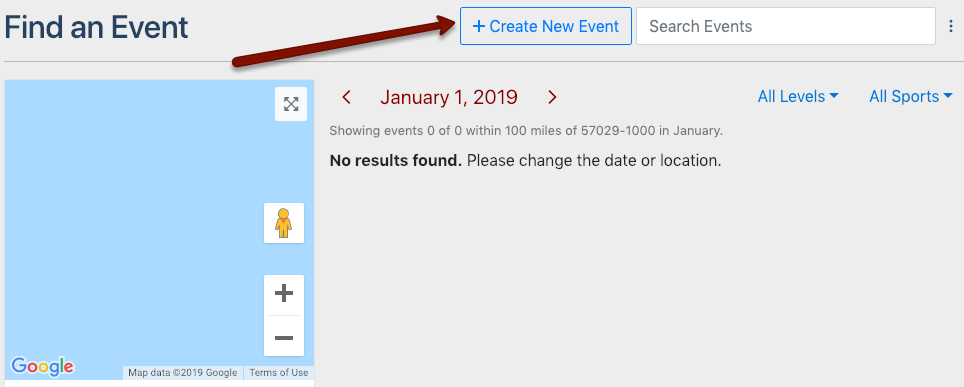
If you don't find your meet, click on Create New Event on the top-right of the screen and choose Outdoor Track & Field.
You'll be prompted to add the meet date, location and name.
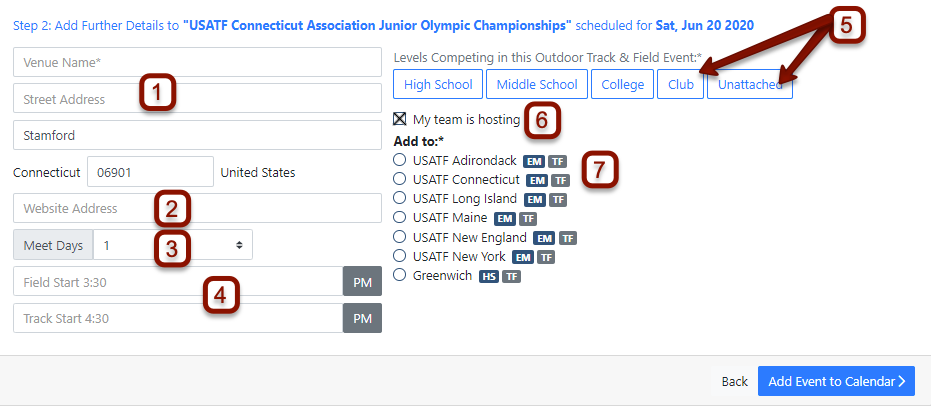
- Venue Location: Enter the venue name, address, city and zip code
- Meet Website: Paste the link to your USATF association's web page here
- Meet Days: Enter the number of days the meet will run.
- Start Times: Enter the start times of track events and field events.
- Levels: For USATF JO meets, you must only select Club and Unattached.
- Hosting: Since your association is hosting the meet, you must check this box. This will give you access to meet configuration options. Be sure to double check this step as it is easy to miss!
- Add to Calendar: If you are affiliated with multiple teams, you'll see each team listed here. Select the correct association to add the meet to that association's calendar.
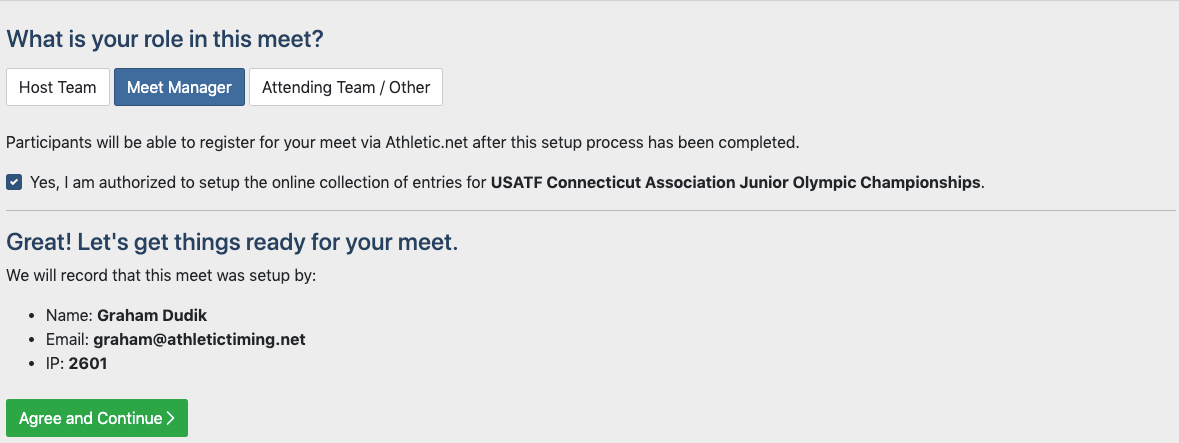
At the bottom right of the screen, you'll see Continue to Meet Setup . If you see something other than Continue to Meet Setup , it means you've forgotten to check the box above that says My Team is Hosting. Once you click Continue to Meet Setup , you'll be prompted to select your role in the meet and confirm that you are authorized to set up online collection of entries for the meet. As an association event manager, you should always choose Meet Manager. When finished, click Agree and Continue.
Select the Template
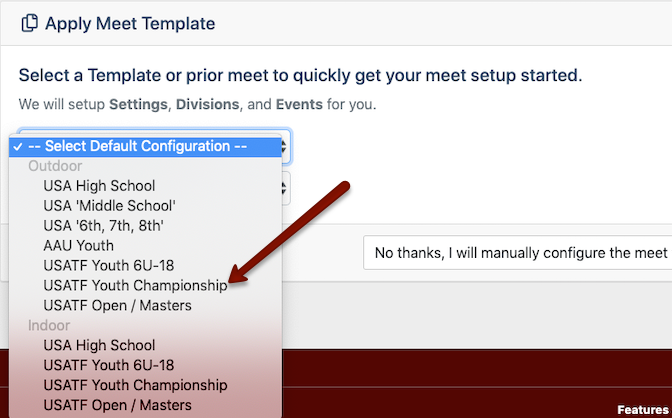
When you create a new meet, you'll be prompted to select a template. USATF Junior Olympic meets already have a pre-configured template to make setting up the meet details easier. You should always select the (Outdoor) USATF Youth Championship from the Default Configuration drop-down menu. Then click Apply Configuration
Editing Meet Information
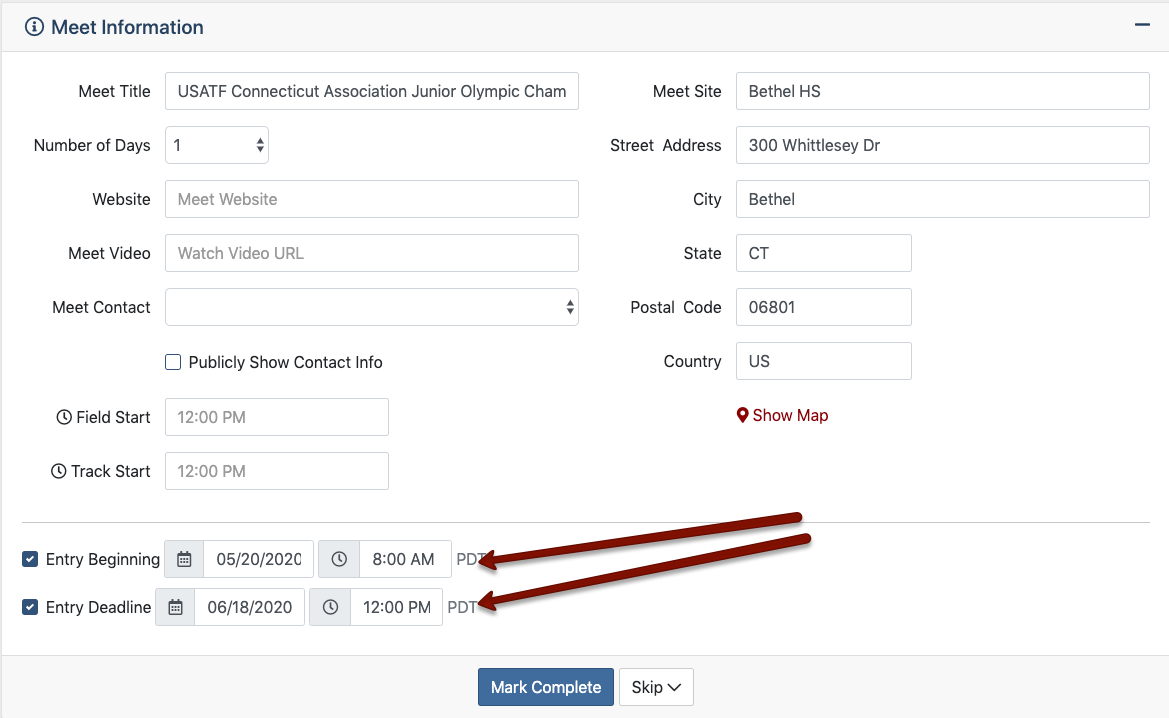
Most of the information here will be pre-filled with information you provided previously. However, this page is a place where the Meet Title, Meet Site, and Meet Contact can be changed. Most of these items are self-explanatory, but take note of the Entry Beginning and Entry Deadline fields below.
Meet hosts should set Entry Beginning and Entry Deadline dates and times. These allow the meet host to define a window during which meet entries may be submitted using Athletic.net. Entries may not be submitted before the Entry Beginning date. Likewise, entries may not be submitted or edited after the Entry Deadline date. When all required fields are filled out, click Mark Complete to move to the next section.
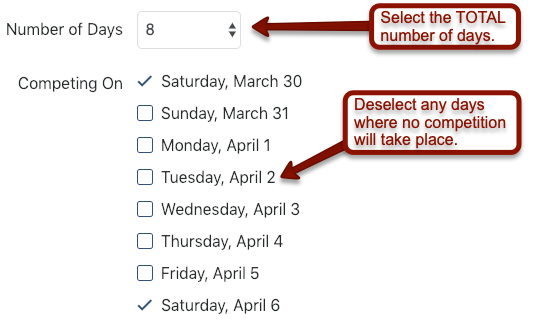
If you are creating a multi-day meet, select the number of days the meet stretch across. To create a meet that stretches over two non-consecutive days, select the total number of days that your meet will stretch across. For example, if your meet begins on Saturday, but the second session isn't until the following Saturday, you'll need to select 8 under Number of Days. Once you do, you'll be prompted to check or uncheck days that should be included in the listing for this meet.
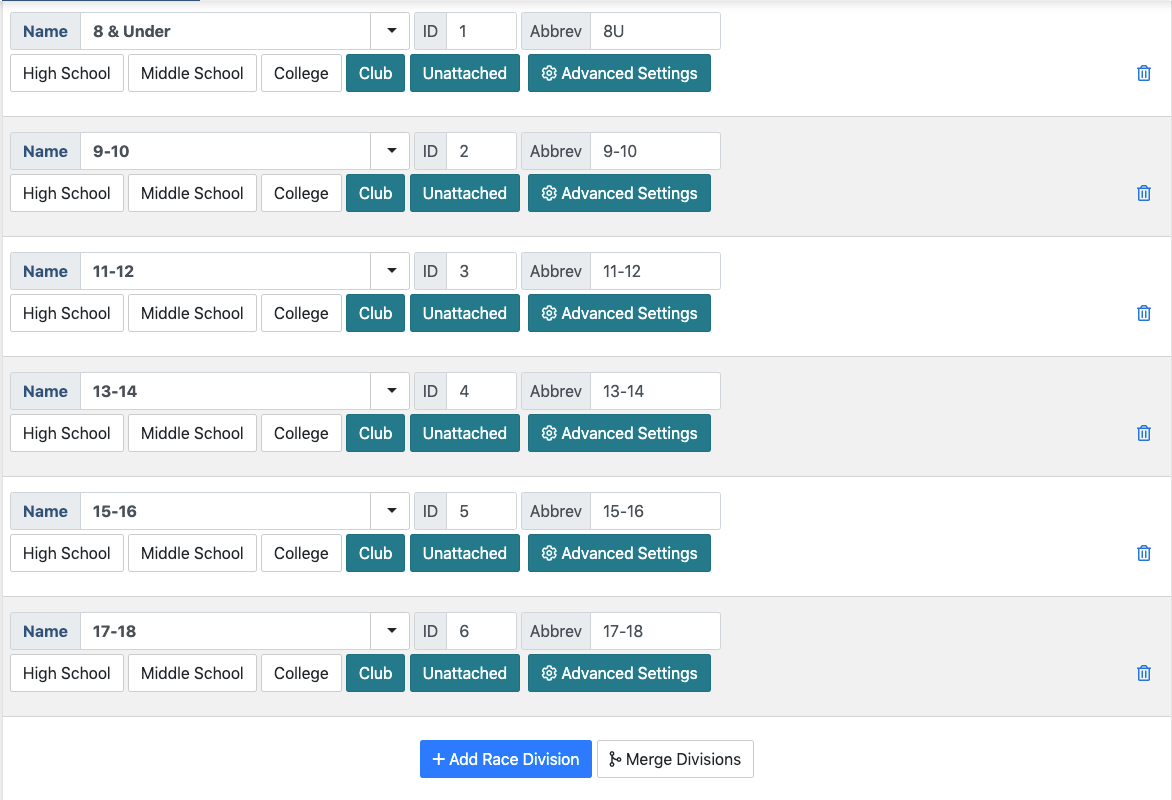
Divisions
Race divisions for Junior Olympic meets are pre-programmed when you select the correct template above. To ensure the HyTek template matches Athletic.net and to facilitate smooth advancement of qualifiers, do not change division settings or ID numbers. Click Mark Complete to move to the next section.
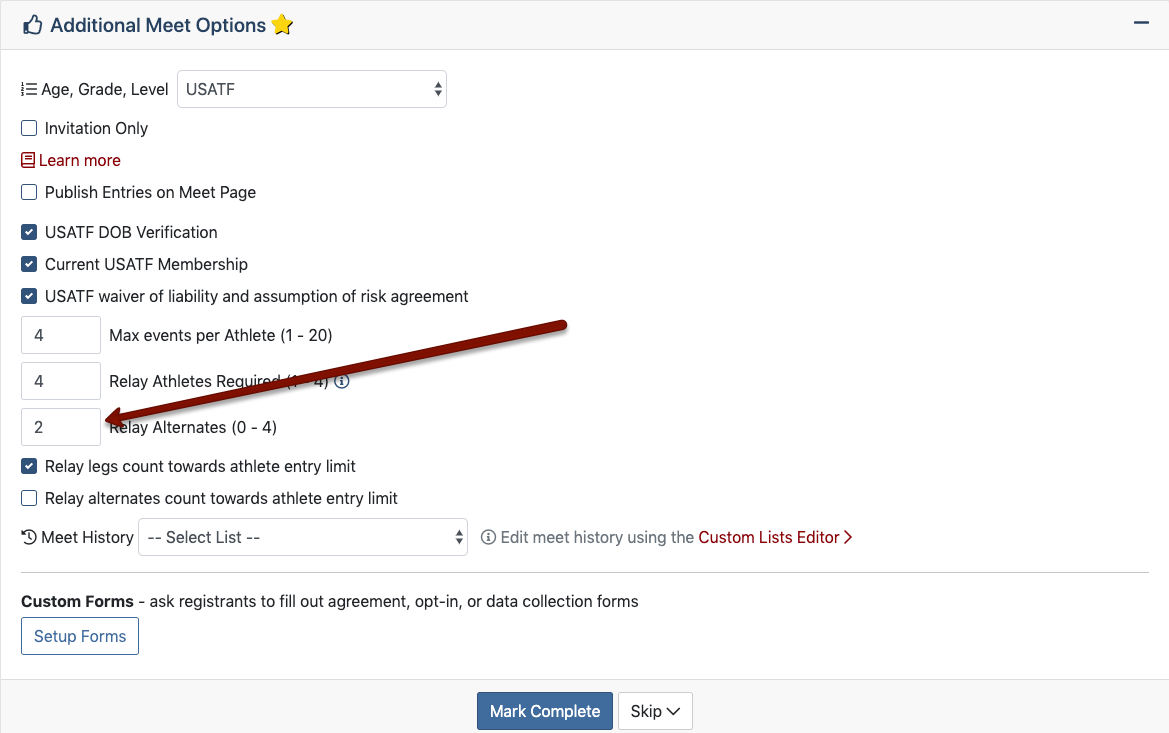
Additional Meet Options
Most of the options here are pre-configured when the correct template is selected. However, ensure that the Relay Alternates field shows 2 relay alternates. Click Mark Complete to move to the next section.
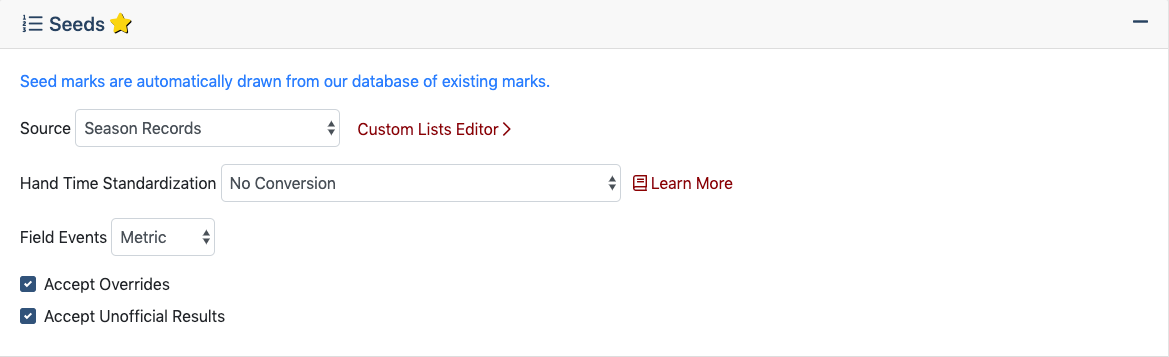
Seeds
These options are pre-configured when the correct template is selected. Click Mark Complete to move to the next section.
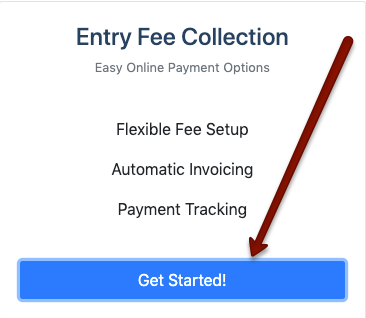
Entry Fees
To set up entry fee collection, click Get Started! under Entry Fee Collection.
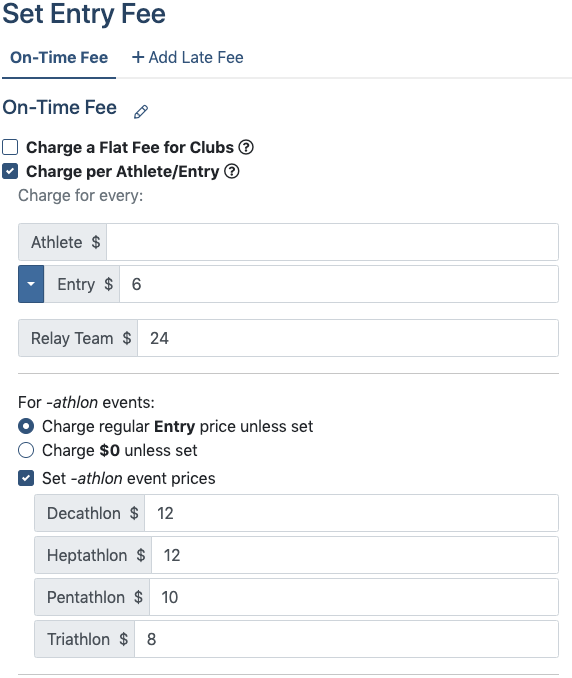
On the next screen, check the Charge per Athlete/Entry box. Common settings for Junior Olympic Championship meets are shown below. Be sure that you are charging fees per entry—leave the Athlete box blank as shown below.
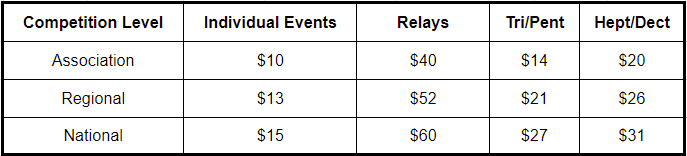
Please note the maximum event fees allowed for 2024 Junior Olympic Championships:
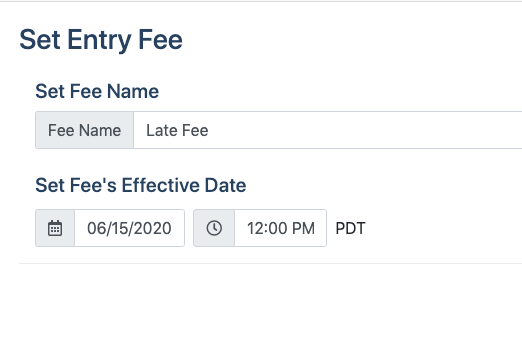
If you intend to add a late fee, click Add Late Fee. You will be presented with options to name the late fee structure and choose the date and time at which it will become effective.
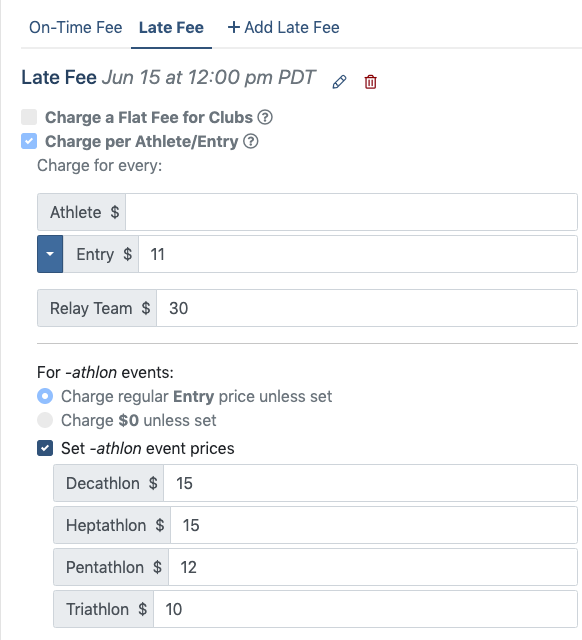
You can then configure a late fee in a similar manner to configuring the regular entry fee scheme:
When you're done configuring fees, click Continue in the bottom-right. On the next screen, check the box that says Online by Credit Card. Once you check this box, a number of options will appear.
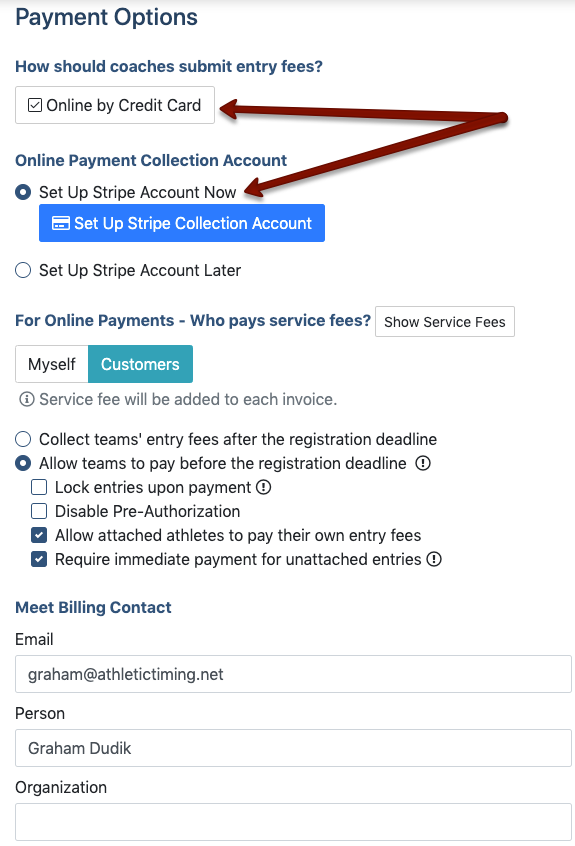
Select the radio button labeled Set Up Stripe Account Now. The other default options are suitable for Junior Olympic meets. Ensure that the contact information displayed at the bottom of the screen is correct; it will be displayed on every invoice. When all options are correct, click on Set Up Stripe Collection Account.
Setting Up Your Stripe Account
Athletic.net's financial features (including team fee collection, team fundraising, and meet entry fee collection) are powered by Stripe, an industry-leading provider of secure electronic payment services. Stripe is the payment processor behind some of the largest businesses online, and uses state-of-the-art security systems to ensure that your payment data is safe. Most USATF associations already have a Stripe account. This account will need to be connected to your meet in order for your association to receive entry fees. The person who manages the Stripe account for your association must be the one who connects the account to the meet. If you're not sure who the Stripe account manager for your association is, contact Athletic.net USATF Support.
If you are the Stripe account manager, when you click Set Up Stripe Collection Account, you'll be shown all Stripe accounts that are linked to your Athletic.net login. Click Use This Account.
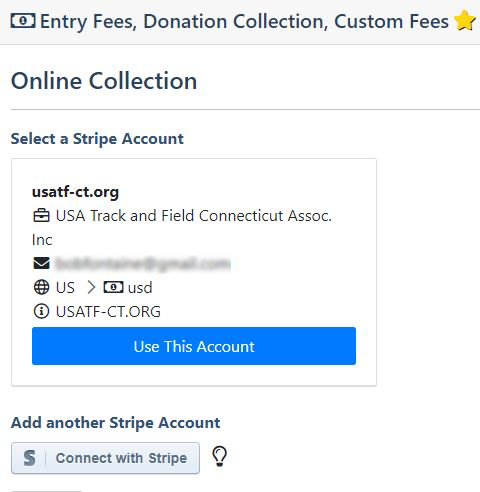
If you need to create a new Stripe account, click the Connect with Stripe button. This will take you to Athletic.net's payment processing partner, Stripe. Stripe will ask for information about the person or business receiving payments. The data required by Stripe varies depending on the type of organization you represent. You'll also need to create a username and password with Stripe, and provide them with a routing number and account number for the bank account where funds should be deposited. When you're done, click Authorize access to this account, and you'll be taken back to Athletic.net. You'll also need to verify your email with Stripe.
Activate Entry Fee Collection
Once you've connected your Stripe account, click Continue . On the next screen you'll be asked if you'd like to allow participants to make a donation to their organization. This can always be set up at a later time, so for now click Not now.
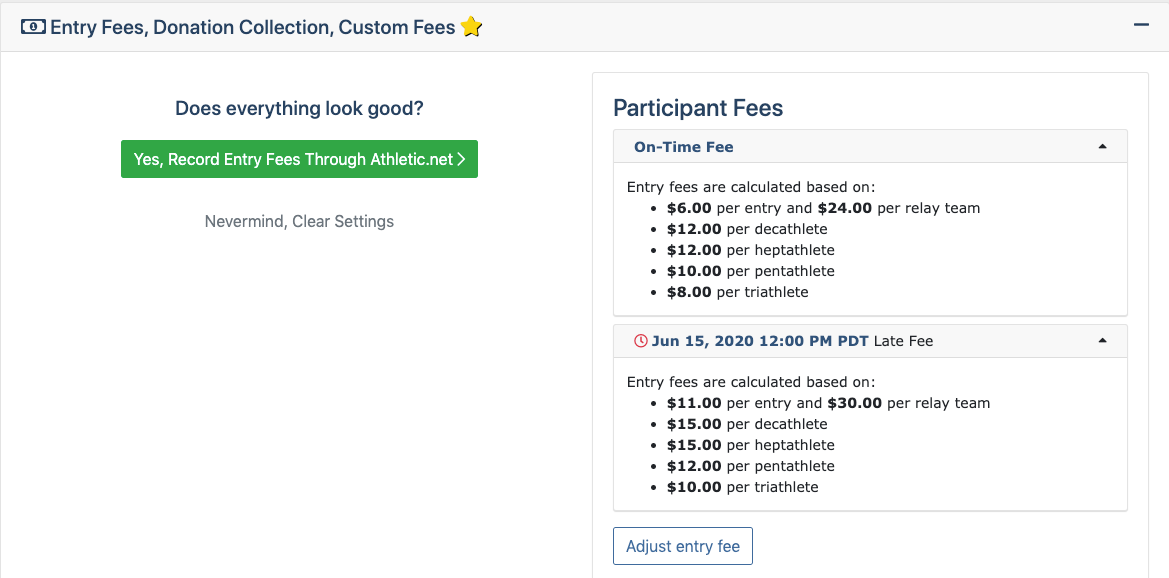
On the next screen, review the entry fee schedule you've created, and if everything looks correct, click Yes, Record Entry Fees Through Athletic.net .
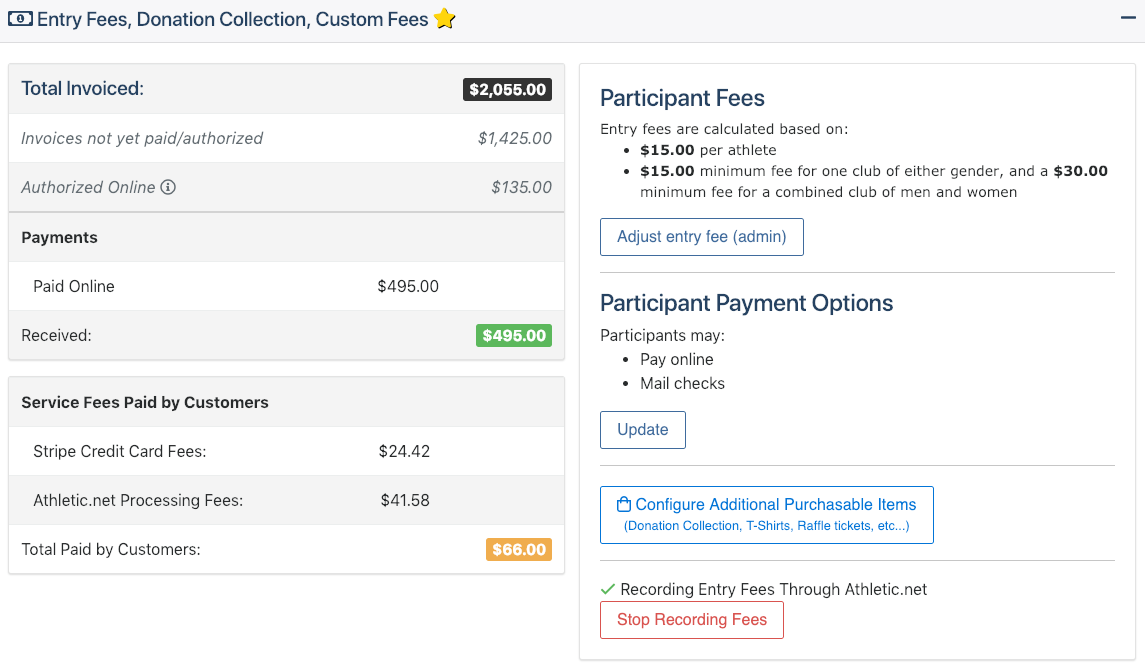
Once you click Yes, Record Entry Fees Through Athletic.net , the screen will change to a summary of fees collected. As registrants pay invoices, you'll see the summary expand in detail.
Finally, click Mark Complete at the bottom, and click Next under the Race Bibs and Pins offer.
Configuring Events
If you selected the correct template at the top of this article, you'll see that the standard Junior Olympic events have been pre-configured for you. Use the headings at the top of the page to change between Track, Field, and Multi-Event categories.
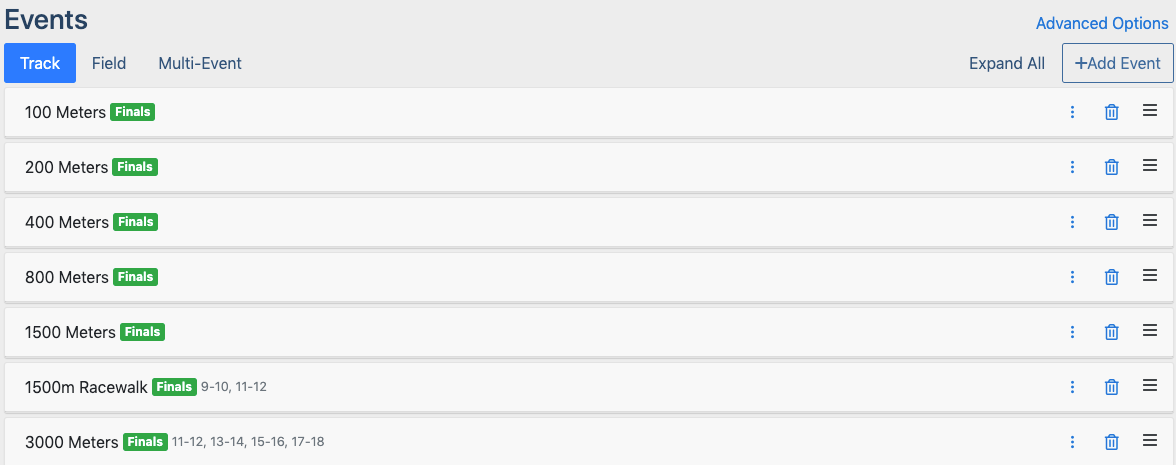
Click on an event to show individual divisions within that event. The following options are available:
Click the to split a division into its own group for easy organization on this page.
Click the to delete an event, or delete a division or gender within an event. If you delete a gender or division, a button to add that gender or division back into the event will appear at the bottom of the event section.
Use to move the events up or down, or change the order of the division within an event. This is useful if there is an exception to the schedule, such as when boys' events run before girls' events, except for a particular event. Otherwise there are options to sort the events by gender or division in the Expand All or Advanced Options menus.
When finished, click Mark Complete at the bottom of the screen.
Activate the Meet
Almost done! On the following screen, set the Open registration later date to a few days in the future, so that both you and Athletic.net staff can review your meet before registration goes live, then click Activate Meet .