Troubleshooting Video Upload Issues
If you're having trouble uploading your virtual results evidence video, here are a few tips to get you going.
Best Practices
Videos (especially those of longer events) can sometimes be difficult to upload if you are in an area with poor reception. These best practices will give you the best chance of uploading your video on the first try.
- We're constantly releasing updates to AthleticAPP. Check your app store and ensure that you have the latest version. If there's an update available for AthleticAPP, install the update and try again.
- Don't attempt an upload with poor signal. Find strong cell phone signal (LTE or 5G is best) or a strong Wi-Fi signal before attempting to upload a video.
- Don't close the app during video uploading. Wait until the progress bar indicates completion before closing the app.
- If the video is taking awhile to upload, make sure your device doesn't go to sleep or lock the screen during the upload.
- Always go to the results page for your meet and ensure that your submission was properly processed. If the video doesn't show up or says “Video Processing”, wait five minutes for the video to process before attempting further troubleshooting.
- If you're seeing this error:
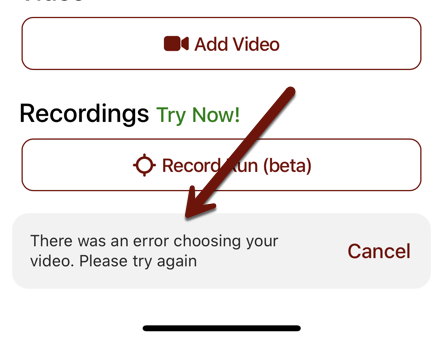
Then your device may not be allowing AthleticAPP to access your camera or photos. See Checking Permissions below.
Browser Upload
If you continue to have problems uploading a video, you can try an alternative method of attaching a video to an existing results post. In order to perform this, your results submission must be posted. You will then remove the broken video from your post and attach a new one.
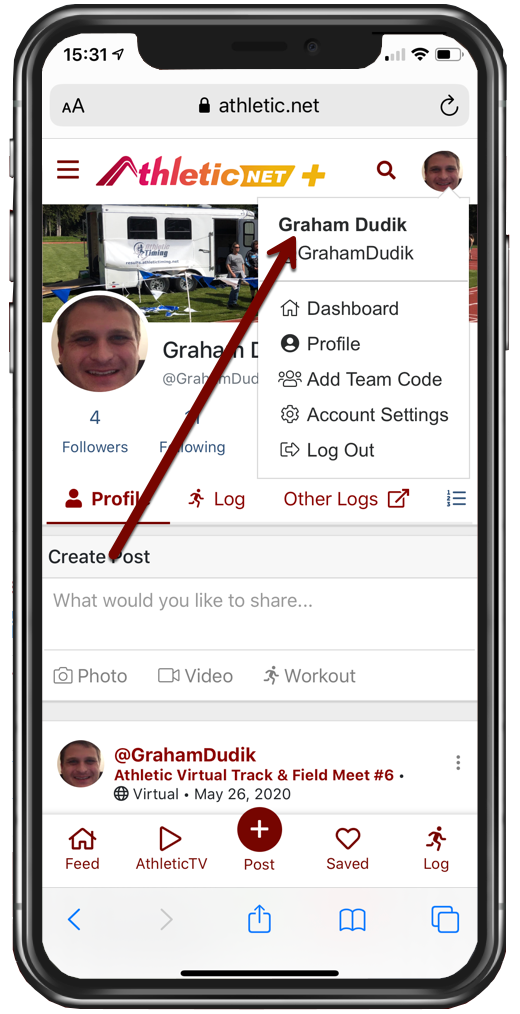
Open a web browser and navigate to Athletic.net. Log in using the icon at the top right of the screen if necessary. Once you're logged in, tap on your name or initials at the top right of the screen, and tap on your name.
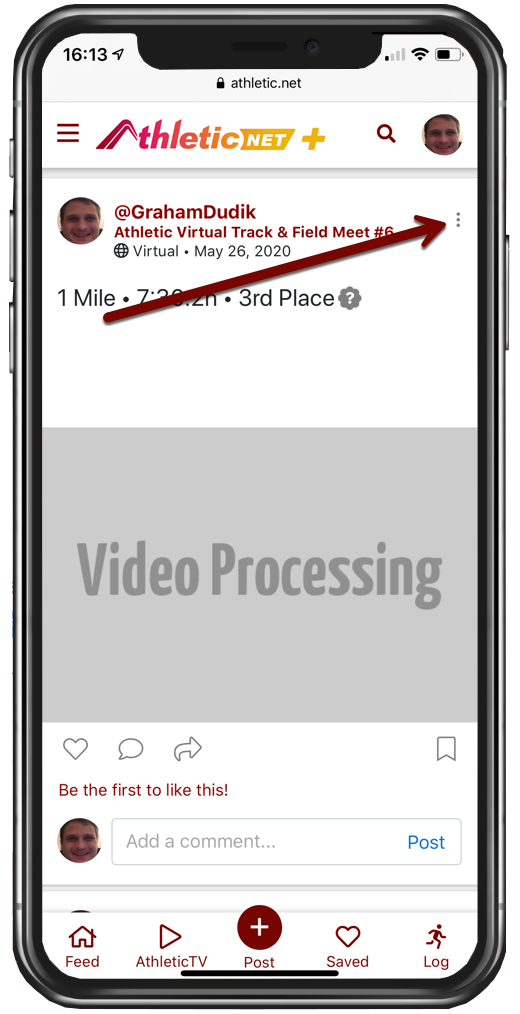
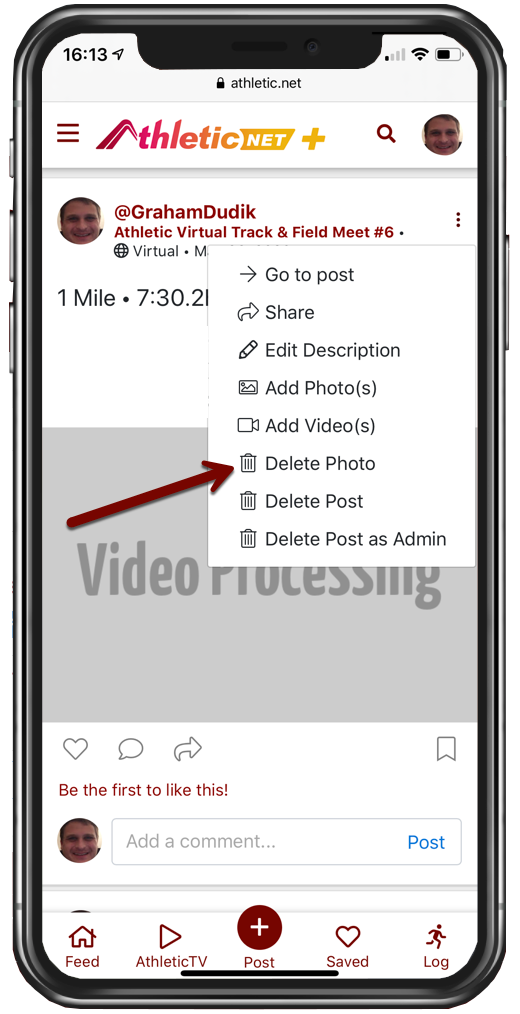
You'll need to find the post to which you're adding a video. Accessing your personal feed, as shown in the previous step, will show you all recent posts you and your followers have made, so the virtual meet results post you're looking for should be near the top of the page. Once you find the post, choose the edit post icon ().
From the menu that appears, choose Delete Photo. This will remove the placeholder image. Choose OK from the warning that appears.
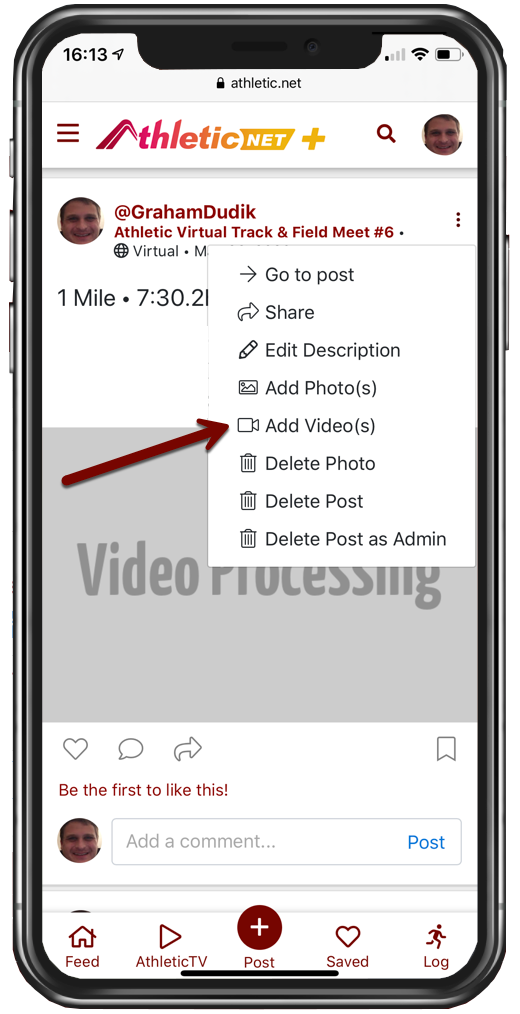
Once the placeholder image has been removed, you can add a new video. Select the edit post icon () again, and choose Add Video(s).
Your device will then prompt you to choose the correct video from the camera roll. Once you've chosen your video, tap Upload File(s).
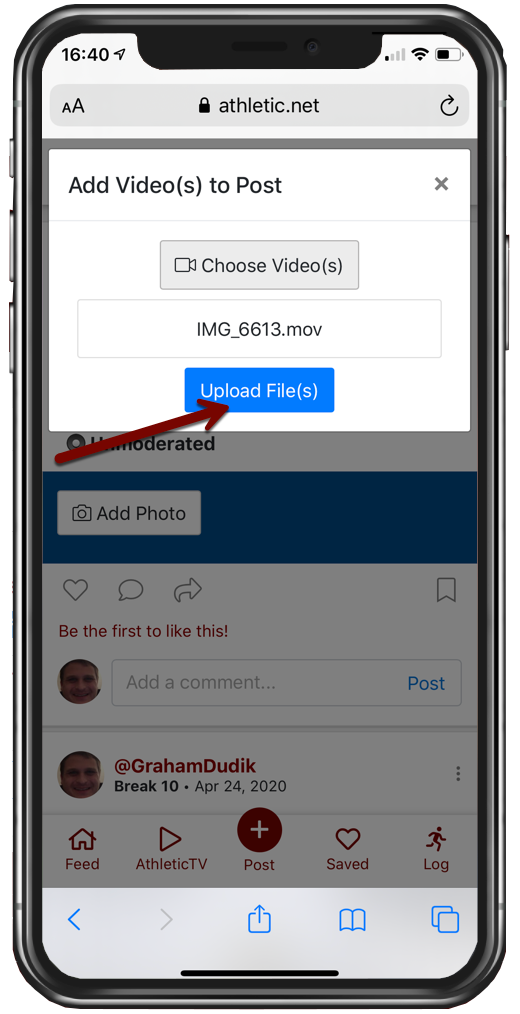
After the progress bar completes, you're finished!
Checking Permissions
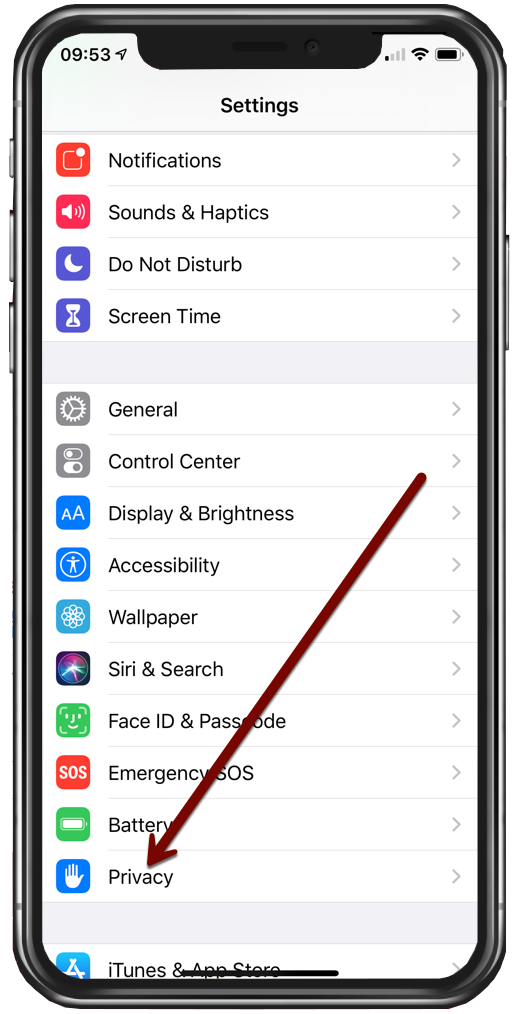
If you encounter an error when trying to choose a photo to upload when working in AthleticAPP, you may have inadvertently denied AthleticAPP permission to access your photos and camera. For iOS devices, you can check the following settings to make sure AthleticAPP has access to your camera and photo library.
Open the Settings App, and then choose Privacy.
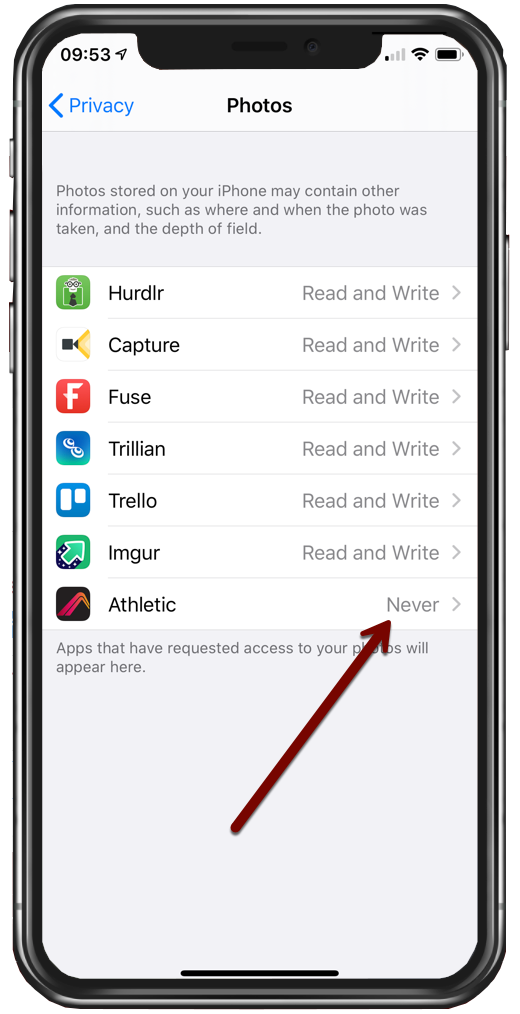
From the Privacy menu, choose Photos.

Ensure that AthleticAPP has permission to read and write to your photo library. If it does not, tap on it to edit the permissions.
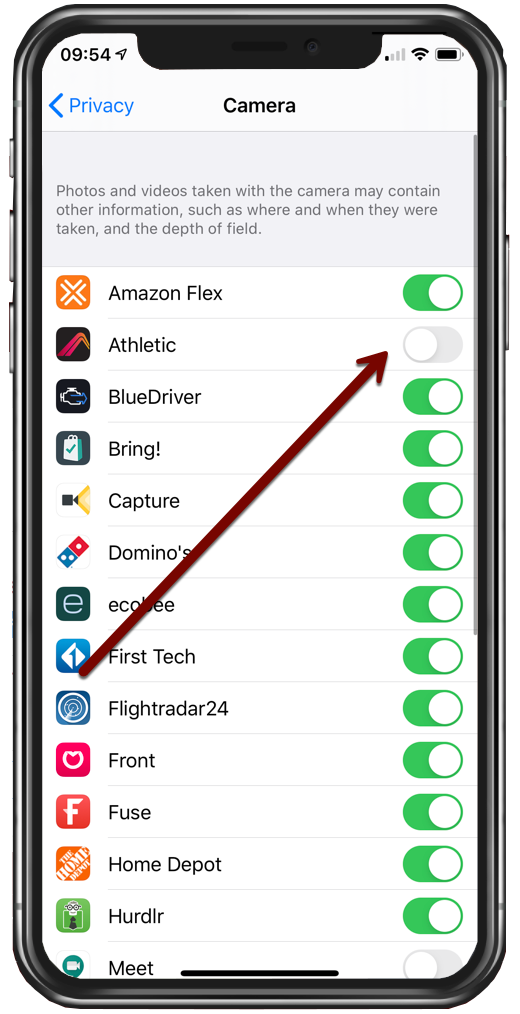
Return to the Privacy menu and choose Camera.
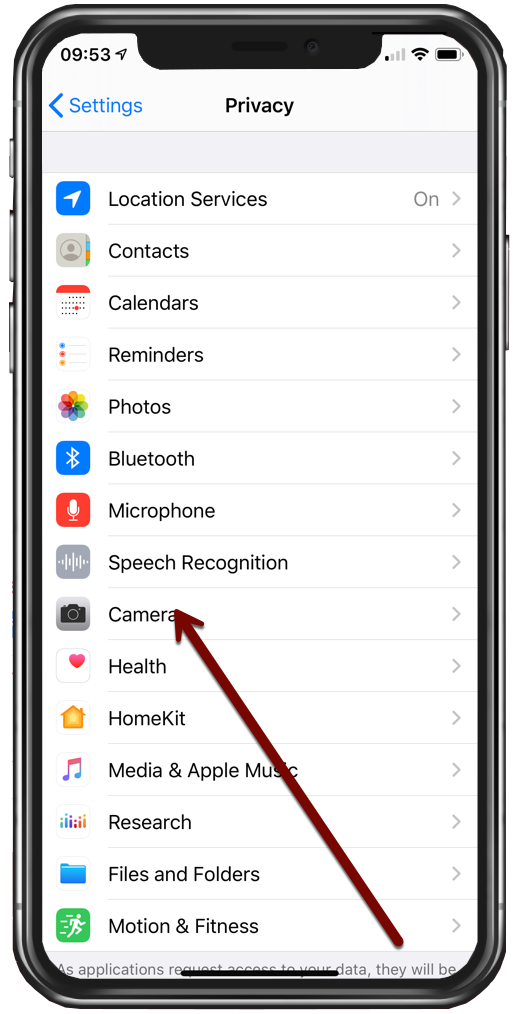
From the subsequent screen, ensure that the slider next to AthleticAPP is switched on.