Officiating a Vertical Event
Load the Round
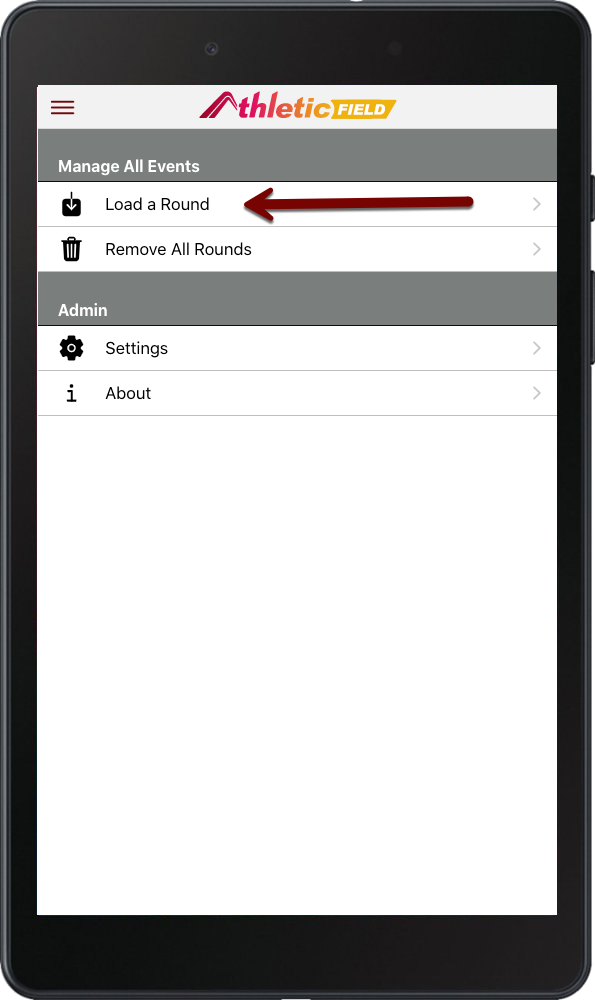
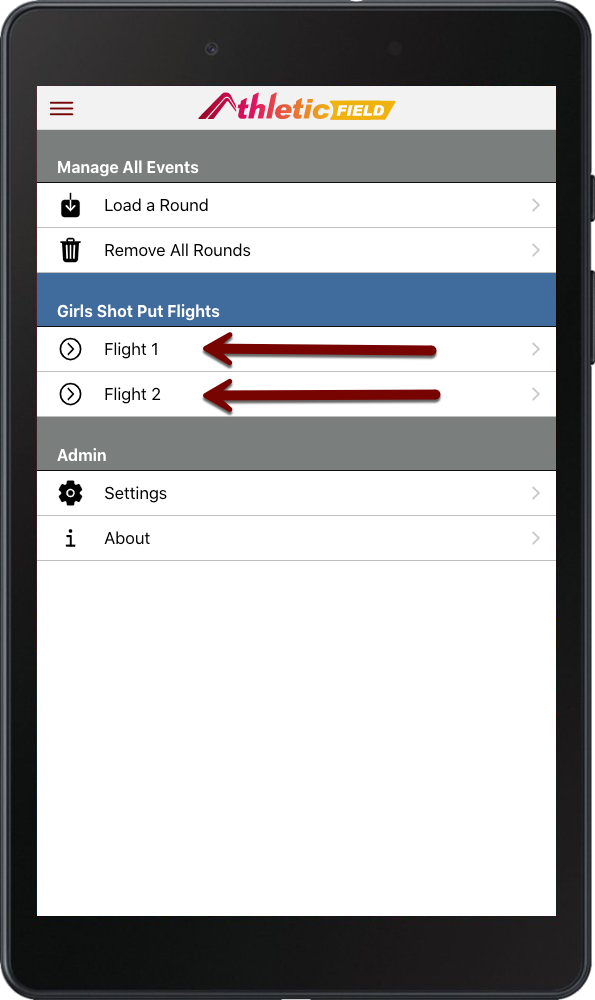
Depending on how your meet management has configured the meet, you'll either see a list of events or be asked to enter a 6 character code. Enter the code provided by meet management/timing staff for your event, or choose it from the list.
Checking In
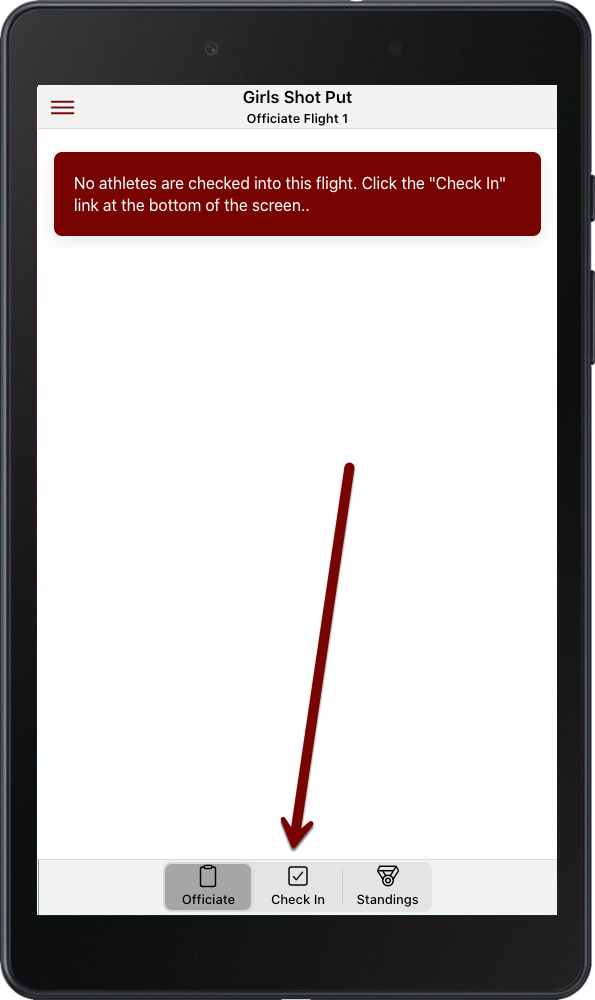
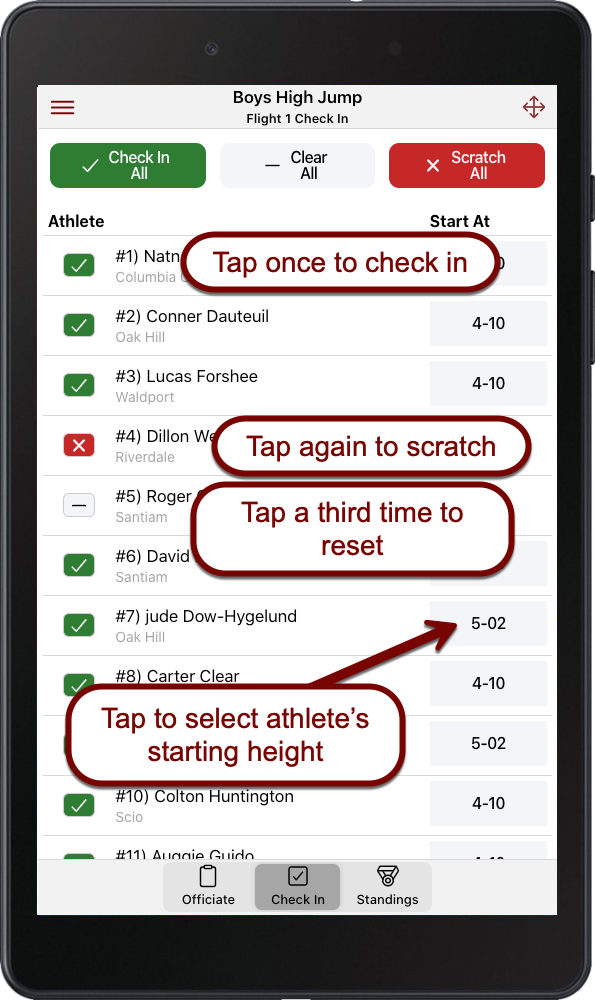
To check athletes in:
- Tap an athlete's name to check them in (noted with a green checkmark).
- Tap the name again to scratch them (noted with a red X).
- Tap the name a third time to erase their check-in status.
- If an athlete wishes to “pass up” to a given height, you may tap their starting height to edit it.
Re-ordering and Moving Athletes
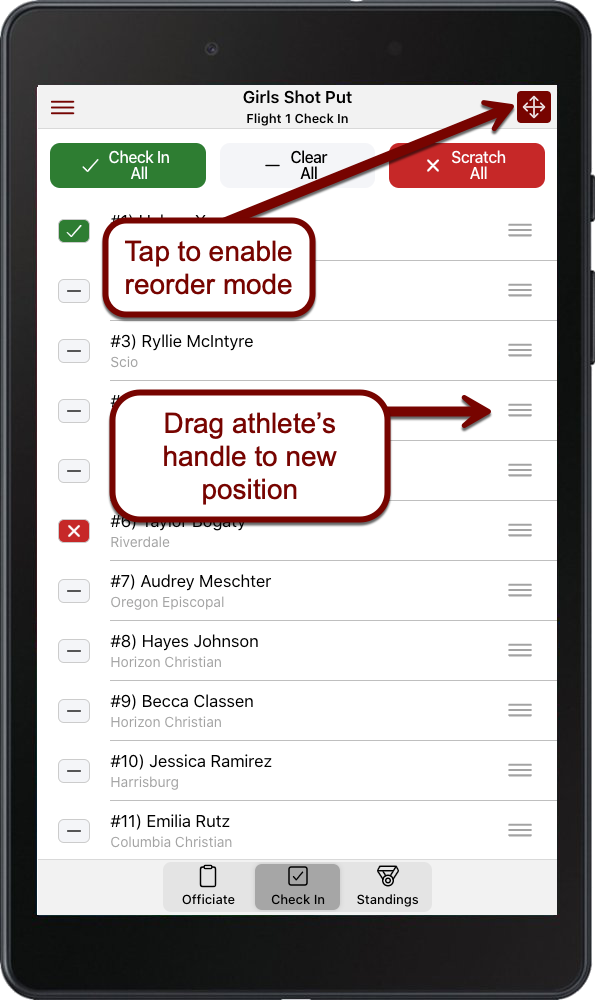
Once you're done, tap the Move icon again to exit Reorder Mode
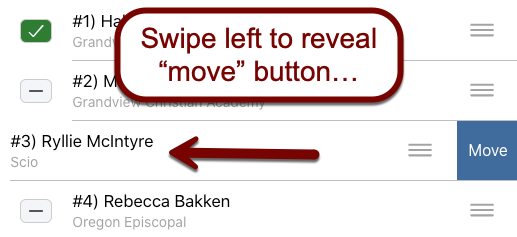
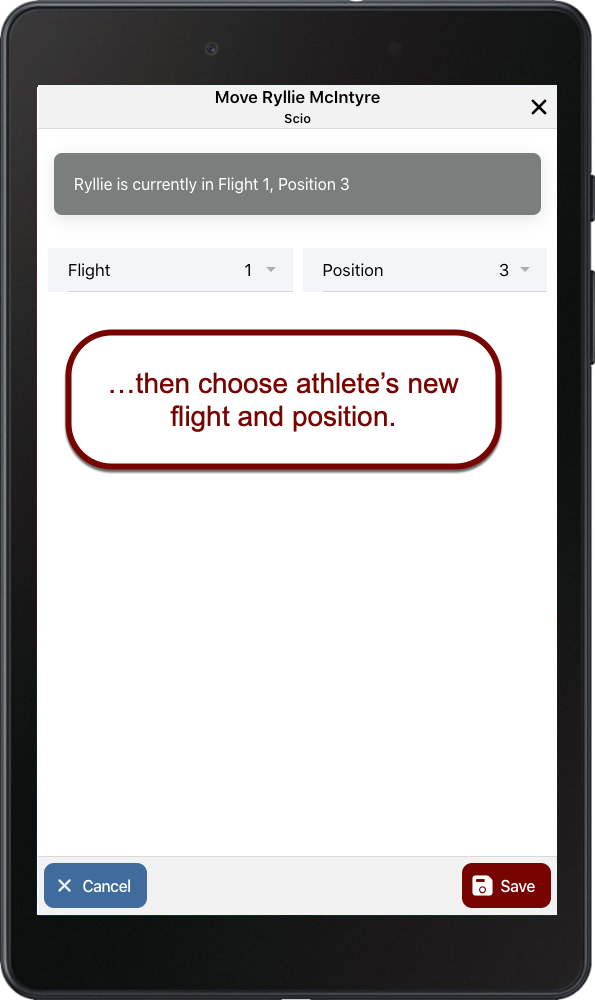
If you need to change an athlete's flight, swipe left on the athlete's name. Tap Move to set the athlete's new flight and position.
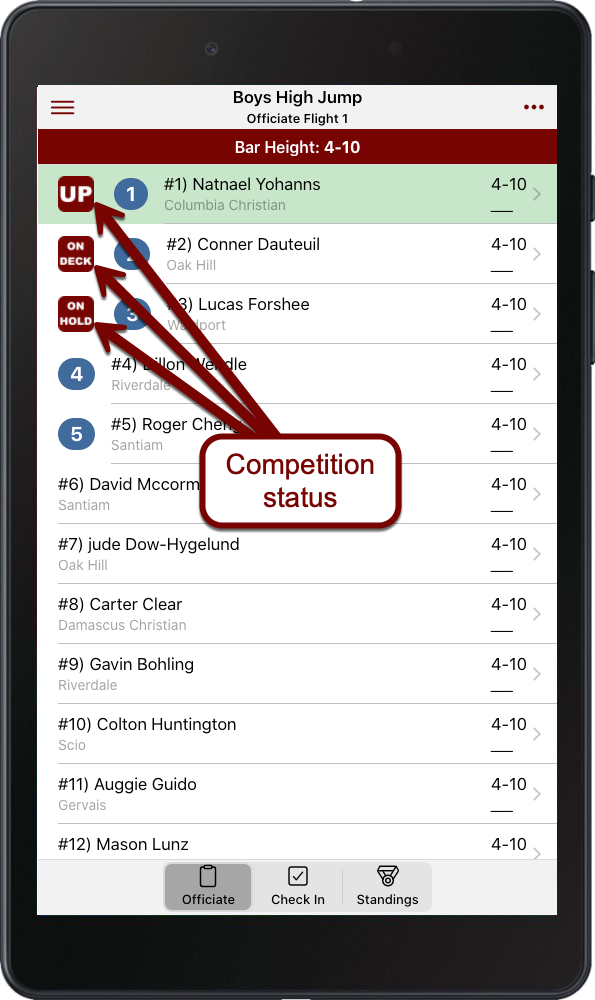
Officiating the Event
On the Officiate screen, athletes are indicated as “up,” “on deck,” or “on hold” with the icons on the left side of the screen. The “up” athlete is also highlighted in green for easy identification.
To officiate the event:
- As the athlete who's “up” readies for their attempt, tap on their name. The mark entry screen will appear.
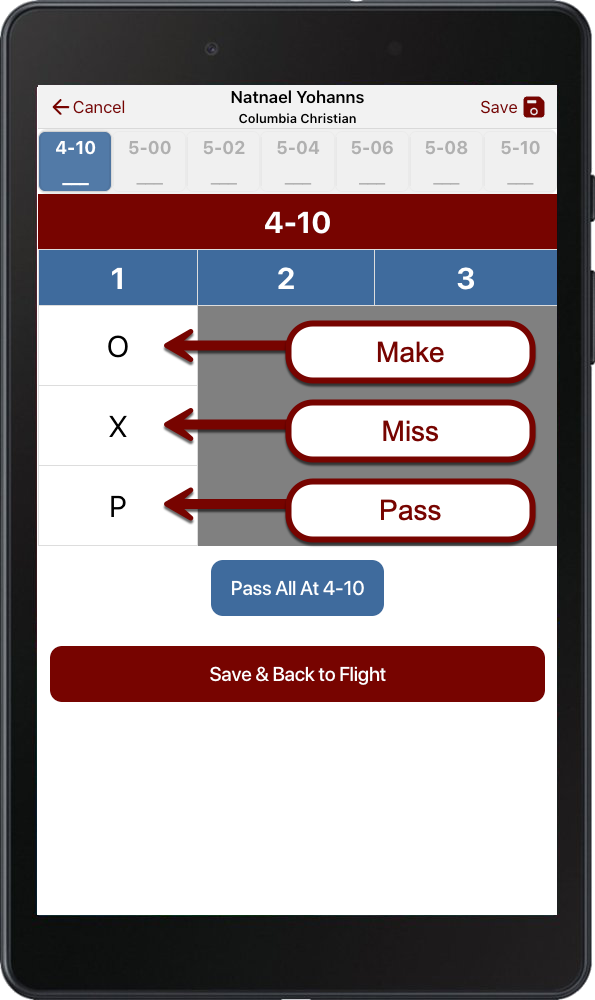
- If an athlete made the attempt, mark O.
- If an athlete missed the attempt, mark X.
- If an athlete chose to pass on the attempt, mark P.
When you're done, choose Save & Back to Flight to return to the flight screen. The next athlete in the rotation will now be indicated as “up”. Once the athlete makes or passes on a height, you will be able to make marks on subsequent heights.
Checking in and out
If an athlete checks out of the competition, swipe left on an athlete and choose Check Out from the flight list. This removes them from the rotation and displays the time the athlete checked out.
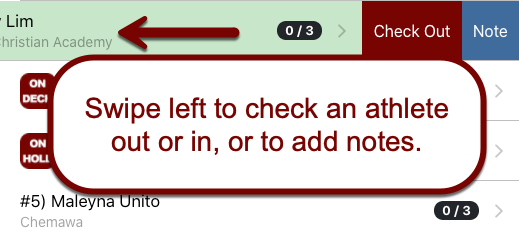
To check them back in, swipe left again and choose Check In.
Add a note
On the Officiate tab, swipe left on an athlete and click "Note". Add a text note for an athlete. This could be useful for pole vault standards or where a checked-out athlete went.
Retire an Athlete
On the Officiate tab, swipe left on an athlete and click Retire. This removes the athlete from the rotation.
If an athlete retired prematurely, swipe left again and choose Un-Retire.
View Standings
Review marks
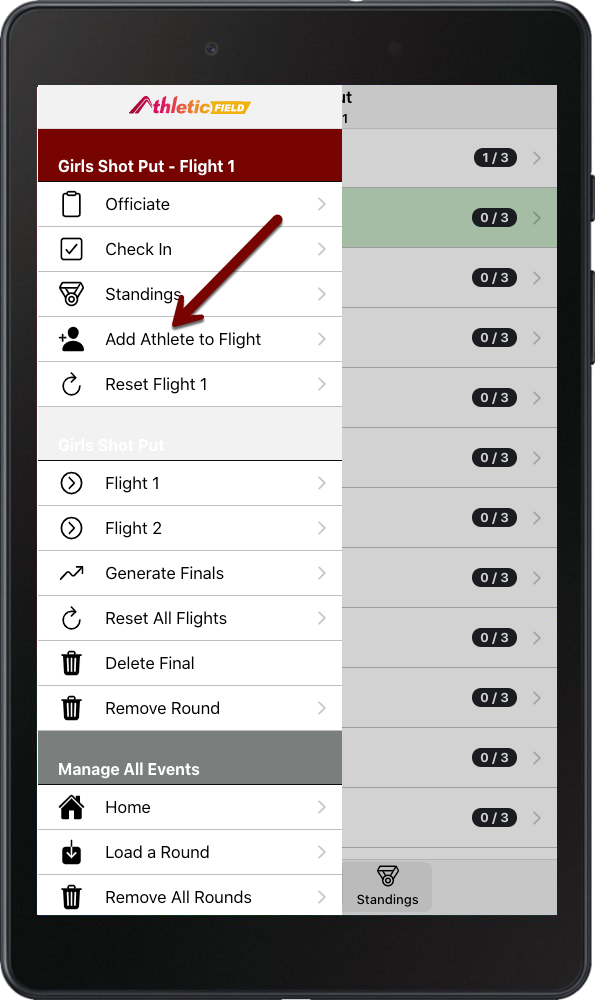
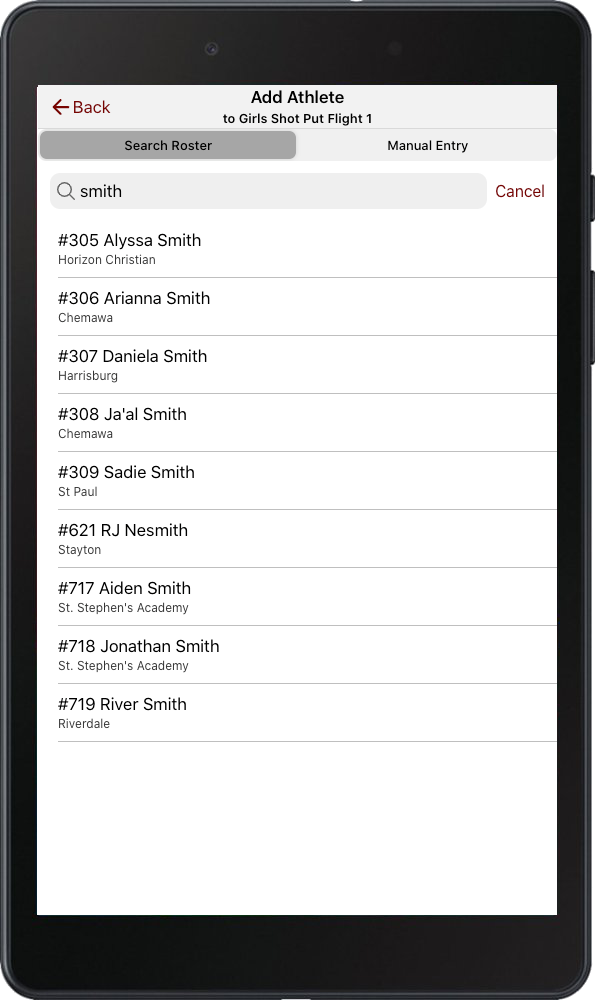
Add an Athlete
If the Search Roster tab is active, you can search for an athlete by number or name. If it's not active, or you need to add an athlete manually, move to the Manual Entry tab and enter the athlete's information.

Using Alive Groups
Meet management may have already configured your vertical event to use alive groups (i.e., 5-alive), but you as the official may choose to change alive group settings as necessary.
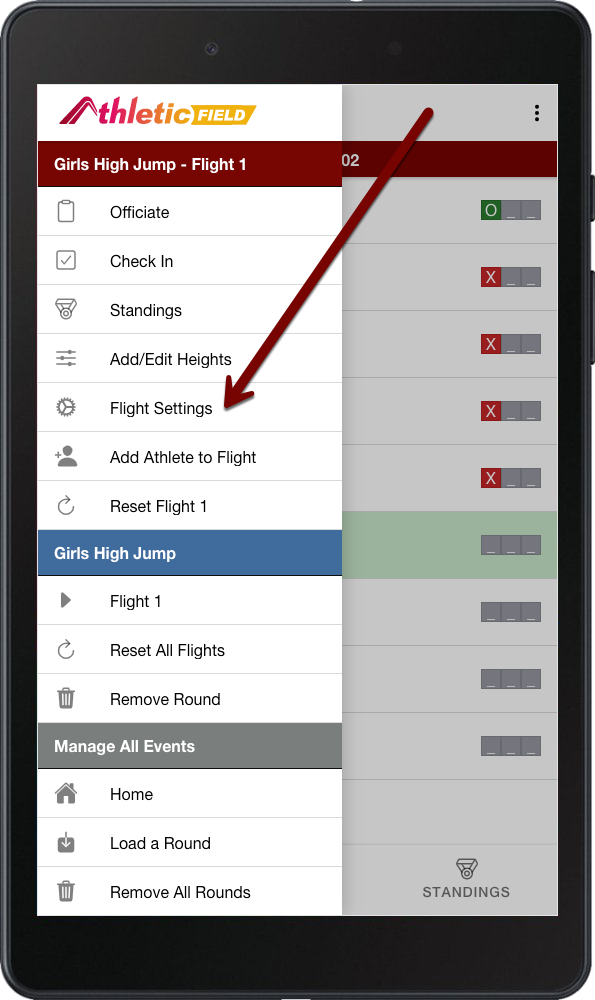
The Flight Settings screen allows you to change the following settings:

- Measurement Type: You can choose from Metric or English measurements. Once athletes are checked in and the event has begun, you can no longer change the measurement type.
- Use Alive Groups: Check the box to enable alive groups.
- Athlete Group Size: Choose how many athletes are in the alive group (i.e., 5-alive, 6-alive, etc).
- Stop doing alive when you have X people left: Select how many people need to be left in the competition at a given height to stop doing alive groups and bring all competitors in the rotation.
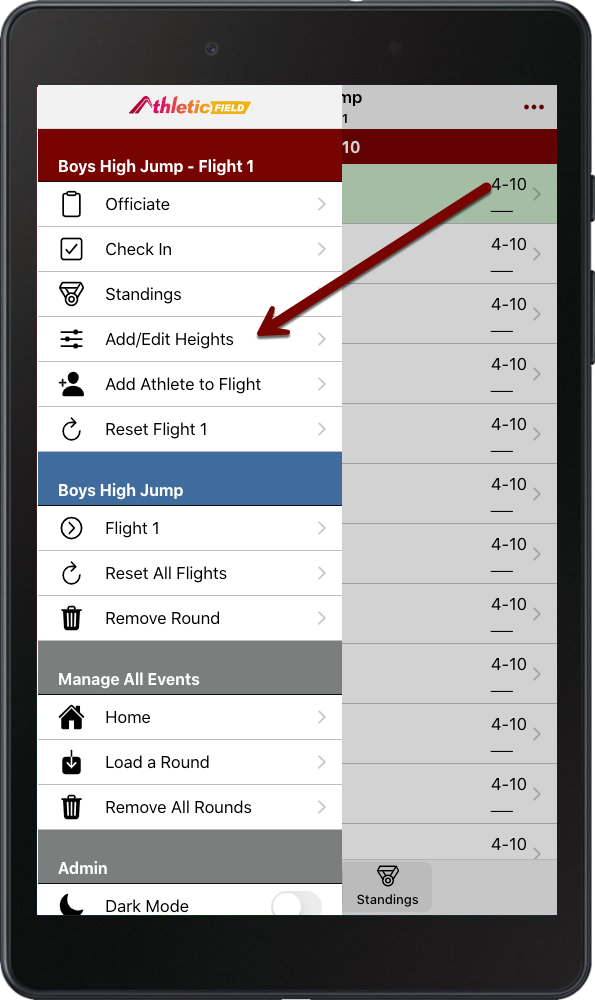
Adding/Editing Heights
Occasionally you may need to update or add new heights, especially if an athlete makes it far in the competition.
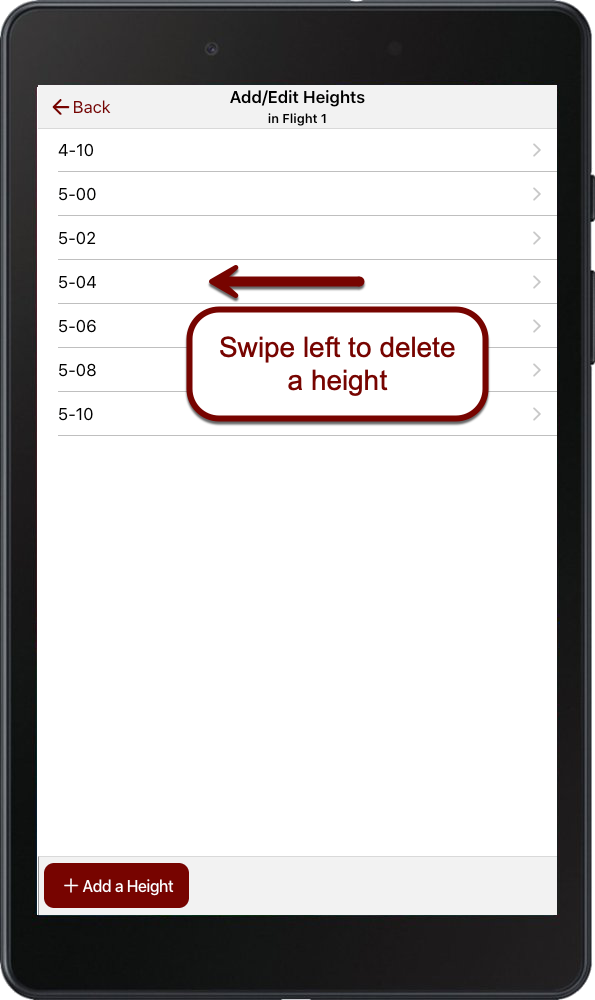
Add/Edit Single Heights
To edit an existing height, tap on the height. Change the height and choose Save & Back to Heights. If an athlete has already jumped at this height, you'll see a warning asking you if you're sure you'd like to edit that height.
To remove a height, swipe left and choose Remove.
Add a Height Progression
Sometimes, especially in combined events, you don't know the starting height until the event is about to begin. The app only allows this at the start of an event
Enter these 4 values. After entering all 4, the list of heights appears below. Confirm that the heights are correct, then click "Add Progression"
- Starting Meters or Feet
- Starting Centimeters or Inches
- Increment in Centimeters or Inches
- Number of Heights
Click the Back button in the top left to go back to the event.