Set Up Online Sync
Online Sync is the method used to synchronize devices running AthleticFIELD with your meet scoring software. Online Sync requires that each device running AthleticFIELD have an internet connection to download start lists and upload results at the end of the event. The device can operate off the internet during the event if necessary.
To configure a meet to run AthleticFIELD using Online Sync, use the following process.
V2 - Fall 2025
On September 18, 2025, all new meets using RunMeet or the HyTek Database Connection will default to Online Sync V2. Instead of exporting and uploading .evt and .ppl files, field app events are created as meet management data flows into AthleticLIVE. Start list updates will automatically push to the app until at least 1 athlete is checked in. Click here to learn more about how V2 improves on V1.
Meetpro and HyTek FTP meets will continue to use the existing Version 1 process
Create an AthleticLIVE Meet
When creating your new AthleticLIVE meet, make sure you select a Pro Field Meet. For more information about creating a new AthleticLIVE meet, see Create a Meet.
Import Start Lists
V2 - Automatic Start List Import and Update
Field App Events automatically get created once start lists are uploaded to AthleticLIVE. Start list updates automatically flow through to the app until an athlete is checked in. This means you can safely set up tablets the night before a meet and be confident that start list changes will sync down to the app.
Once an athlete is checked in, the app becomes the source of truth. Subsequent updates must take place in the app unless you check everyone out.
V1 - Export Flight Lists from Your Scoring Software
You'll need to export flight lists and event schedule files from your scoring software for AthleticFIELD to know what events will be held and who will be in those events.
V1 - HyTek's Meet Manager
To export flight lists:
- Open the Run screen, then choose Interfaces Set-up Field Event Scoring.
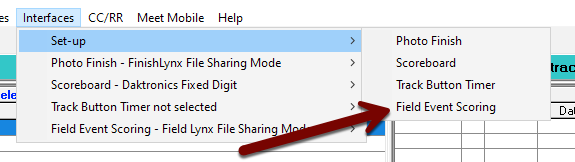
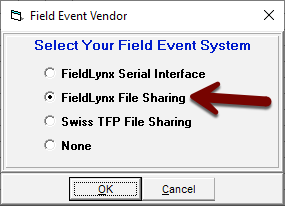
- From the dialog box that appears, choose FieldLynx File Sharing and click OK.
- Return to the Interfaces menu and choose Field Event Scoring - Field Lynx File Sharing Mode Update Start Lists.
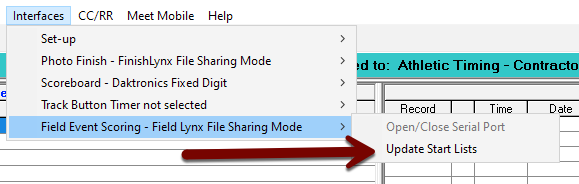
- Check the Activate update of start lists box and then choose Change Data Location to select the file location where you are keeping meet data. (We recommend creating a new folder for each meet you time.) Finally, click OK.
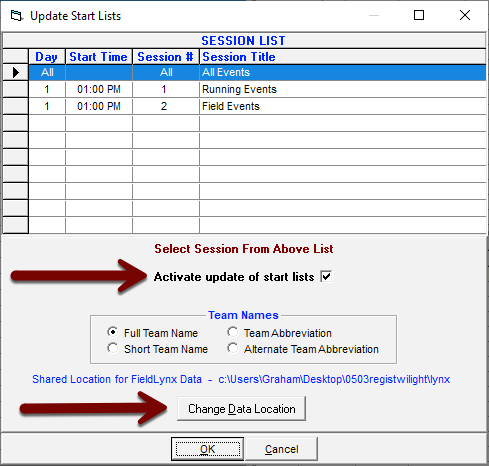
This will save both a file called Lynx.PPL and a file called Lynx.EVT in the location you select.
V1 - MeetPro
To export flight lists:
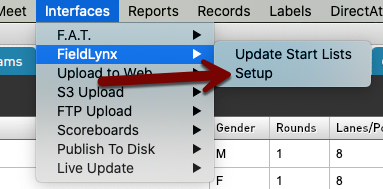
- Open the Interfaces menu and choose FieldLynx Setup.
- Click the button next to FieldLynx Directory to select the file location where you are keeping meet data. (We recommend creating a new folder for each meet you time.)
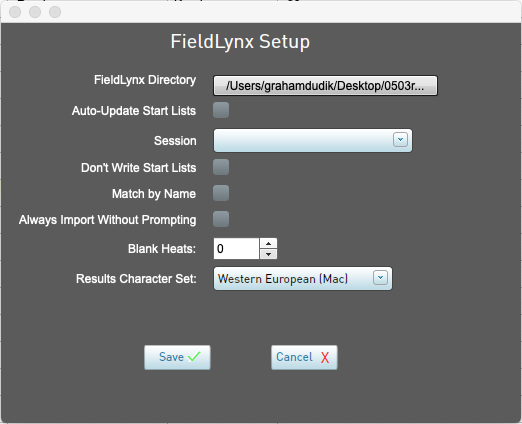
- Click Save.
This will save both a file called Lynx.PPL and a file called Lynx.EVT in the location you select.
V1 - Upload EVT and PPL Files
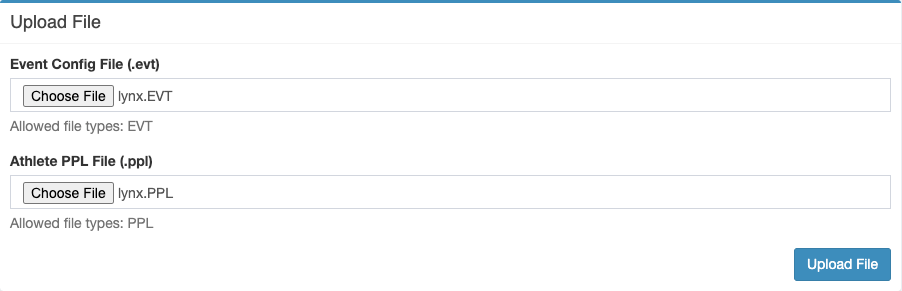
- From the main AthleticLive meet administration page, choose Upload .evt & .ppl under the Field App heading.
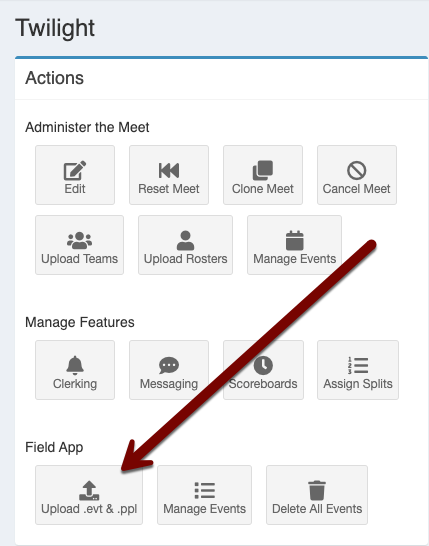
- On the next screen, browse to and select the PPL and EVT files you saved from your meet scoring software. When you're done, click Upload File.
Configure Events
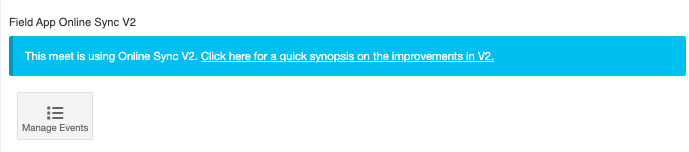
Once you upload your PPL and EVT files (V1) or upload your events (V2), return to the main meet details screen and choose Manage Events from under the Field App heading.
On the Field App Events page, you'll have options to configure each field event. Each event must have its parameters configured before AthleticFIELD can record results for the event. There are two methods for entering the configuration for each event: Manual configuration or CSV configuration.
Manual Configuration
Configure the event by clicking on the Edit button next to the event.

Horizontal Events
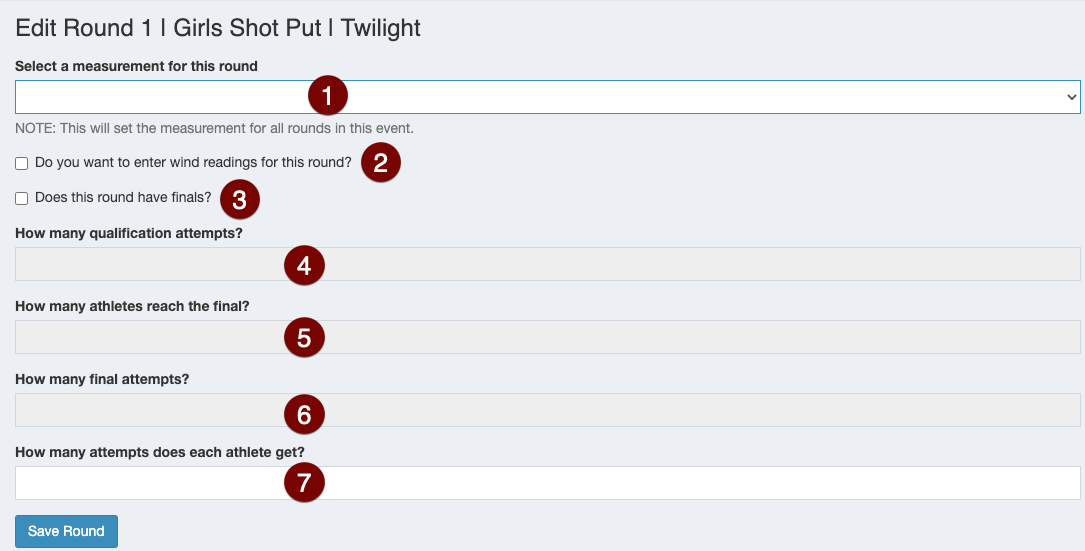
- Measurement Selection: Choose whether the round will be measured in Metric or English measurements
- Wind Readings: Check the box if you'd like the field event operator to be prompted to record wind readings with each attempt.
- Finals: Check the box if this event will have both prelims and finals. If each athlete gets the same number of attempts, leave the box unchecked.
- Qualification Attempts: If you are having prelims and finals, enter how many qualification attempts each athlete will receive.
- Athletes to Final: Enter how many athletes will advance to the final round.
- Final Attempts: Enter how many attempts each athlete will receive in the final round.
- Total Attempts: If you are not having prelims and finals, enter how many total attempts each athlete will receive.
Vertical Events

- Measurement Selection: Choose whether the round will be measured in Metric or English measurements.
- Alive Groups: If you expect that officials will be required to do alive groups, enter the number of people who will be in the rotation together (usually 5). Leave blank if you are not expecting officials to use alive groups.
- Stop Doing Alive: Enter the number of people who should be left in the competition at a given height to stop doing alive groups. Leave blank if you are not expecting officials to use alive groups.
- Starting Height: Enter the feet (box 1) and inches (box 2) or meters (box 1) and centimeters (box 2) of the starting height.
- Increment: Enter the number of inches or centimeters that the bar will go up each time.
- Number of Heights: enter the total number of heights that will be competed.
Once you've entered all the information in the height boxes, click Calculate Heights. Click on any given height to edit it.
CSV Configuration
Instead of configuring each event individually, you can upload all configurations in a CSV spreadsheet. Using the spreadsheet allows quickly enter configuration settings for all events at once.
From the Events page, click Download Config CSV. This CSV file will be pre-populated with event names and number, so all you need to do is fill out the configuration and upload it. The spreadsheet will contain the following fields (click the image to enlarge it).

- Measurement: Enter the whole word
englishfor feet and inches, or enter the whole wordmetricfor meters and centimeters. - Rulebook: Enter either
nfhs,ncaa,usatf, orworld_athleticsto set the field app to use correct rules for timing and jump offs. - Horizontal Events (leave these fields blank for vertical events):
- Enter Wind?: Enter
0for “no” and1for “yes”. - Attempts: If you are not having prelims and finals, enter how many total attempts each athlete will receive. Leave blank if you are having prelims and finals
- Qual. Attempts: If you are having prelims and finals, enter how many qualification attempts each athlete will receive.
- Final Attempts: Enter how many attempts each athlete will receive in the final round.
- Final Athletes: Enter how many athletes will advance to the final round.
- Enter Wind?: Enter
- Vertical Events (leave this fields blank for horizontal attempts):
- Alive Groups: If you expect that officials will be required to do alive groups, enter the number of people who will be in the rotation together (usually 5). Leave blank if you are not expecting officials to use alive groups.
- Stop Alive At: Enter the number of people who should be left in the competition at a given height to stop doing alive groups. Leave blank if you are not expecting officials to use alive groups.
- Set Progression in App: If you will enter the progression in the app instead of in the admin, set this to 1 and don't fill out the next 4 fields.
- Start - Feet/Meters: Enter the feet or meters component of the starting height.
- Start - Inches/Centimeters: Enter the inches or centimeters component of the starting height.
- Step - Inches/Centimeters: Enter the number of inches or centimeters that the bar will go up each time.
- Number of Heights: enter the total number of heights that will be competed.
Your field officials may also edit measurement type, alive group settings, and heights directly from their AthleticFIELD device.
Once you have finished filling out the spreadsheet, save it in CSV format, and click Upload Config CSV, and choose the CSV file you just saved. Your events will appear in the list, fully configured.
Sync to the App - V1 Only
Once you've fully configured your events, click Sync Events to App to prepare AthleticFIELD for recording data.

Loading Rounds
Once your events are configured, each event will be listed with a Key, which is a unique six-digit identifier that the operator will use to load the round into the device.

Instructions for officiating using AthleticFIELD, including how to load a round, can be found at Officiating a Horizontal Event and Officiating a Vertical Event.
Getting Results
Automatic Download to AthleticLOCAL
Let LFFs sync to your computer after every mark by following these steps:
- Download AthleticLOCAL 1.0.0 or higher from the Downloads page.
- Choose your meet in AthleticLOCAL.
- Modify your settings as follows:
- Enter the AthleticFIELD Download Path. LFFs will sync down to this directory. This should be where you exported the EVT/SCH from your meet management system.

- LFFs should be updated after every mark.
- Do not pull results into your meet management system until your event is done. Otherwise, the meet management system thinks the event is done, and it will remove your live results.
Manual Admin Download
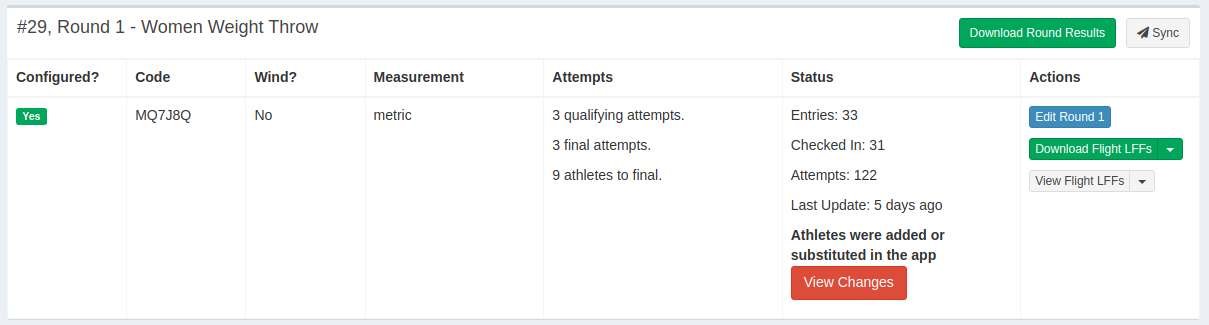
Once an event is complete, click Download Round Results for the event.

This will download a zipped file containing the LFF (results file) for each flight. Open the zipped file and move the LFFs inside to the location where you saved your EVT and PPL files. You can then use your scoring software's function to retrieve the results (Get Marks in Hytek, and Get Event Results in MeetPro).
Alternatively, you can wait until all field events are completed, and then click Download All Results. This will download one zipped file with all of the LFFs for the entire meet inside. Move them to your scoring software's export location and import the results for each event into your scoring software.

Handling Changes
If athletes are added, substituted, or reordered in the field app, you need to make corresponding changes in your meet management system.
If any of these cases occur, you will see a "View Changes" button. Click that button. Make your seeding match the "Updated Flight Order" column.