Laser Measurement
AthleticFIELD allows laser measurement through BluetoothLE, TCP/IP, and Serial (Android only).
Supported Devices
Total Stations
- Mato MTS-602R
- GoWin TSK 202 (Sokkia SET 65 also works with this option)
- Sokkia SET5x
- South Station NTS-352R
Leica Handheld Lasers
NOTE: If measuring from the board, the laser and the prism must be at the same height and pointing straight at the laster.
- Leica Disto D2
- Leica Disto E7500i
- Leica Disto X4
- Leica Disto X6 (Using a Leica X6 with the 360-X Tripod Mount)
- Leica Disto D5
Connection Types
Serial (Android only)
How the total station connects to your mobile device depends upon the USB port available on the mobile device:
Mobile Devices with USB-C Ports
The simplest way to connect a total station to your USB-C mobile device is with a USB-C to serial adapter. Connect this device to your mobile device and to the serial cable that was included with your total station. Most total stations use a cable with a Hirose connector on one end and a DB-9 (serial) connector on they other. They look like this.
Mobile Devices with Micro-USB Ports
To connect a total station to a Micro-USB device, you'll need the following items:
Connect the OTG adapter to your mobile device, plug the USB-A to serial adapter into the OTG adapter, and then plug the total station's serial cable into the USB-A to serial adapter. Most total stations use a cable with a Hirose connector on one end and a DB-9 (serial) connector on they other. They look like this.
Serial Settings
When setting up a serial device in AthleticFIELD, you need to know Baud, Stop Bits, Parity, Data Bits, and Flow Control. These settings are defined by your total station, but if you don't know, try these settings first:
- Baud: 9600
- Stop Bits: 1
- Parity: None
- Data Bits: 8
- Flow Control: None
TCP/IP
This setup works with iOS and Android devices. Because serial doesn't work with iOS, this is the best option for a hardwire connection between total stations and iOS devices.
Purchase the following for each iOS device you intend to use.
- POE Ethernet adapter for iOS (Amazon Link). We like this one because it doesn't turn off when the iOS devices lock or go to sleep
- POE Switch (may or may not need this depending on your networking setup) (Amazon Link)
- Lantronix DB9 to POE connector (Amazon Link)
- Male-to-Male Null Modem Adapter - needed because that particular DB9 to POE connector has its TX/RX pins reversed (Amazon Link)
This works by creating a mini-network between your total station and your device.
BluetoothLE
For Leica handheld lasers, we support connection via BluetoothLE.
To connect a device via BluetoothLE on the Laser Settings page:
- Enable Bluetooth and location on your device.
- Click Start Scan.
- Eventually, you should see your AirConsole or your Disto device.
- Click Stop Scan.
- Click "Connect" on the device. You'll see three dots. Once connection happens, the button will change to "Disconnect" and you'll see a green connection message.
Bluetooth Gotchas
- If your device moves over 20-25m away from the total station, you risk disconnects.
- If your device does disconnect, you should get a red warning asking you to reconnect.
- If a measurement fails, you can click a button to go back to the settings page and reconnect
Laser Setup
- Open the app.
- Click on "Settings"
- Click on "Allow Laser Measurement"
- Click the back button at the top.
Connect to a Laser
- Click on Laser Settings.
- Set your options.
- Click "Active"
- Set your desired Connection type
- Choose your Laser.
- Set Measure to Point to Point or Triangular.
- Click Save.
- Click "Test" in the bottom right.
- Click "Measure" in the bottom right. After a couple seconds, measurement data should appear
Setup Throws Triangulation
- From the Laser Settings page and after entering your laser settings, click "Setup Throws Triangulation"
- Select the appropriate circle radius.
- Click "Measure to Circle Center". After a couple seconds, you should see the measurement details.
- To ensure your measurement is correct, set your prism within the throwing area and measure with tape. Then, click "Test Measurement". Make sure the tape measurement and the app measurement correspond.
If you set the Circle Radius to Shot Put, this center circle measurement will work for all Shot Put events. If, for example, you change to a Discus event, the app will not let you take a laser measurement until you re-measure the center circle.
Setup Jumps Triangulation
Note: Triangular laser measurement only works for total stations at this time. It does not work with Leica Distos.
- Download any desired events to the app.
- From the Laser Settings page and after entering your laser settings, click "Manage [Event Name] Jump Boards"
- From the board closest to the sand, measure the far edge and the near edge.
- For any other boards, select a point on the edge of the board closest to the sand and measure. The Offset is the distance from the front of board 1 to the front of the board just measured.
Setup Jump Rail Lasers
When using a rail system with multiple jump boards, allow AthleticFIELD to track the offset between each board and the pit.
Learn more about adding Jump Boards to a horizontal jumps event >
Configure Laser Settings
If you plan to send laser marks into the app, use the following settings. Regardless of your choice, you will be entering the raw value from the laser to the end of the rail into your app. Then, you will select a board and apply an offset to that raw value
- Active: Yes
- Connection: Bluetooth LE
- Measure Type: Jumps - Rail
- Enter offset in app: Yes
If you plan to enter marks into the app, use the following settings:
- Active: Yes
- Connection: None
- Measure Type: Jumps - Rail
- Enter offset in app: Yes
Setting Offsets
If you have already downloaded the round into the app, you can manage jump boards from the laser settings screen.
Rail Offset Instructions
- Make a mark in the sand.
- Use a measuring tape to measure from the takeoff board to the mark. Enter in the "Tape Measurement" field.
- Measure the same point with your laser. Enter in the "Laser Measurement" field.
- Offset = Tape Measurement - Laser Measurement. The app generates this automatically.
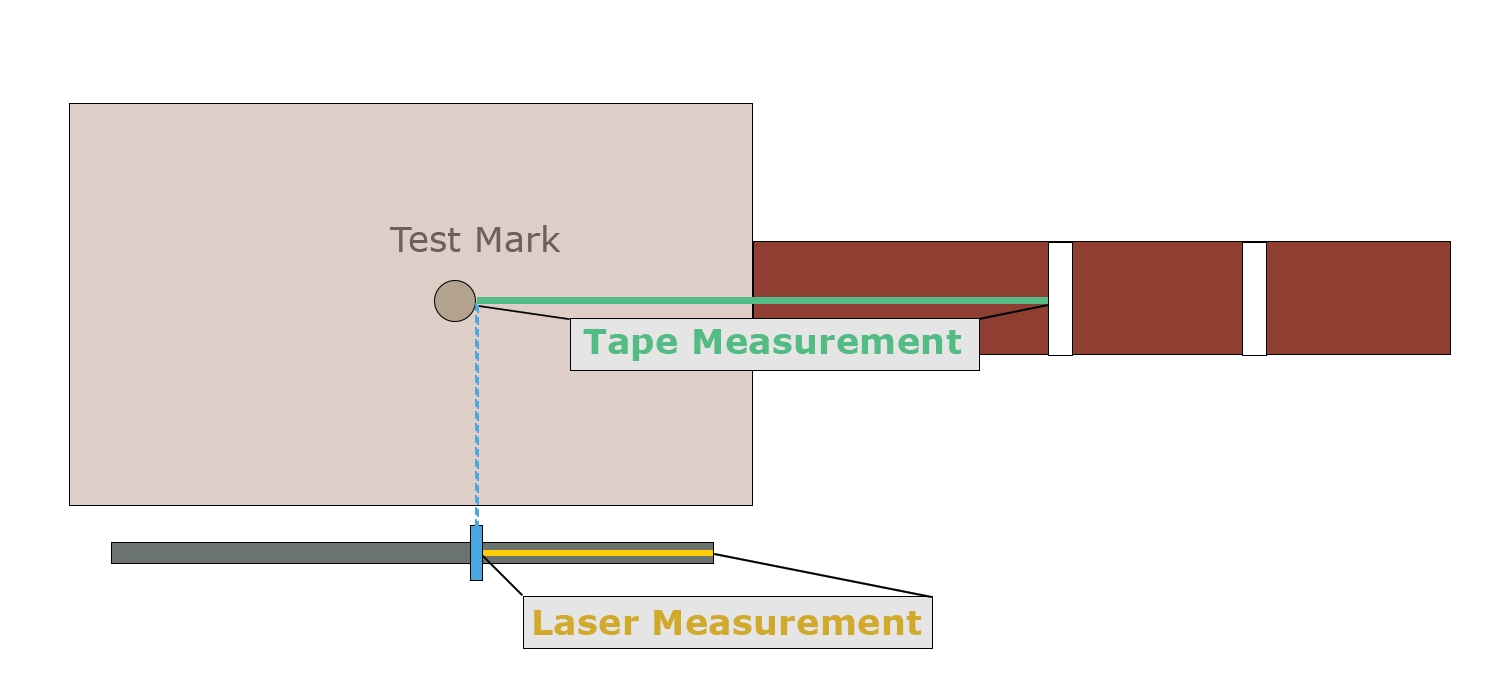
- Click save when finished
Operation
- When you enter an attempt, take a laser measurement.
- If there is no default board, select a board.
- Click "Apply Offset".
- The mark will be calculcated for you.
- Hit Save.
Gotchas
- If something happens and you need to start using tape, simply enter the tape mark, select a board, and do not click "Apply Offset". The app will ask if you meant to do that. Confirm and continue.
- The app will not let you enter a mark unless you select a board for the attempt.
Measure a mark in an event
- Check athletes in, then prepare to enter a mark for an athlete.
- Click the wand icon in the "Mark" header.
- Within a couple seconds, the mark should appear.