GPS Privacy Zones
When you record a workout using AthleticAPP, a GPS track of your run is created and displayed in your profile feed. This allows you to show off how far you ran, the places you ran, and the kind of terrain you encountered.
Privacy zones allow you to obscure where exactly the beginning and end of your runs take place within a certain radius. This will ensure that someone viewing the track of your run can't see exactly where you begin and end your workouts (such as your home or school).
For example, if you have a privacy zone obscuring your house, your GPS track will not begin until you're outside the radius of your privacy area. But if you run back past your house in the middle of your workout, the GPS track will not be interrupted.
Adding a Privacy Zone
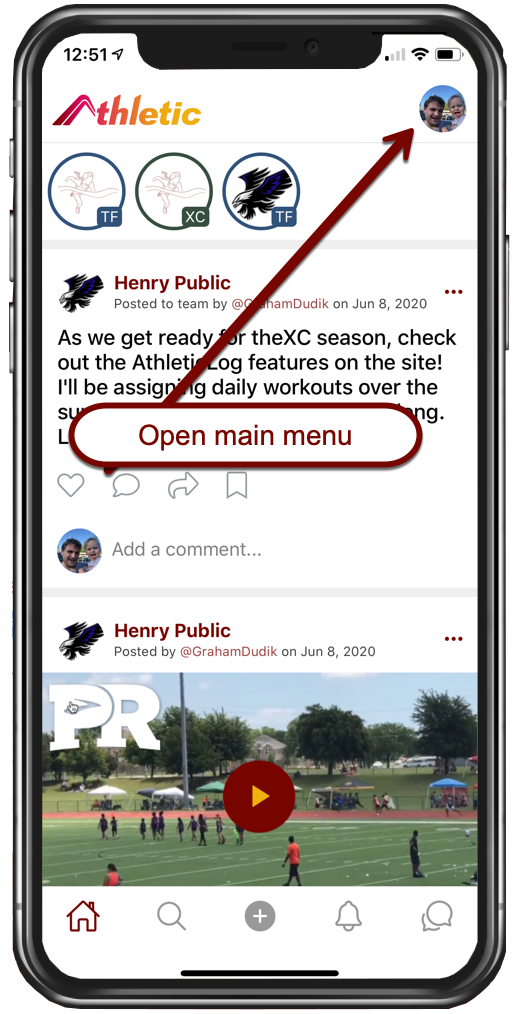
To add a privacy zone within AthleticAPP, tap on your initials or picture to open the main menu on the home screen.
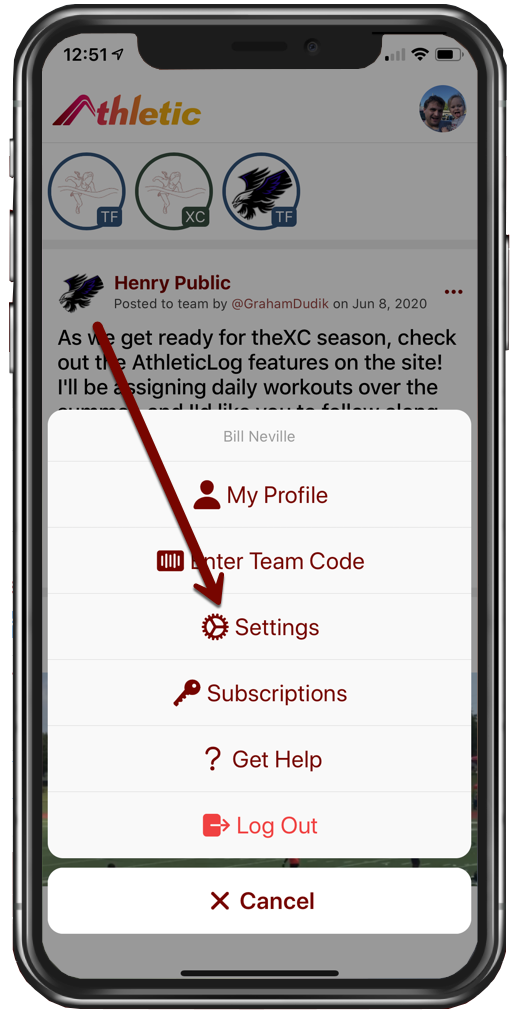
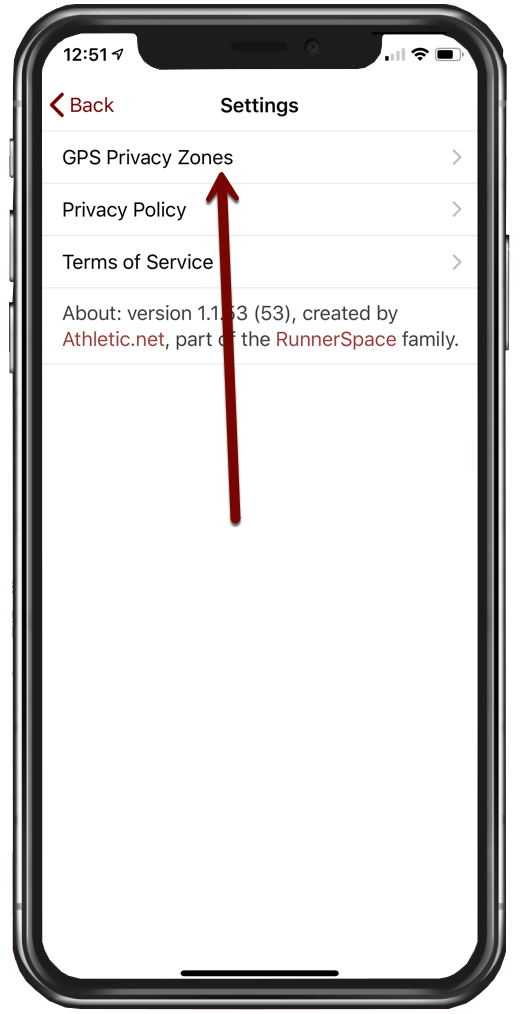
From the Settings screen, choose GPS Privacy Zones.
The first time you access this screen, you'll be prompted to create a new privacy zone. You'll be shown a few options for locations to obscure.
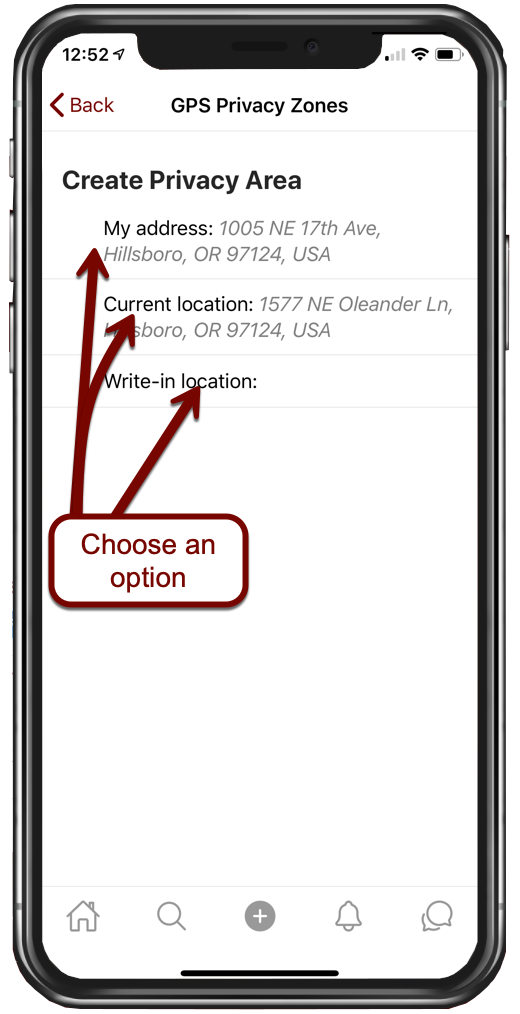
- My Address: If you've added an address as your home address in your Athletic.net account settings, it will be shown here for you to select.
- Current Location: An address based on your current location.
- Write-in Location: If you'd like to add a different address, enter it here.
Once you make a selection, you'll be shown a map of the area with the proposed privacy zone highlighted. Enter a name for the privacy zone, and select a radius to dictate the size of the area you will obscure.
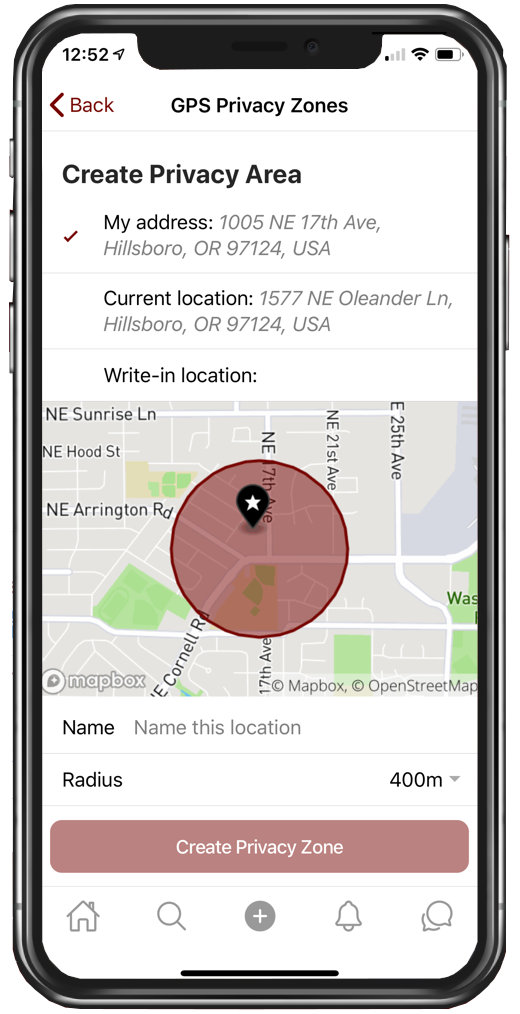
Once you've entered a name and selected a radius, choose Create Privacy Zone.
After your privacy zone is created, it will be shown in a list. Use the Add Privacy Zone button if you'd like to add another.
Deleting a Privacy Zone
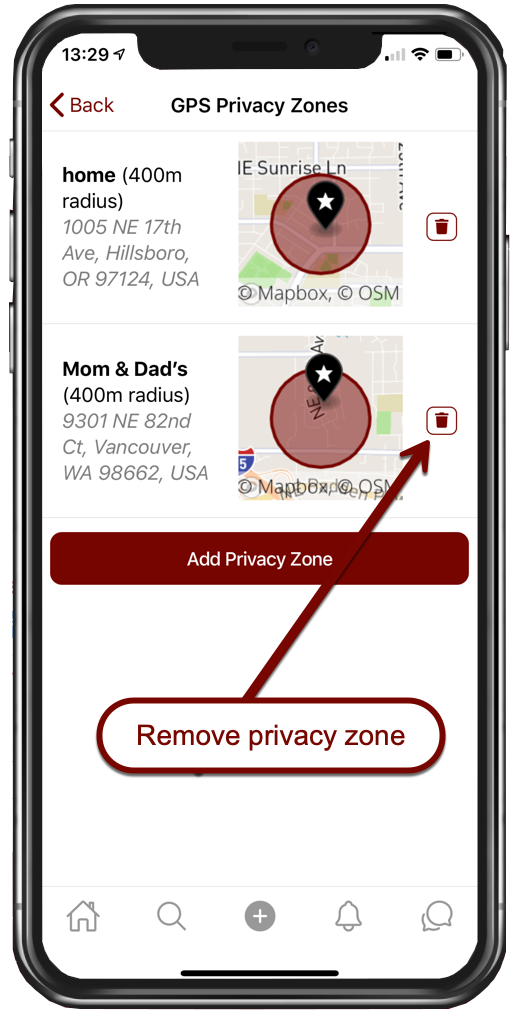
If you need to delete a privacy zone, use the icon to delete the zone from the list.
