Creating and Editing XC Course Records
AthleticNET allows you to keep a historical list of records run on your cross country course. Follow these simple steps below to create that list.
Editing Venue Location
In order for cross country course records to work correctly, you will need to make sure that all the meets you will be adding your course to have the same Venue address. If a meet has a different address, then the course you created will not be available in the list of courses.
In the Settings tab, choose Meet Information. From there, make sure that the Venue name and address are correct.
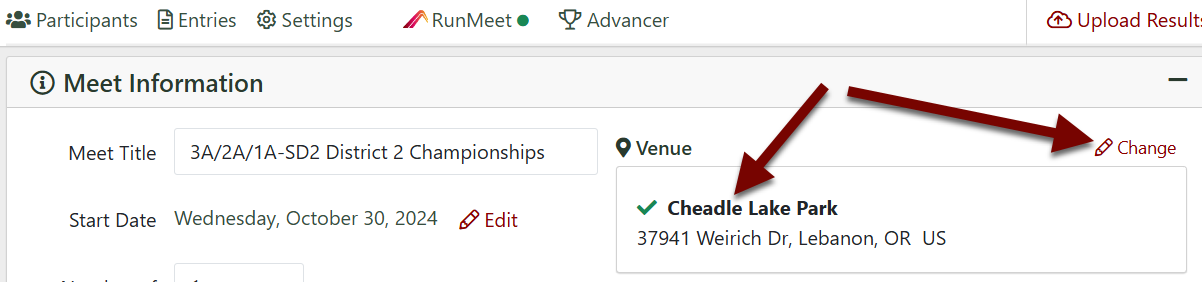
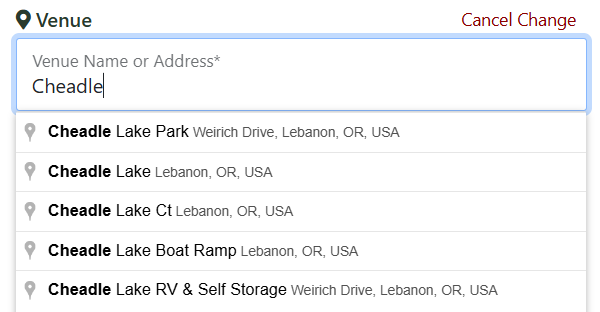
If they are incorrect, choose Change. Begin typing in the Venue Name or Address and a dropdown will populate. Make sure to choose the correct location as there may be many venue addresses listed, particularly at many county and state parks.
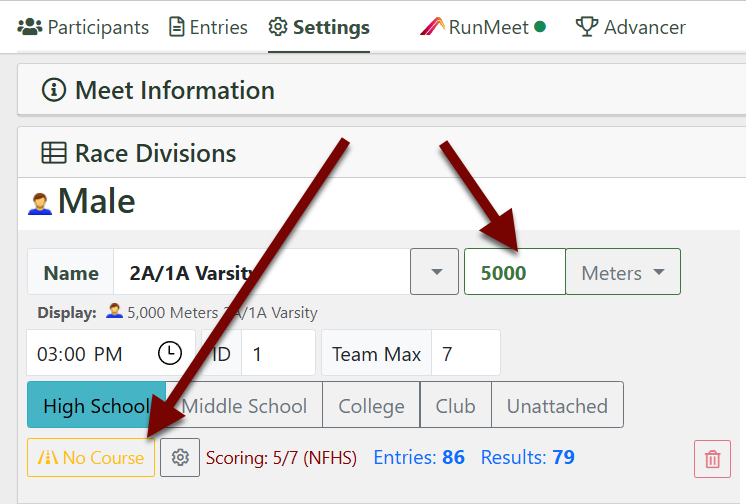
Creating a New Course
To create a new course and begin tracking its history, click on the meet name on your team calendar. Then click Manage Meet > Settings > Race Divisions > No Course.
If your Venue location does not have any courses defined for the distance you've entered, you will see the following message:
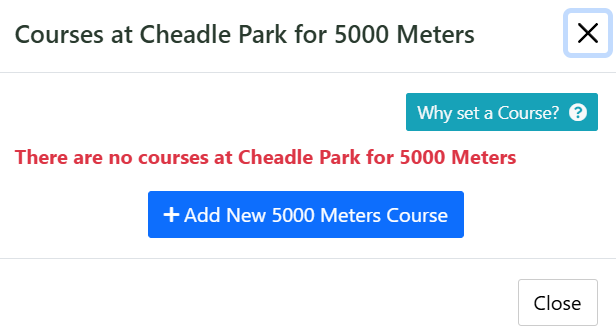
Click Add New [Distance] Course. You'll be asked to name and describe the course.
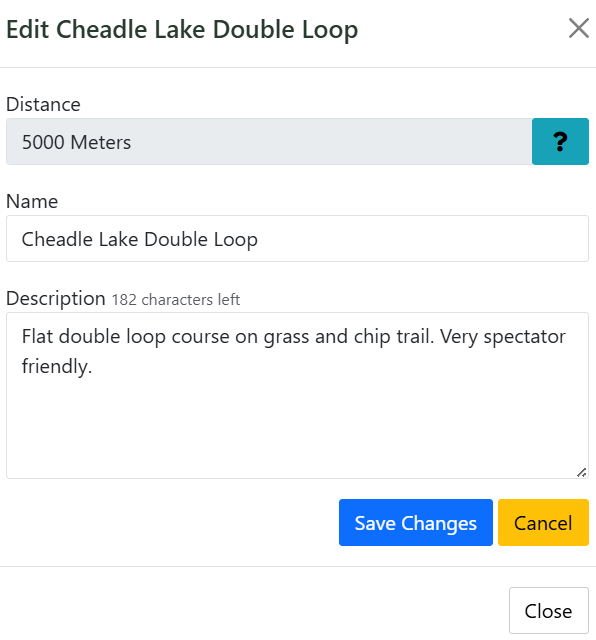
Once you've entered the required information, click Save Changes.
After you have saved a course, you will now be able to select it from the course list.
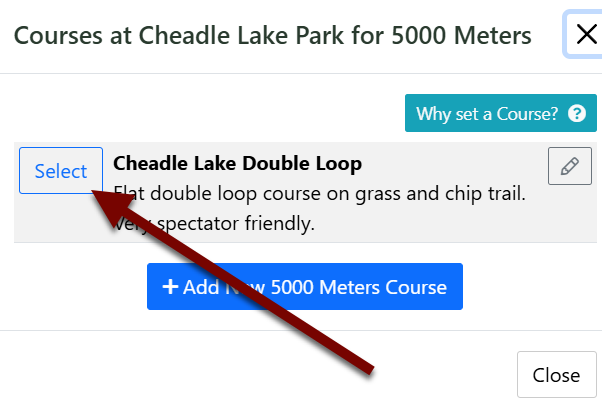
The course you selected will show on the division list.
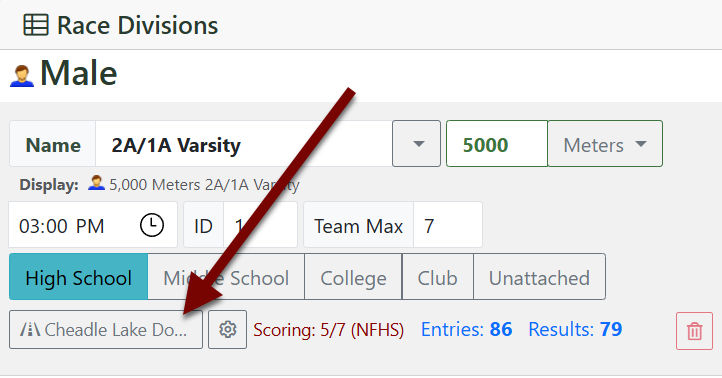
Your course is now connected to that race!!
Continue to add courses for every meet (past and future) and every division in those meets to create a complete list of historical course records.
Viewing Course Records
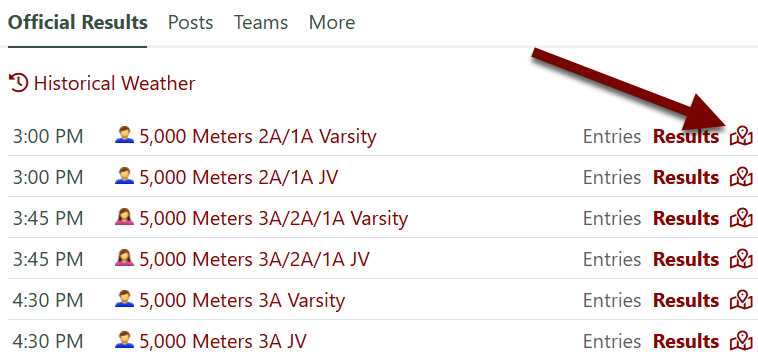
After you have added courses to all the meets and divisions you want to add, it is easy to view the course records. On your meet schedule page, click the meet name and then choose View Results or Meet Info. From there you will see a list of race divisions, click on the Map icon to view the historical course records for that race distance.
On the Course History page, you can view a lot of information:
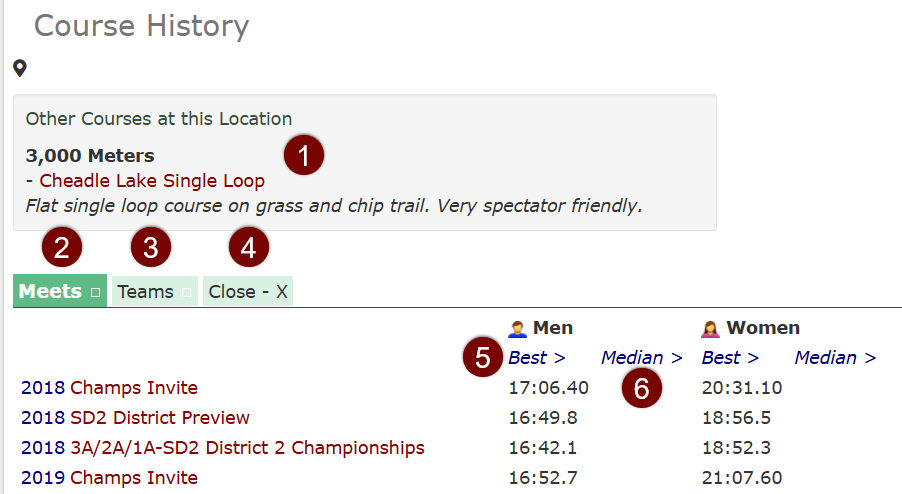
- Other Courses: Shows other courses created at the same location.
- Meets: Shows all the meets that have their division(s) linked to this course.
- Teams: Shows all teams with results linked to this course.
- Close - X: Click this button to close the Meets and Teams view and only show the records list.
- Best >: Hover over to view the best time by grade on this course at each meet and also the all-time best by grade.
- Median >: Hover over to view the median time by grade on this course at each meet.
Scroll down or click Close - X to get to the records list that shows the following information:

- All Years: If this button is highlighted on, you are viewing records from all years. If you click this button off you can then go up to the Meets and click on various meets to limit the view to specific meets. This view will show each athlete's performances by year and the overall rank in the course history for that athlete's best time in the selection.

- Grades: Toggle on and off each grade to view specific lists by grade or multiple grades. This works with All Years turned on or off.
- Turn Highlighter On: This function currently does not work.
- Prepare Report for Copy: This removes the + signs so you can copy or print the page.
- By clicking on the + sign, you will be able to view the performance history for that athlete for all races he/she has run on that course in order of time. The times in red show the difference in time from their best time. By default, each athlete is only ranked on the course history list by their best time.