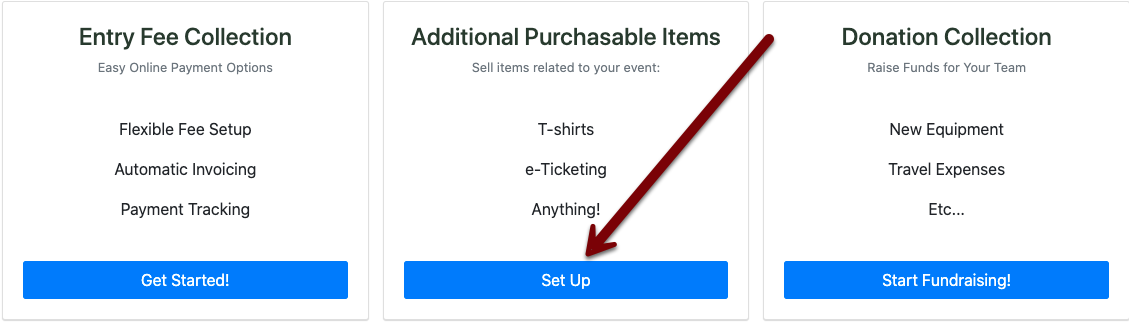
Additional Purchasable Items/E-Ticketing
In addition to charging entry fees and collecting donations, AthleticNET allows meet hosts the ability to pre-sell items that will be picked up during the event. This includes T-Shirts, meal tickets, commemorative items, and anything else you can think of! You can set up purchasable items in conjunction with other meet host financial features, such as collecting entry fees or accepting donations.
Configuring purchasable items is part of the meet creation process. For more information, see the series on meet creation for your particular sport in the Hosting an Event category. To begin the configuration process, find your meet on your team's calendar, and click Manage Meet. At the top of the page, click Settings, and then Entry Fees, Donation, Collection, Custom Fees.
Setting Up Purchasable Items
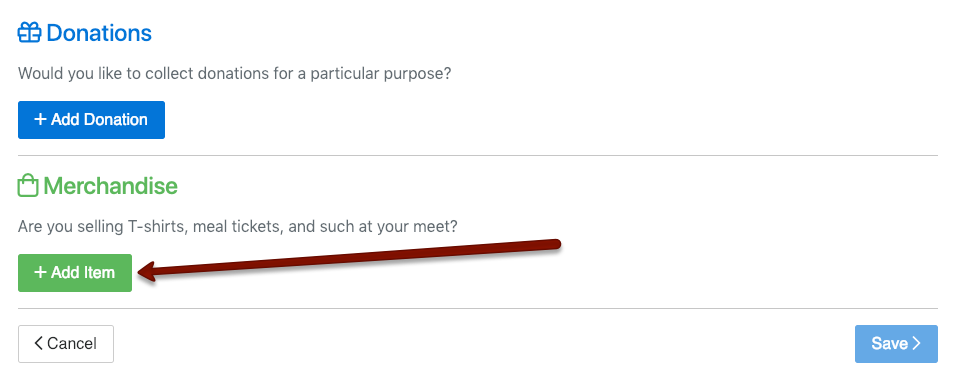
From that point, click on Set Up Merchandise under Additional Purchasable Items.
On the next screen, click Add Item.
After you click Add Item, you'll be prompted to enter details about the first item for sale:
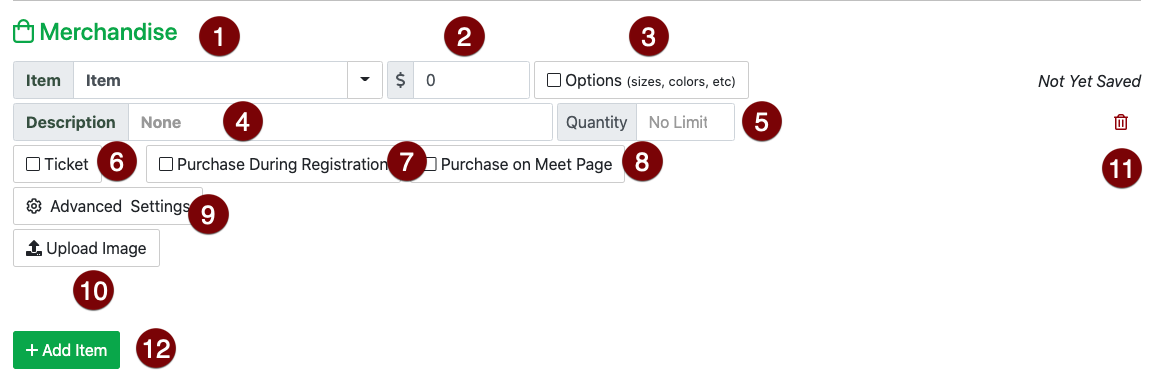
- Item: Enter a name for the item you're selling.
- Price: Enter the price for the item in US Dollars.
$0.00 will allow you to create a free, reservable item, but you can't put free items on the public meet page. Free items may be reserved during meet registration only.- Options: Allows you to list multiple versions of the same item (such as colors or sizes). Each item may have its own quantity limit. For more information, see Item Options below.
- Description: You can list an item description where the item is listed for sale. It will also appear on any invoices for the item.
- Quantity: Limit the number of items for sale. For example, if you've got fifty backpacks to sell, enter
50. The system will only allow fifty backpacks to be sold, and then will display a Sold Out message for that item. - Ticket: Check this box if the item is a ticket. This will enable e-ticketing for the item, and a special set of features. See E-Ticketing, below.
- Purchase During Registration: Checking this box will enable an opportunity for coaches and unattached athletes to purchase the item while they are registering for the meet.
- Purchase on Meet Page: Checking this box will enable an opportunity for any member of the public to purchase the item from the public meet information page.
- Advanced Settings: Allows you to set a maximum quantity per team or a maximum quantity per athlete, as well as other features. See Advanced Options below.
- Upload Image: Allows you to display an image of the item you're selling.
- : Deletes the current item. This isn't available once you've made a sale of the item.
- Add Item: Add another item for sale.
Once you click Save , you'll be prompted to set up your Stripe account, so you can receive funds. You have the option to set this up immediately, or defer it by up to 30 days. If you do not set your Stripe account up within 30 days of activating this feature, all money collected will be refunded. For more information about setting up a Stripe account, see Entry Fee Setup > Credit Card.
Item Options
With the Options checkbox, you have the ability to set up more than one type of a particular item that you're selling. For example, you could sell T-Shirts, and have different sizes available as item options, each with its own quantity limit:

Advanced Settings
In the Advanced Settings dialog, you have a few options to determine how your items will be sold.
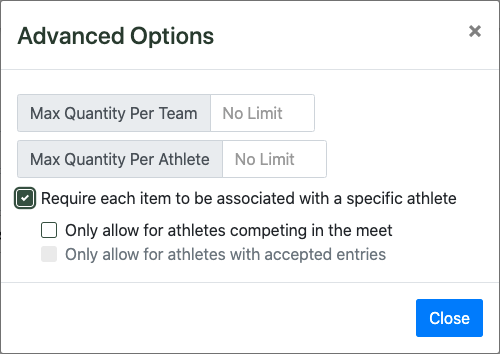
- Max Quantity Per Team: Prohibit a team from purchasing more of an item than the entered quantity.
- Max Quantity Per Athlete: Prohibit a particular athlete from purchasing more of an item than the entered quantity.
- Require each item to be associated with a specific athlete: Checking this box will require that each item purchased is tied to a specific athlete (e.g., for personalization purposes). Also, checking this box reveals the bottom two checkboxes:
- Only allow for athletes competing in the meet: Requires that the athlete tied to the item be entered in the meet.
- Only allow for athletes with accepted entries: Requires that the athlete tied to the item have an entry that's been accepted by meet management.
In order for the limits defined in the Advanced Options dialog box to be enforced, you'll need to make sure the items in question are only sold on the meet registration page by checking the Purchase during registration box.
E-Ticketing
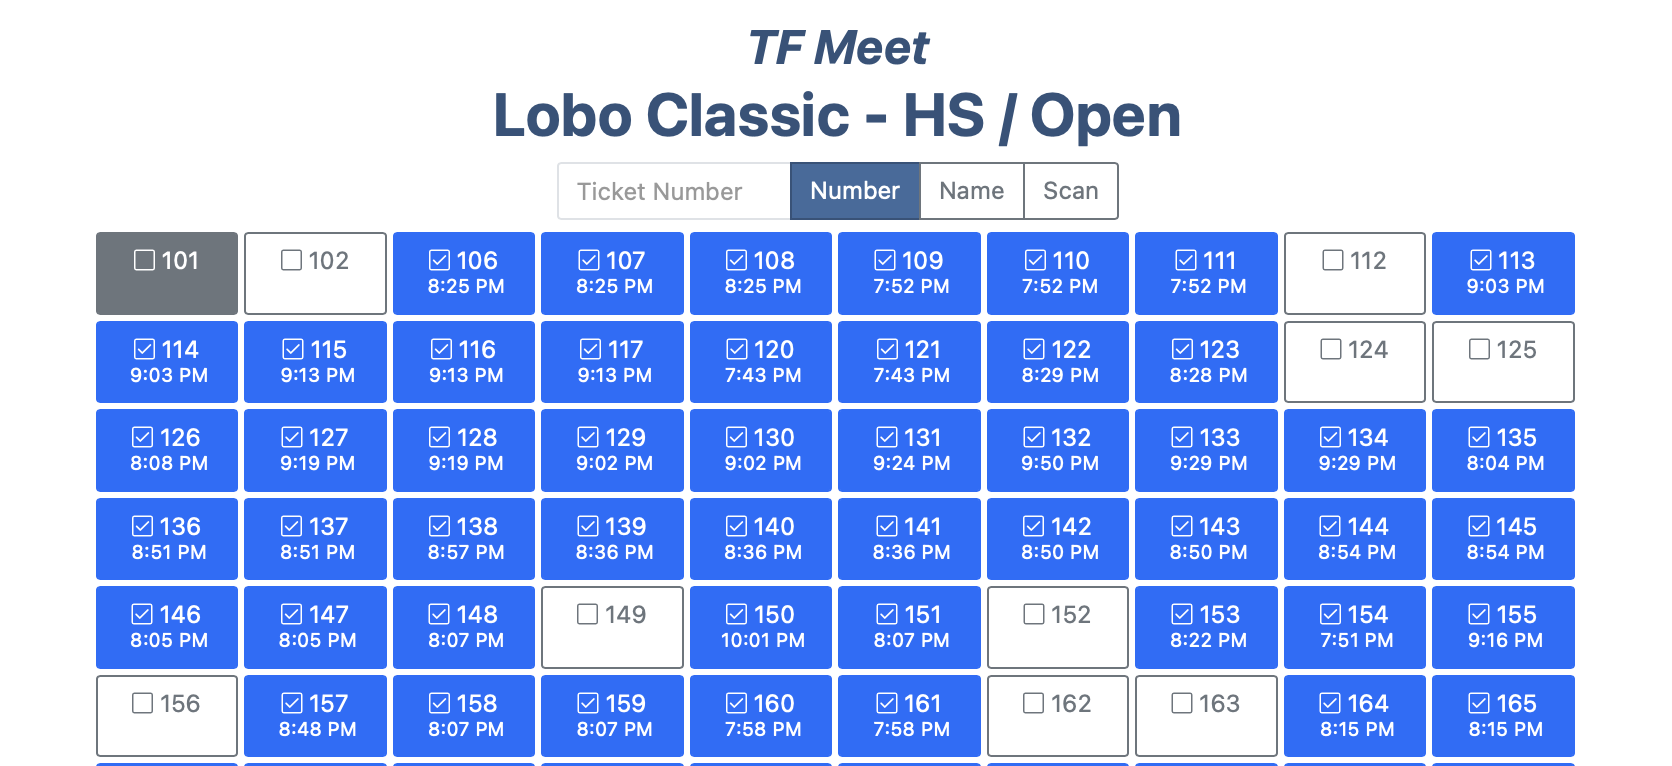
If you select the Ticket checkbox during your item creation, a unique ticket number will be generated for every purchase of the item. In addition, the copy of the invoice emailed to the purchaser will contain a link to their ticket. When it comes time to present the ticket, purchasers display their ticket on their mobile device and you can then check off which tickets have been used.
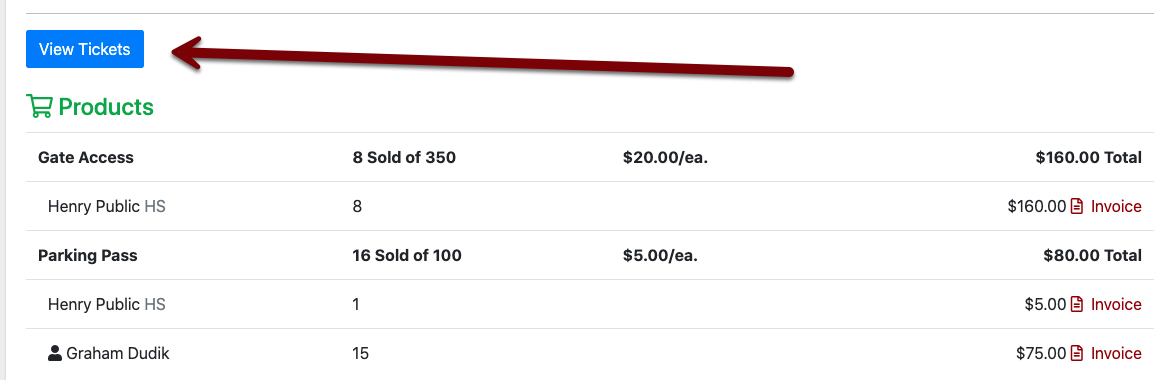
Once you have configured and saved your items, a View Tickets button will appear on the fee collection summary screen. Clicking this button will allow you to access a simple interface that allows you to check off each ticket's unique number as having been used.
Viewing Purchased Items
Once purchases of items have been made, you can view details of each purchase on the fee collection summary page (in Manage Meet Settings):
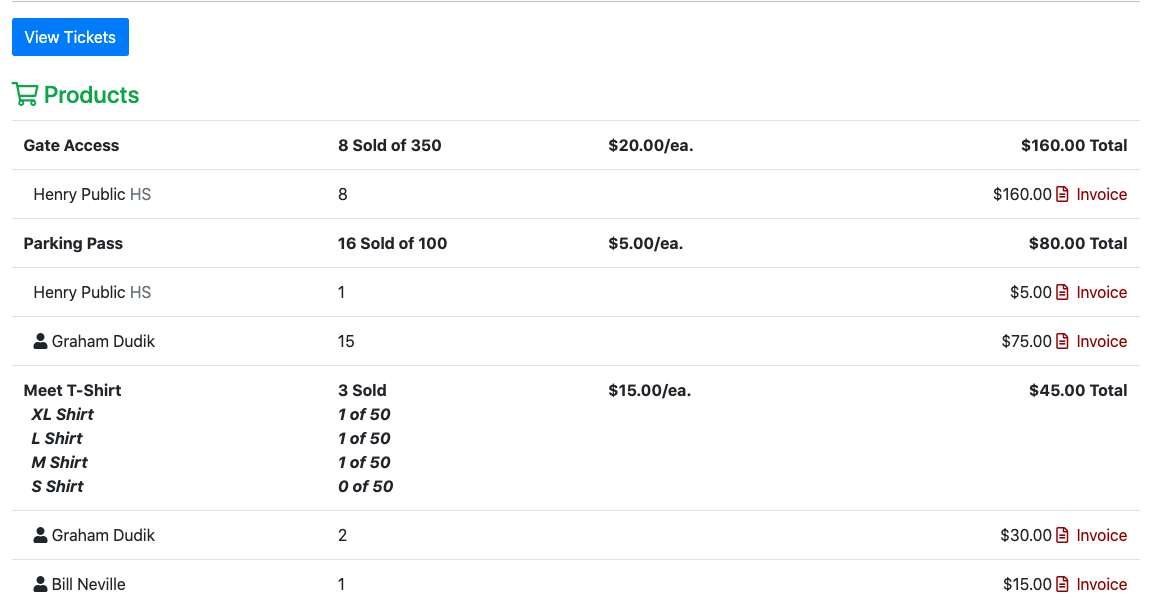
This will allow you to view how many of each item is remaining to be sold, invoices for each purchase, and other details. This view is useful for order fulfillment. Invoices are listed in chronological order, with the earliest orders appearing first.