Team Donations and Fundraising
AthleticNET's Team Donations and Fundraising features allow teams to collect donations via credit card through a secure online portal. You can set goals and monitor your team's progress towards those goals, and donors can set up recurring monthly or yearly donations to your team. You can set up multiple donations items, each with their own goals, and donors can choose which cause they'd like to donate towards. If necessary, you can configure each donation item to deposit into a separate bank account.
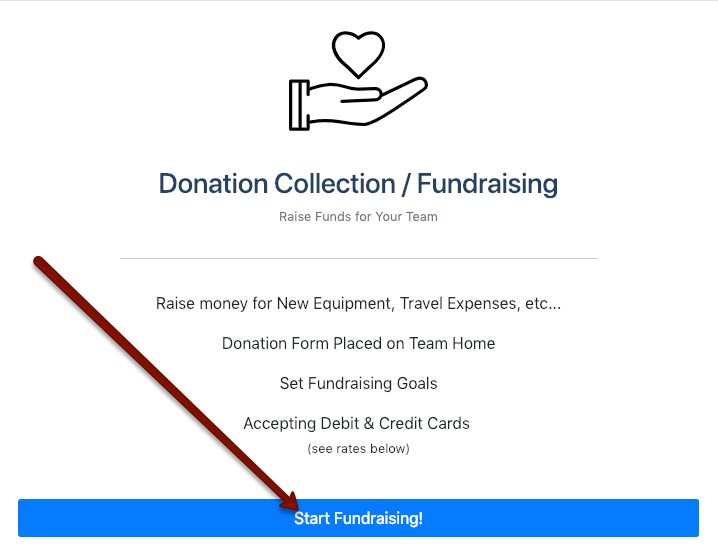
To set up a new donation item, you'll need to access your team's homepage. To access your team's homepage, navigate to your team's homepage by clicking on the Menu Icon () in the top left corner, and then clicking on your team's name. From there, click on Manage Team in the top menu bar. Click on Donations/Fundraising, and then click on Start Fundraising!
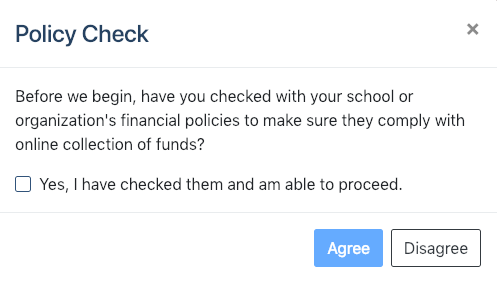
You'll need to confirm with your school or organization that their policies allow the online collection of funds. Once you have done so, check the box and click Agree.
On the next screen, you'll be asked to enter a title for this donation item. Optionally, you may enter a goal amount, a goal deadline, a description, upload and image, share the fundraiser details, and choose whether donors may set up recurring donations.
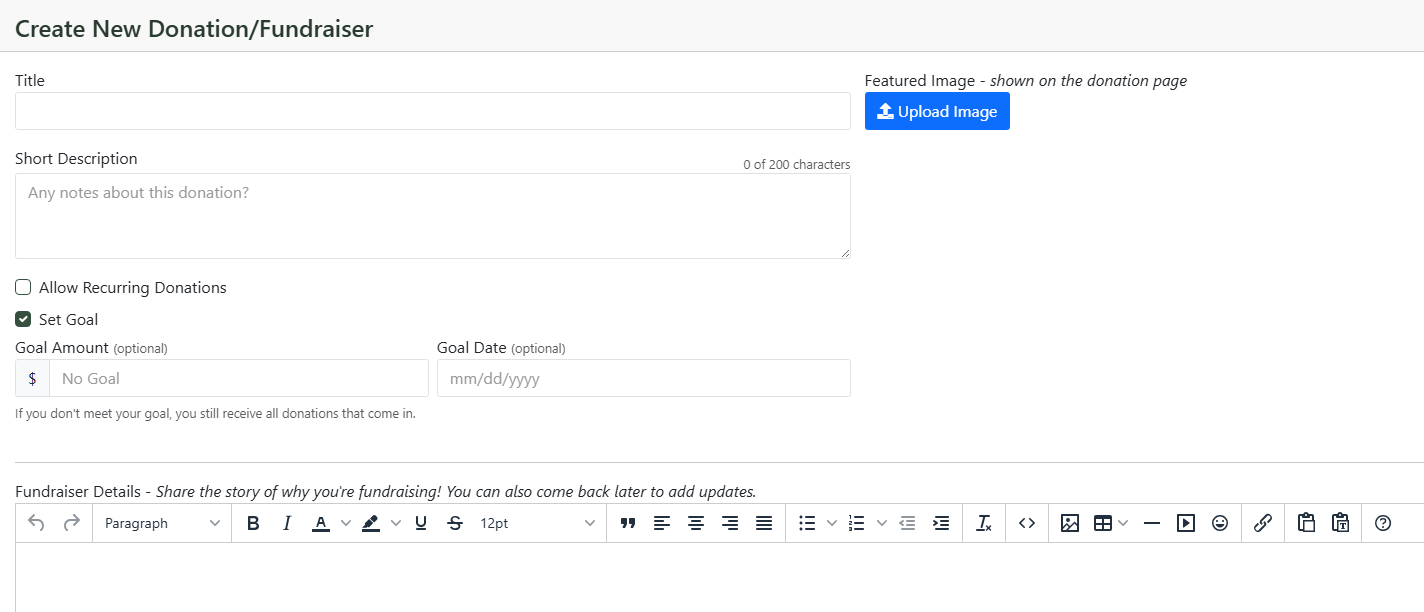
Click Next to continue.
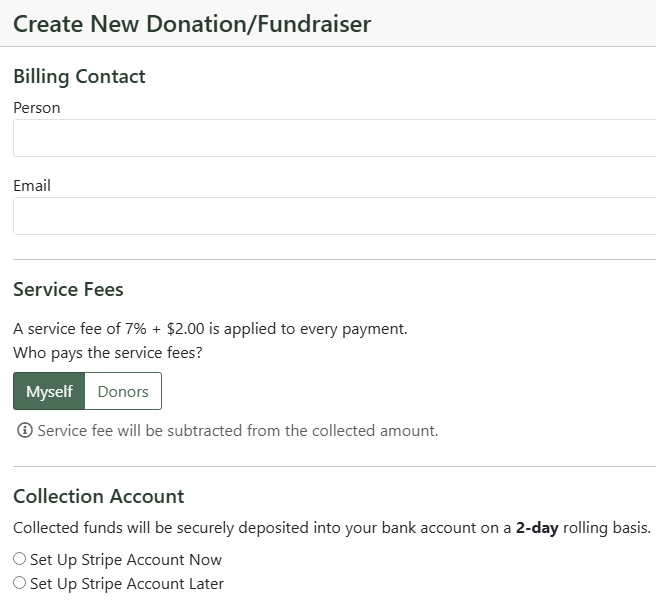
On the next page, you'll be asked to enter contact information for a billing contact. This person will receive notifications of fees paid and inquiries from donors regarding fees. The billing contact information will appear on all invoices. Additionally, you'll be presented with the service fee structure, and asked to decide who will be responsible for the credit card service fees. If you choose Myself, the service fee will be deducted from the amount the team collects from each transaction. If you choose Donors, the service fee will be on the donor's invoice and added to their total. For more information on service fees, see AthleticNET Financial Feature FAQ.
Next, you'll need to click Setup Collection Account. This will take you to AthleticNET's payment processing partner, Stripe. Stripe will ask for information about the person or business receiving payments. The data required by Stripe varies depending on the type of organization you represent. You'll also need to create a username and password with Stripe, and provide them with a routing number and account number for the bank account where funds should be deposited. When you're done, click Authorize access to this account, and you'll be taken back to Athletic.net. You'll also need to verify your email with Stripe.
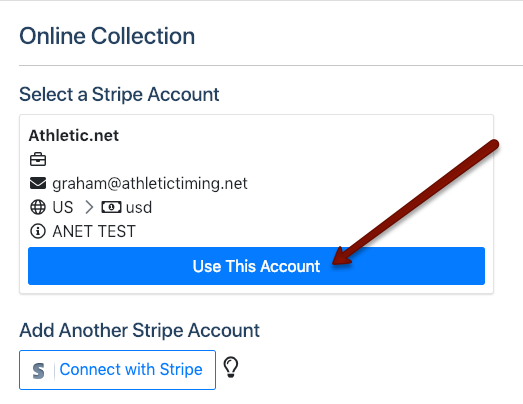
Once your account with Stripe has been created, press the Click to Continue button on AthleticNET. You'll be prompted to select an account. Click Use This Account.
Once you've selected the Stripe account you're going to be collecting fees with, and/or completed the information required for paper checks, click Finish Setup in the bottom right corner.

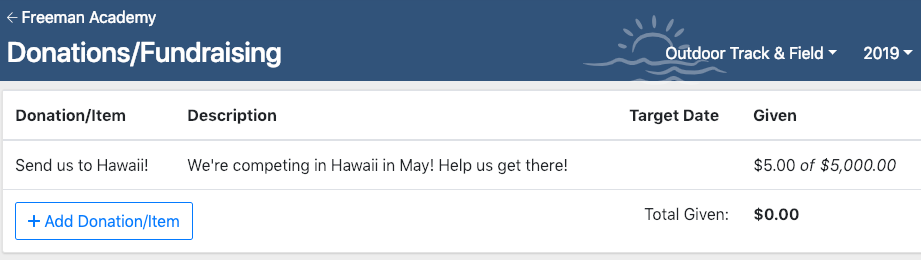
Once you've finished setting up the donation, the main Donations/Fundraising screen will display a summary of all donation campaigns currently active, including goal amounts, goal progress, and target dates. Click on any line to see more detailed information.
Clicking on a donation item will show details including donor names, a fee breakdown, and the total received by the team for this campaign. Clicking on Send Thanks will allow you to send a custom thank-you email to the donor.
