Record Full Race Videos
You can use the AthleticFIELD app to record full-length videos of races from a mobile device and have the video appear alongside the results on AthleticLIVE! AthleticLIVE uses your meet management software's schedule files to nicely organize each video file and then will upload them in the background while you record the next video.
Option 1: Stream and Auto-Chop
If you have the means to stream video through OBS, ask us for a stream key. Put any overlays you like onto the stream and send to us. We auto-chop on-demand videos in the cloud. Learn more here >
Option 2: Configure AthleticFIELD
In the AthleticLIVE Admin, edit your meet and set a Race Video Password. If you do not see this field, email live@athletic.net for access.

Download and open AthleticFIELD on an appropriate mobile device.
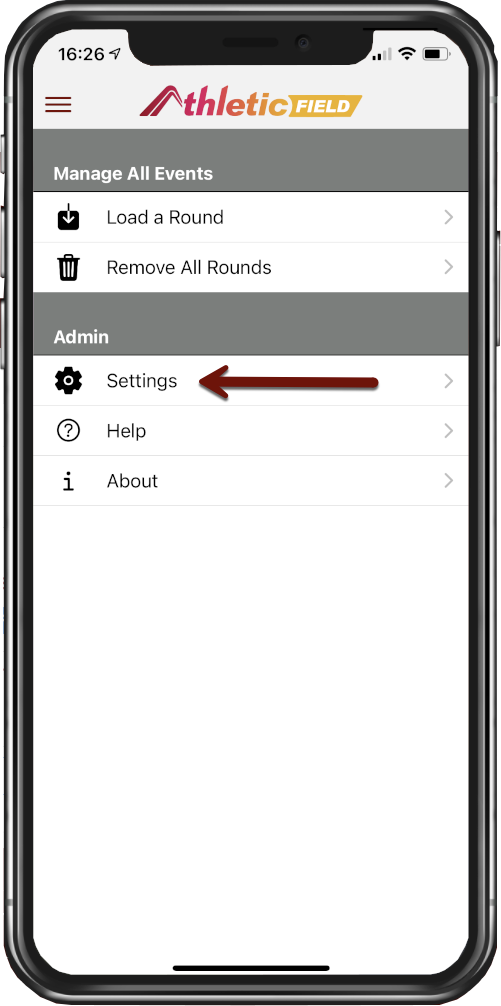
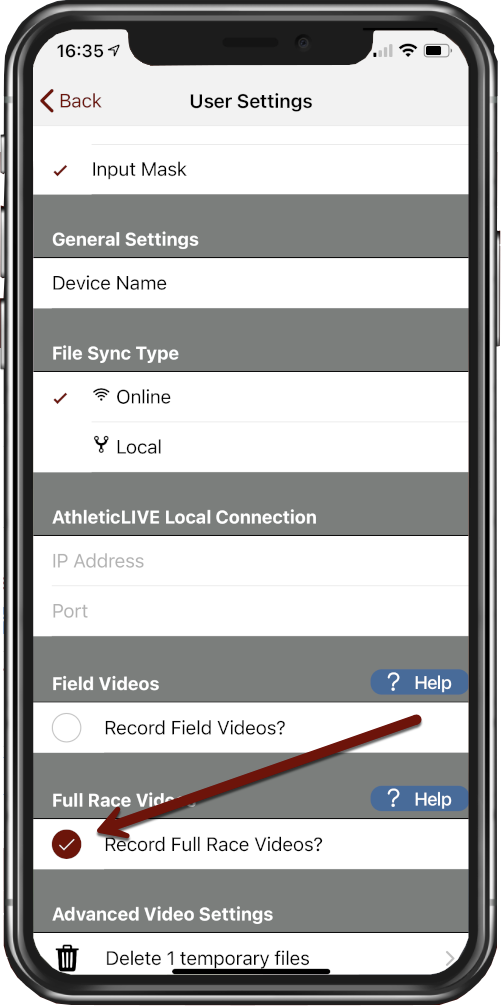
On the User Settings page, check the box labeled Record Full Race Videos? and then return to the main screen.
Record Videos
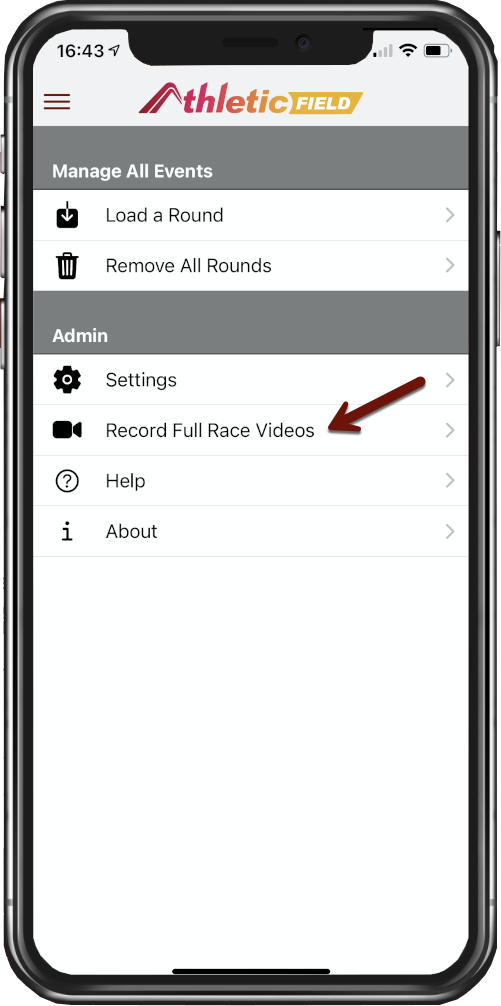
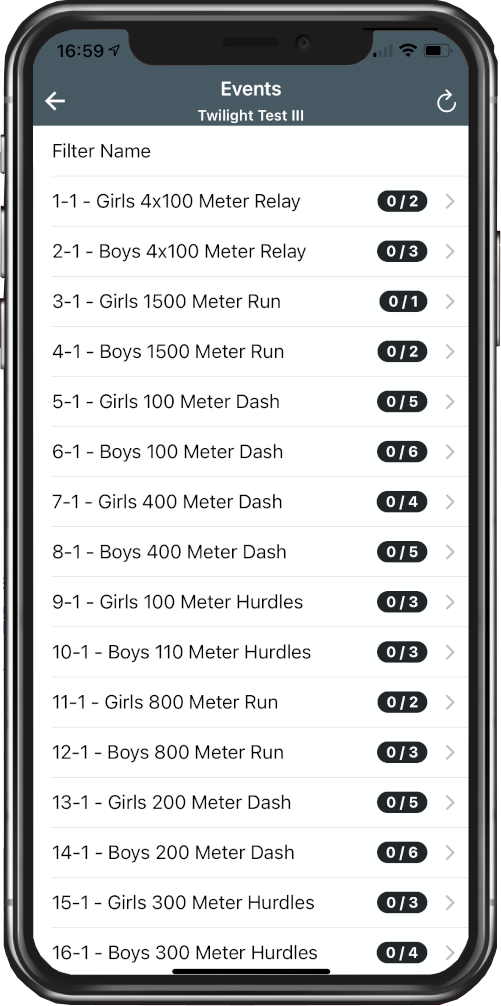
Finally, tap on the meet name. You'll be presented with a list of all running events in the meet.
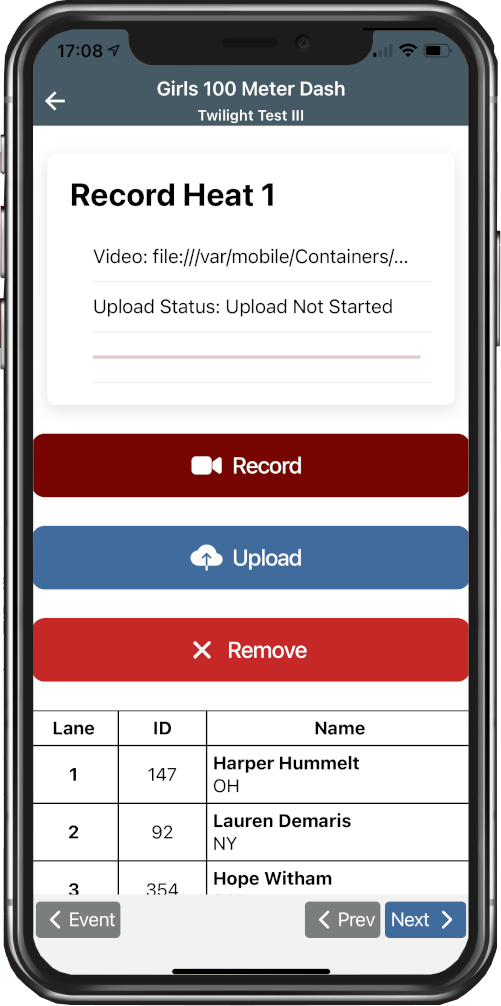
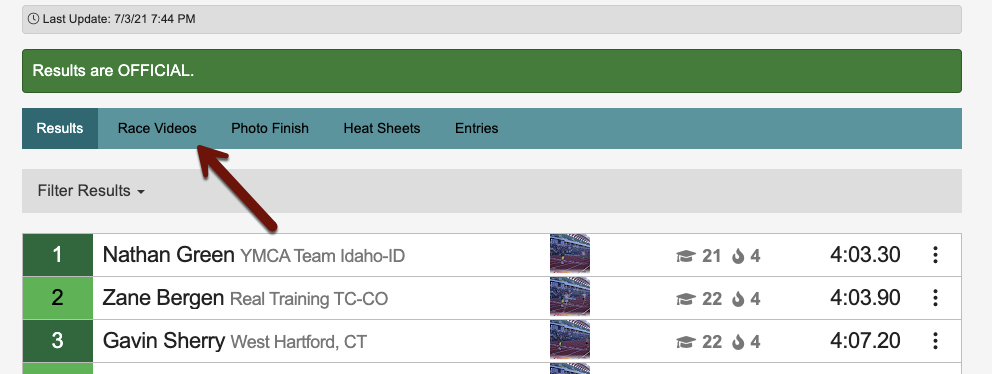
Once you begin the video upload, you may proceed to the next event, even if the previous video is still uploading. Videos will queue in the uploader, with the first video recorded being uploaded first, before moving to the next video. Once videos are uploaded, they will appear on your live results page:
INCLUDING MULTIPLE VIDEOS IN AN XC EVENT
Re-title your Videos
Rename the video titles that are shown on the live results page to make them something more descriptive and appropriate than "Heat 1", "Heat 2" etc.
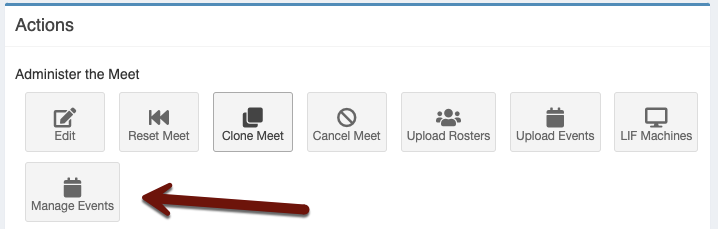
Visit the AthleticLIVE Meet Administration Portal, and click Manage Events.
For each event that should have videos re-titled, click Edit.

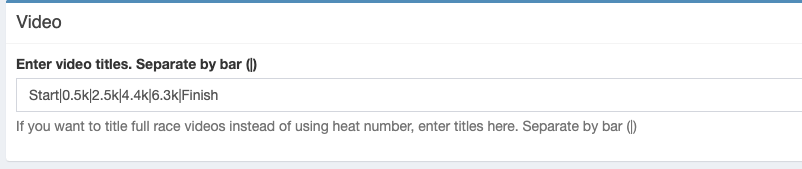
Scroll all the way down to the bottom of the page, to the Video section. In the text box, enter the title for each video that will be uploaded, separated by the pipe/bar character (|).
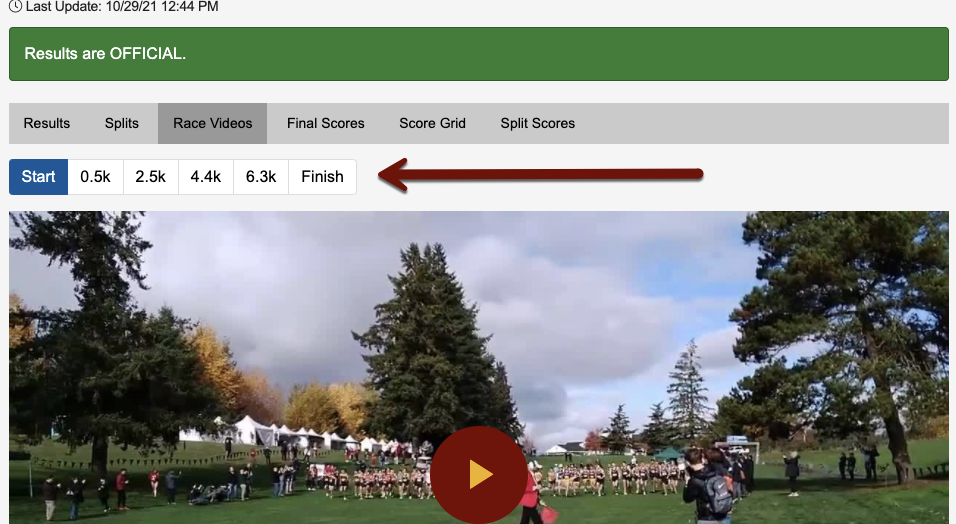
When you're finished, click Save Event at the bottom of the screen. If you visit the live site, you'll notice your videos now have descriptive titles:
FIXING STUCK VIDEOS
Uploading All
If videos get stuck, here's how you can get them uploaded.
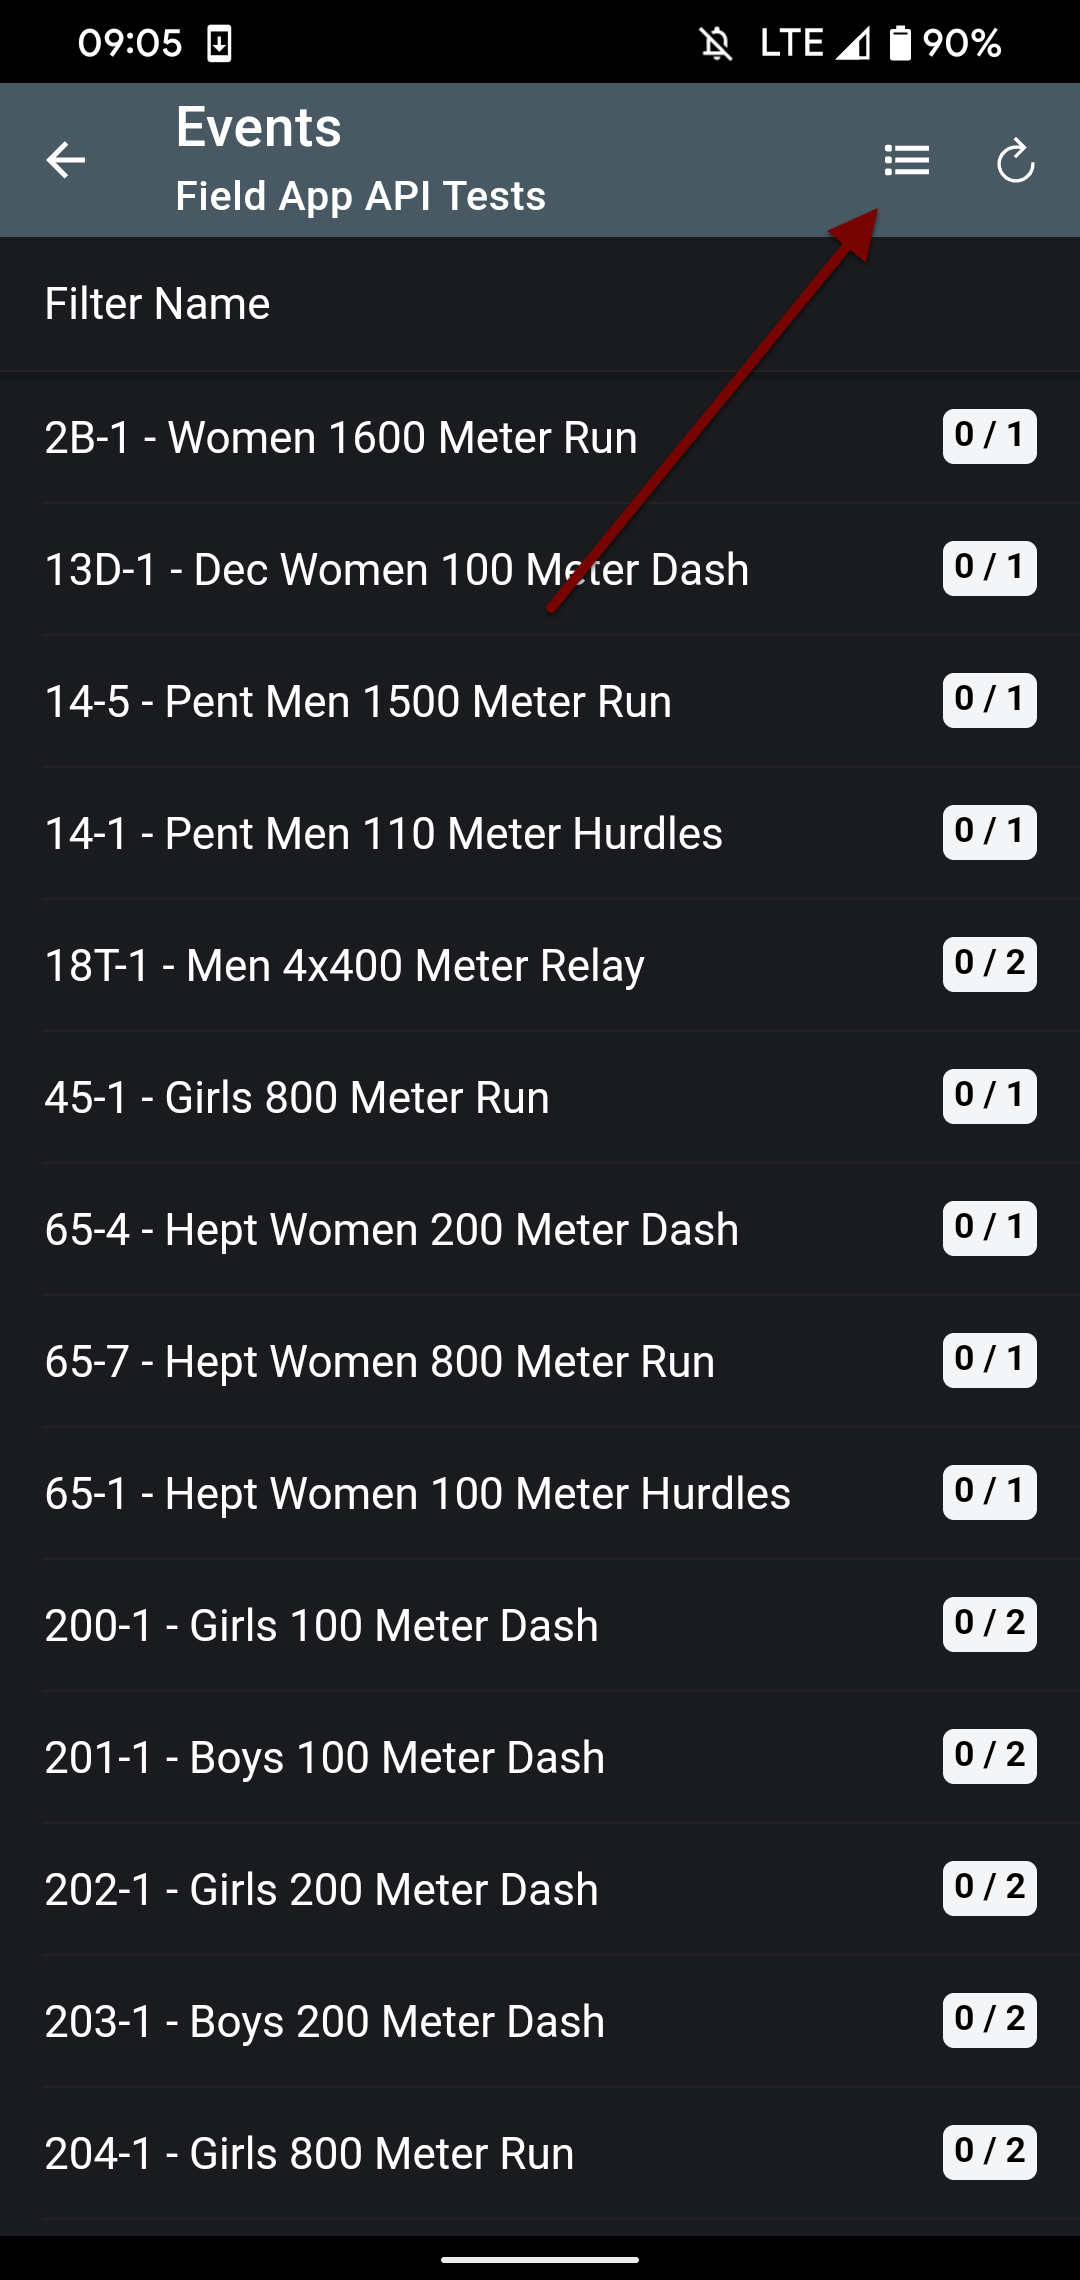
- On the main meet event page, click the list icon in the top right.
- On the Video list page, click the three dots button in the top right.
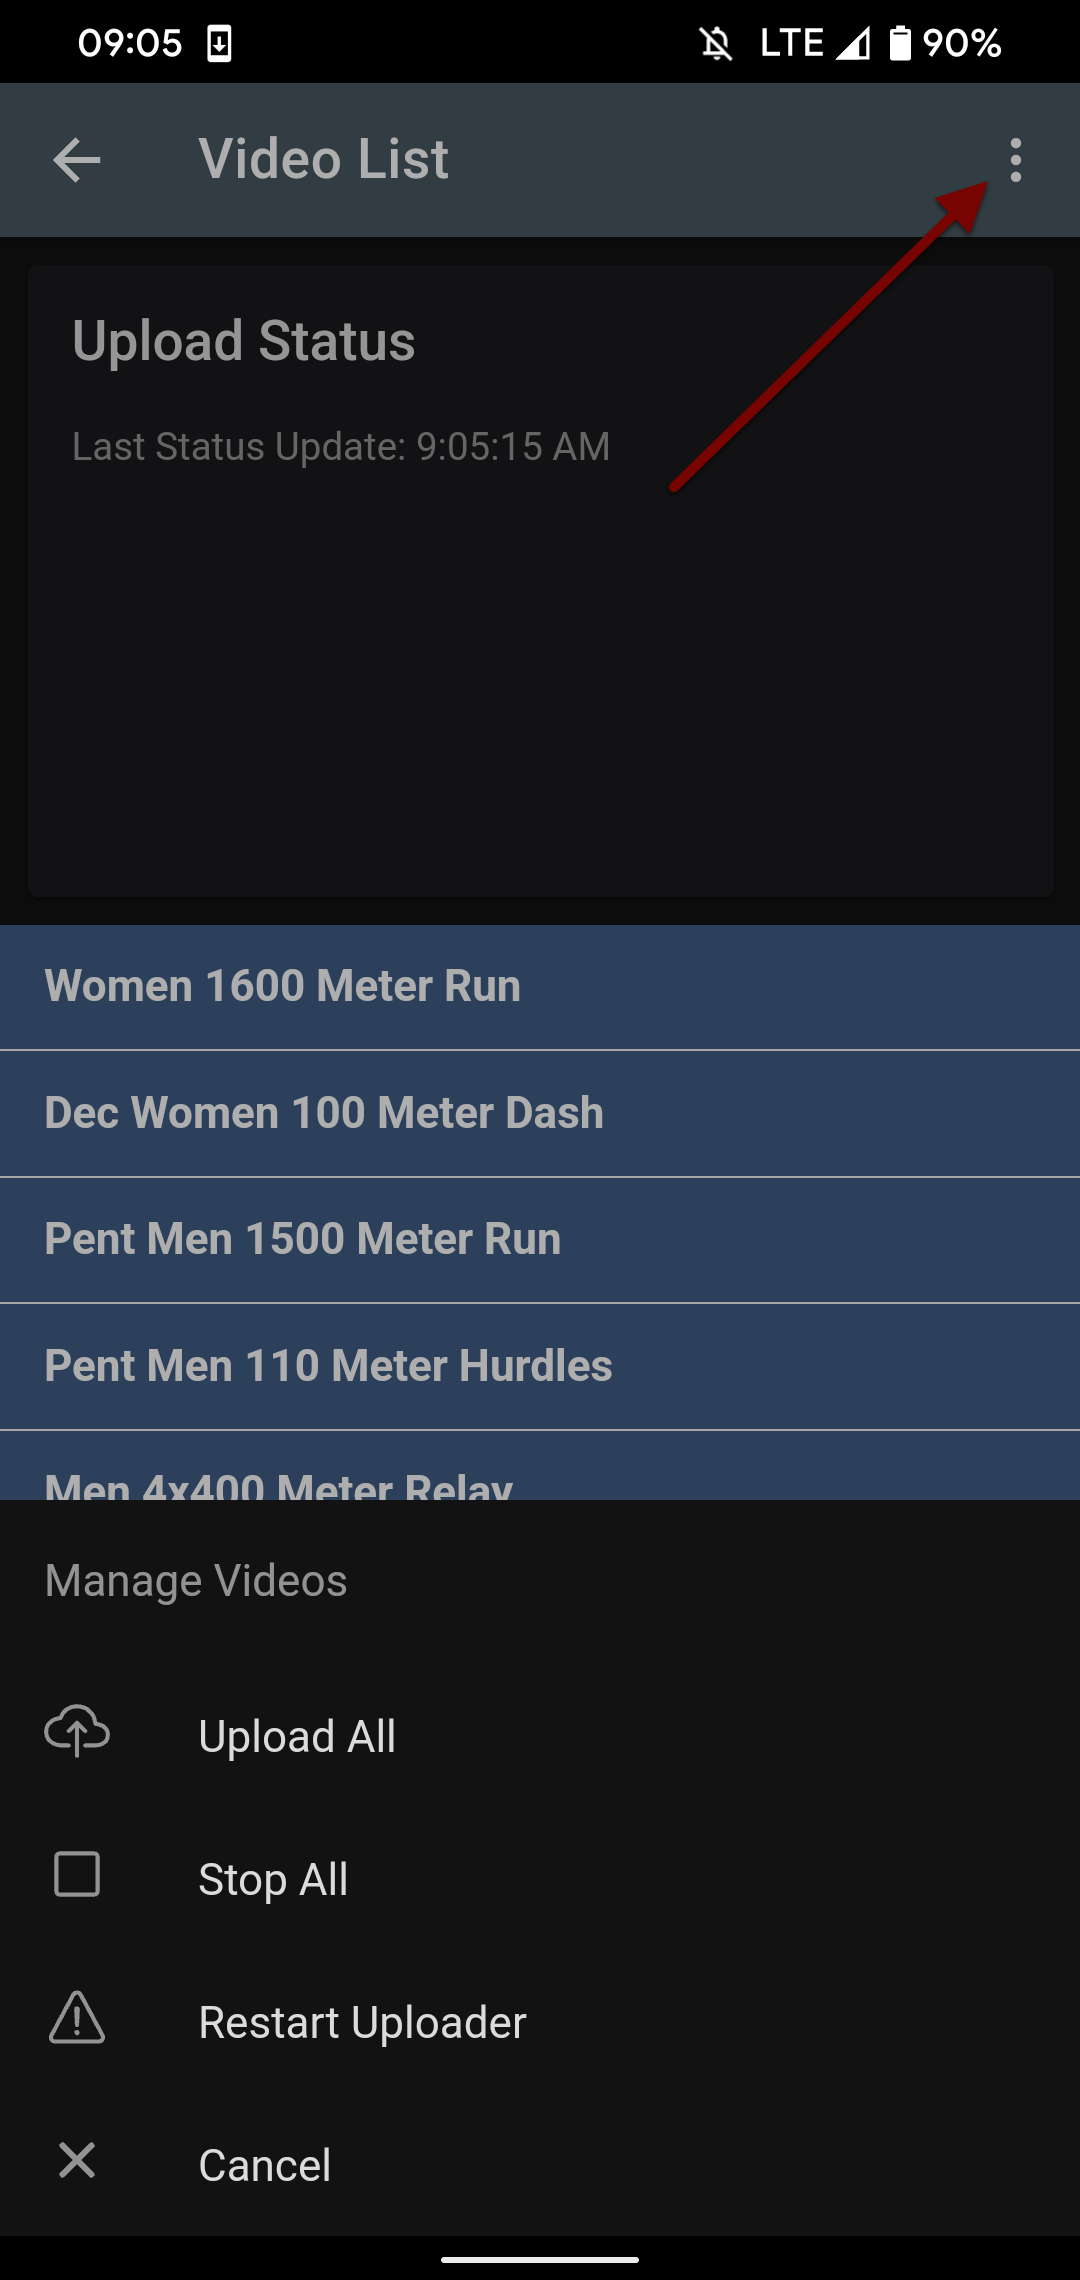
- Click "Stop All".
- Click the three dots button again and hit "Restart Uploader".
- Click the three dots button again once more and hit "Upload All"
Uploading One at a Time
If it seems like Uploading All isn't working, you can try uploading one by one.
- Click the three dots button again and hit "Stop All".
- Click the three dots button again and hit "Restart Uploader".
- On the Video List page, try uploading videos one by one. See if a couple work. If so, then click the upload button for the rest.