Assign Workouts to Your Athletes
AthleticNET's AthleticLOG functions allow coaches to track athletes' workouts so coaches can keep an eye on athletes' progress towards goals. Coaches can manually log athletes' workouts and mark them as completed using the Training Log, but the Training Log is at its best when athletes are using their individual Training Logs to track their own workouts. Athletes who use their own training logs can then mark workouts as completed and enter notes or modifications to the workouts.
Accessing the Training Log
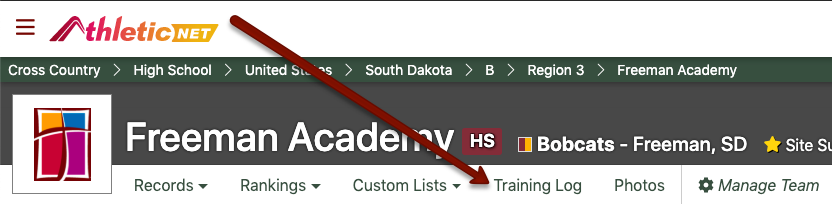
The Training Log is accessible from your team's home page. Click on the menu icon () in the top left corner, and then click on your team's name from the menu, selecting Track and Field or Cross Country as appropriate. From your team's home page, click Training Log at the top.
Workouts Tab
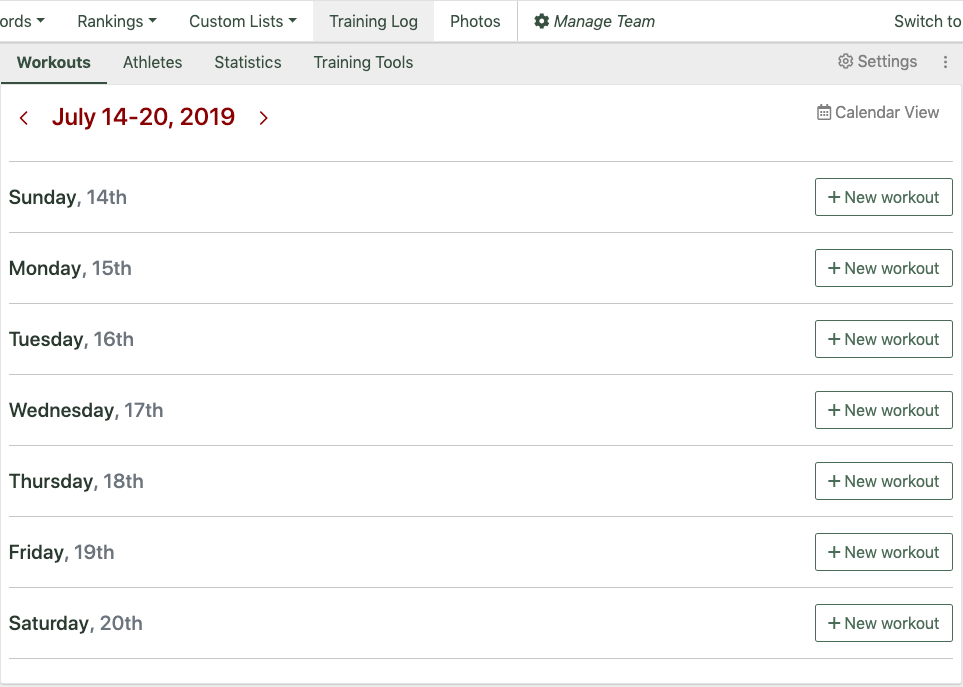
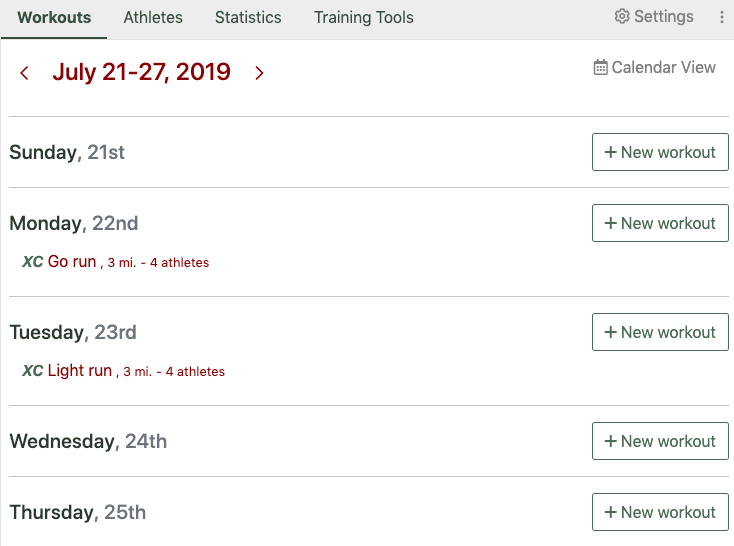
The first tab that will appear after accessing the Training Log is labeled Workouts. By default, it shows a week-by-week view of all workouts that have been assigned to your team. When you first access it, there will be no workouts listed. As you add workouts, they will be displayed on this screen. You can assign workouts from this tab or from the Athletes tab (see Assigning Workouts below).
Athletes Tab
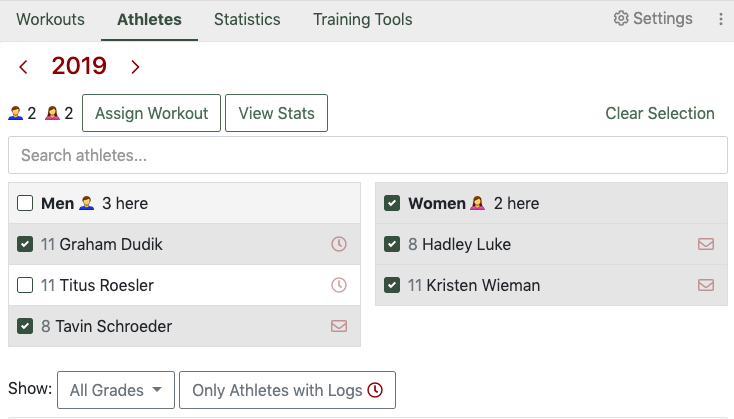
The Athletes tab is where you can view the athletes on your roster, and see at a glance whether they have claimed their athlete bio. If an athlete has claimed their bio, it means they have associated their results that are posted on AthleticNET, as well as their entry on your roster, with their login. If you assign a workout to an athlete who has claimed their bio, they will be able to see your assigned workouts on their personal Training Log, mark the workouts as completed, and enter notes. Workouts you assign will be tracked along with any workouts the athlete enters to form the overall picture of the athlete's training history.
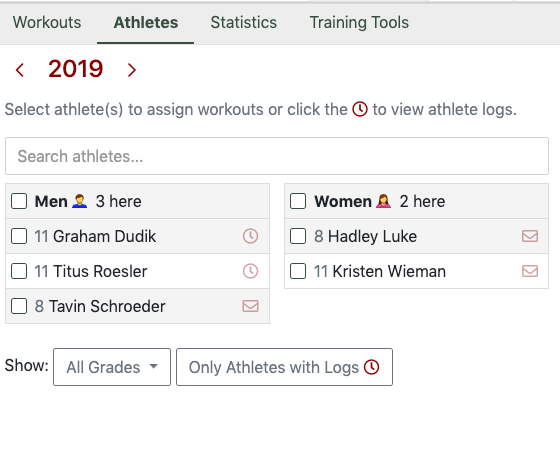
Athletes who have claimed their bio are marked with a , while athletes who have not yet claimed their bio are marked with a . As a coach, you can click on the to view an athlete's personal Training Log. You can also invite athletes who haven't yet claimed their bio to to do by clicking the and entering the athlete's email address.
Assigning Workouts
There are two ways to assign workouts: either from the Workouts tab or from the Athletes tab.
Assigning from the Workouts Tab
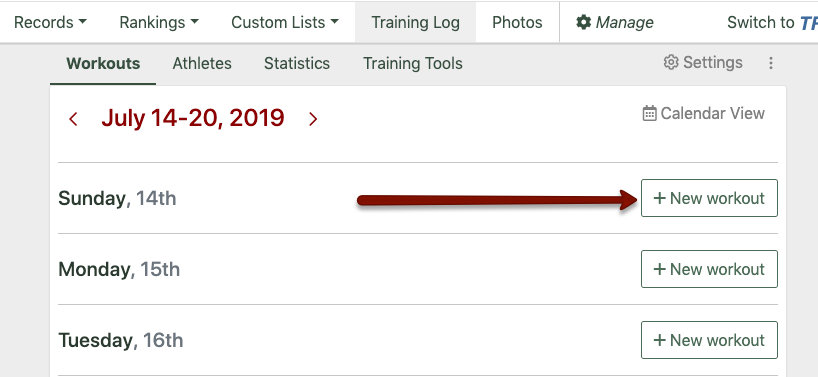
From the Workouts tab, click New Workout on the day you'd like to assign the workout.
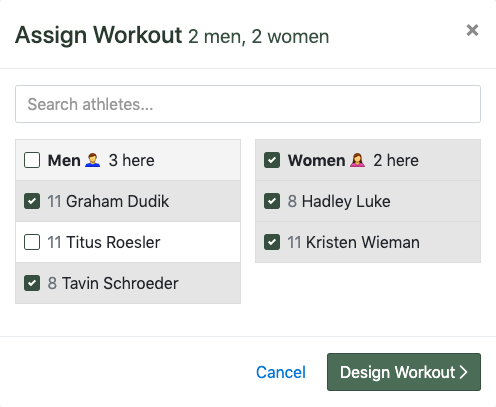
Select all the athletes that you'd like to assign this workout to, and then click Design Workout .
On the next screen, you'll enter details about the workout.
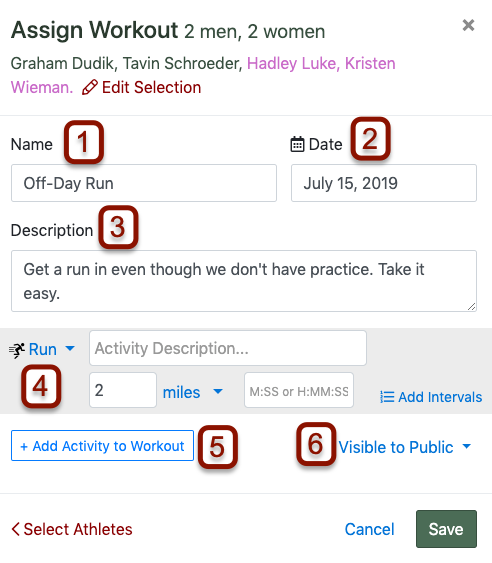
- Name: Give your workout a name (required field)
- Date: This will show the date on which you're assigning the workout. If it's wrong, click to change it (required field).
- Description: Describe what the workout looks like (optional)
- Activity: Select and describe what you did in your workout. You can choose from a number of different activities using the dropdown arrow next to the activity type, including running, swimming, biking, weights, or you can describe your own. Enter the distance and time (if applicable). If you're doing interval training, you can use the Add Intervals button to add intervals of different distances to the workout.
- Add an Activity: You can use this button to add a second activity to the same workout
- Visibility: You can make your team's training log visible to the public (see Settings, below) on your team's homepage. If you do, you can choose to make this workout visible to the public, or make it visible only to the team.
When you're done, click Save. If any of the athletes the workout has been assigned to have their own Training Logs, the workout will be displayed on the day in question.
Assigning from the Athletes Tab
Assigning workouts from the Athletes tab works largely similarly to assigning from the Workouts tab except that you select athletes first, and then click Assign Workout at the top.
Once you've done that, you can fill out the Assign Workout screen as described above.
Assigning and Working with Managed Athletes
If you'd like to assign or view workouts from team members who are under 13 years old, the athlete's parents will need to add him or her as a managed athlete and record workouts for their managed athlete. Information regarding how to add a managed athlete to a parent's account can be found at Adding a Managed Athlete to Your Account. Information regarding how to access a managed athlete's training log can be found Track Workouts using AthleticLOG -> Using AthleticLOG with a managed athlete.
As a coach, you can help ensure that the managed athlete and the athlete listed on your roster are properly linked. Ensure that the athlete's date of birth and grade have been entered in your team's roster. For information on how to edit your team's roster, see Editing Athlete Info. If you're still having trouble viewing an athlete's workouts, contact us using the icon on any page.
Viewing, Editing, and Marking Workouts as Complete
Once you've added some workouts to the Training Log calendar, you can view them on the Workouts tab. Each workout entered will be shown on the day it was assigned to be completed.
To view, edit, or mark a workout as completed, click the name of the workout. You'll be shown a table with athletes to whom the workout was assigned on the left, and the distinct activities the workout consisted of across the top.
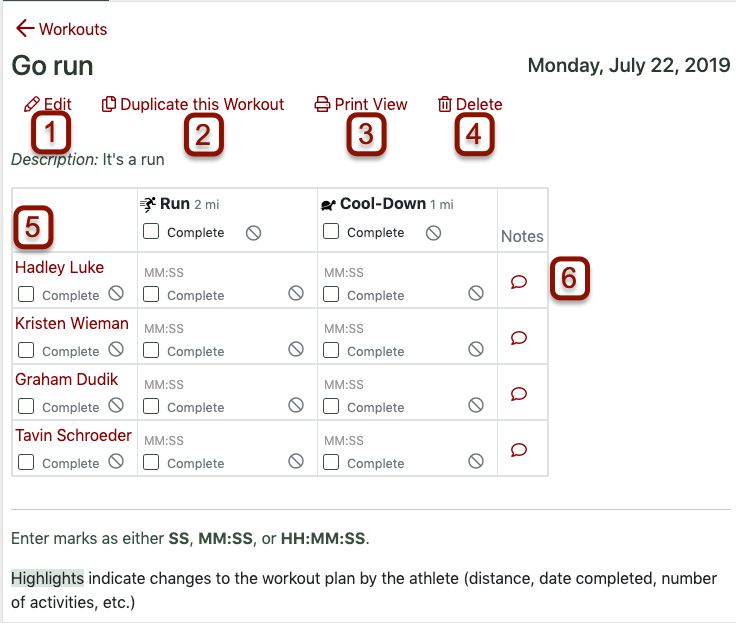
- Edit: Opens the Design Workout screen where you can make modifications to the workout, as described above.
- Duplicate this Workout: Allows you to quickly create a duplicate copy of this workout for assignment on a different day. You can assign different athletes if necessary.
- Print View: Allows you to create a printer-friendly table of all information displayed here.
- Delete: Delete this workout from the schedule.
- Workout data table: Allows you to note whether a workout or an individual activity in a workout was completed, skipped, and what the time was.
- Use the Complete checkbox to indicate that a component of a workout was completed. To mark that an athlete has completed all activities within a workout, use the checkbox under the athlete's name to mark that entire row as complete. To mark that all athletes have completed a particular activity within a workout, use the checkbox under the activity name to mark that entire column as complete.
- Use the to indicate that a component of a workout was skipped. To mark that an athlete has skipped all activities within a workout, use the under the athlete's name to mark that entire row as skipped. To mark that all athletes have skipped a particular activity within a workout, use the under the actvity name to mark that entire column as skipped.
- Click on the MM:SS to enter an elapsed time for this particular segment. Press
Enterwhen done. - Notes: Click the to enter notes for the athlete. Click the icon again to hide the field once a comment has been entered. Any notes entered here will be shared with the athlete on their personal training log. If the icon shows , then a comment has been entered.
HH:MM:SS.ss format. Hours, minutes, and seconds should be separated by a colon (:). Seconds should be separated from tenths and hundredths of a second by a decimal point (.).Settings
To change settings related to your team's training log, click on Settings at the top right of the training log. This will allow you to change various preferences relating to the display and function of the training log.
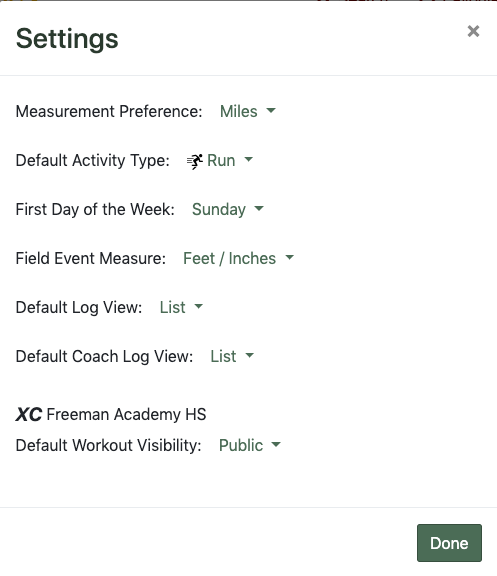
- Measurement Preference: Choose between Miles and Kilometers for the default distance measurement preference.
- Default Activity Type: Choose what activity type is pre-populated in the activity field when designing a new workout.
- First Day of the Week: Choose whether to display Sunday or Monday as the first day of the week.
- Field Event Measure: Choose whether field events are displayed in Feet/Inches or Meters.
- Default Log View: Choose between weekly list and calendar view for your personal Training Log.
- Default Coach Log View: Choose between weekly list and calendar view for your team's Training Log.
- Default Workout Visibility: Choose whether team workouts are displayed publicly on your team's homepage or are only visible to the team.