Editing Athlete Info
In order to take full advantage of the AthleticNET roster capabilities, you'll need to edit and customize athlete data. In this article, we'll show you how to edit basic athlete data, customize what data gets collected, and edit contact details for each athlete.
To access your team's roster, navigate to your team's homepage by clicking on the Menu Icon () in the top left corner, and then clicking on your team's name. Then click on Manage Team in the top menu bar, and then Athletes.
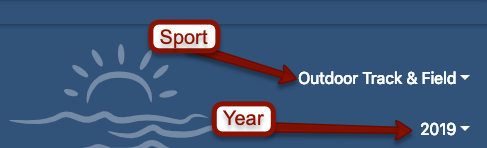
Ensure that the sport and the year are both correct. If you're working on a different sport or season from what's listed, use the drop-down arrows to select the correct season or sport in the top-right corner. Once those are correct, you can see the roster for this season and sport as it currently stands.
The Roster Screen
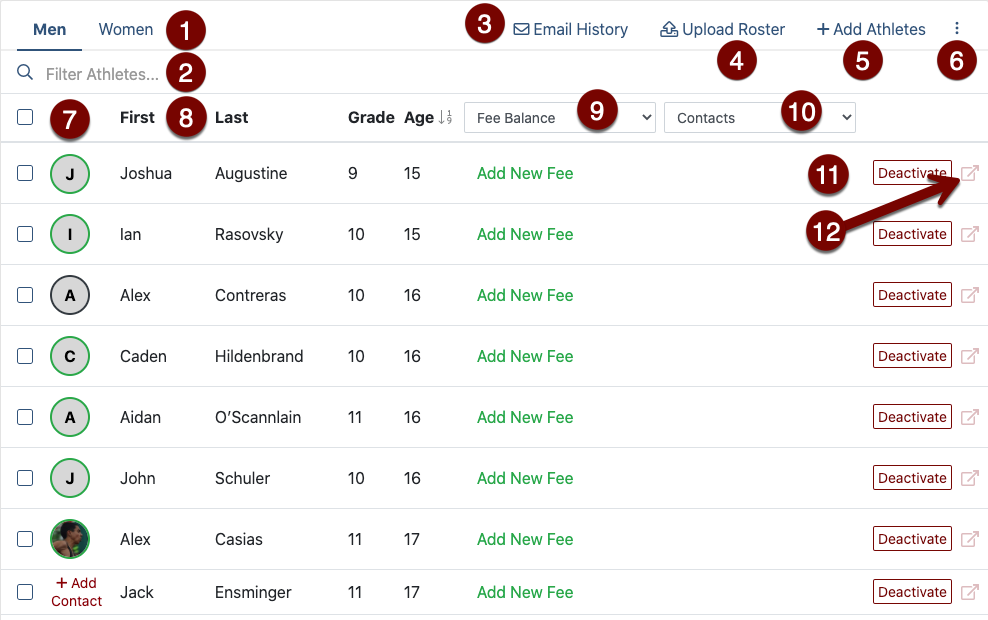
The roster screen contains a number of features. See a description for each number below.
- Gender Selector: Display male or female athletes.
- Athlete Filter: Enter all or part of an athlete's name to display all matching athletes.
- Email History: Display all emails sent to athletes. For more information, see Athlete Communication Features.
- Upload Roster: Bulk-upload lists of athletes from another source. For more information, see Uploading a Roster.
- Add Athletes: Quick-add a single athlete. Also allows access to the list of existing athletes from other seasons, sports, or linked schools so that they may be activated for the current season or sport.
- Additional Options:
- Synchronize with Indoor Roster: (Track & Field Only) Adds all athletes listed on the current season's Indoor Track & Field Roster to the corresponding Outdoor Track & Field Roster.
- Print Athlete Information: Prepares a customizable, printer-friendly report of roster information.
- App/Team Connection Status: Shows whether there is an AthleticNET user account who has claimed this bio on your team's roster. Add Contact means nobody has claimed this athlete's bio. Clicking here will allow you to send an invitation email to the athlete prompting them to sign up for an account. A green border indicates that the user has properly entered your team code and is fully connected to your team. A black border indicates that the user has claimed this bio as their own, but has not yet entered the team code to fully connect with the team. For more information, see Connecting Athletes to Your Team Using the App.
- Column Headers: Click any column header to sort by that column. Click the checkbox on the far left to select all athletes for batch operations, such as deactivation or sending emails.
- Customizable Column Header: Displays any of the user-defined fields available to record custom information, including text, checkboxes, sizing information, and more.
- Customizable Column Header: Displays any of the user-defined fields available. For more information, see Customizable Fields below.
- Deactivate Button: Deactivates the current athlete. For more information, see Deactivating, Reactivating, and Moving Athletes.
- View Athlete Profile: Click to visit an athlete's profile page and view their performance history.
Basic Athlete Data
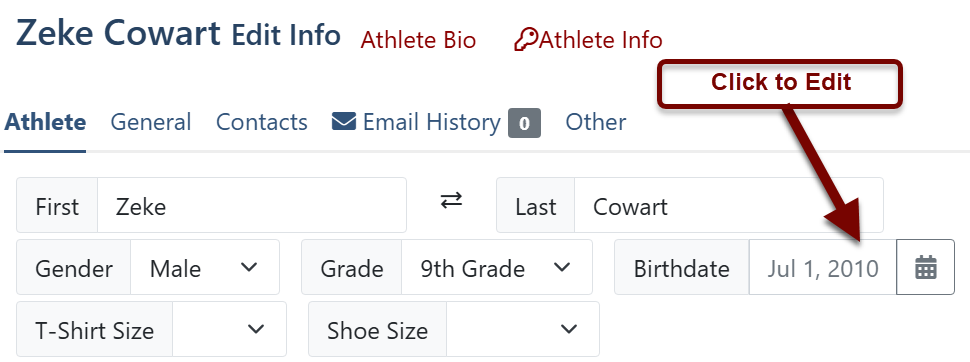
In order to edit an athlete's basic information, simply click on the athlete's name from the main roster screen. This will bring up a pop-out window with the athlete's information.

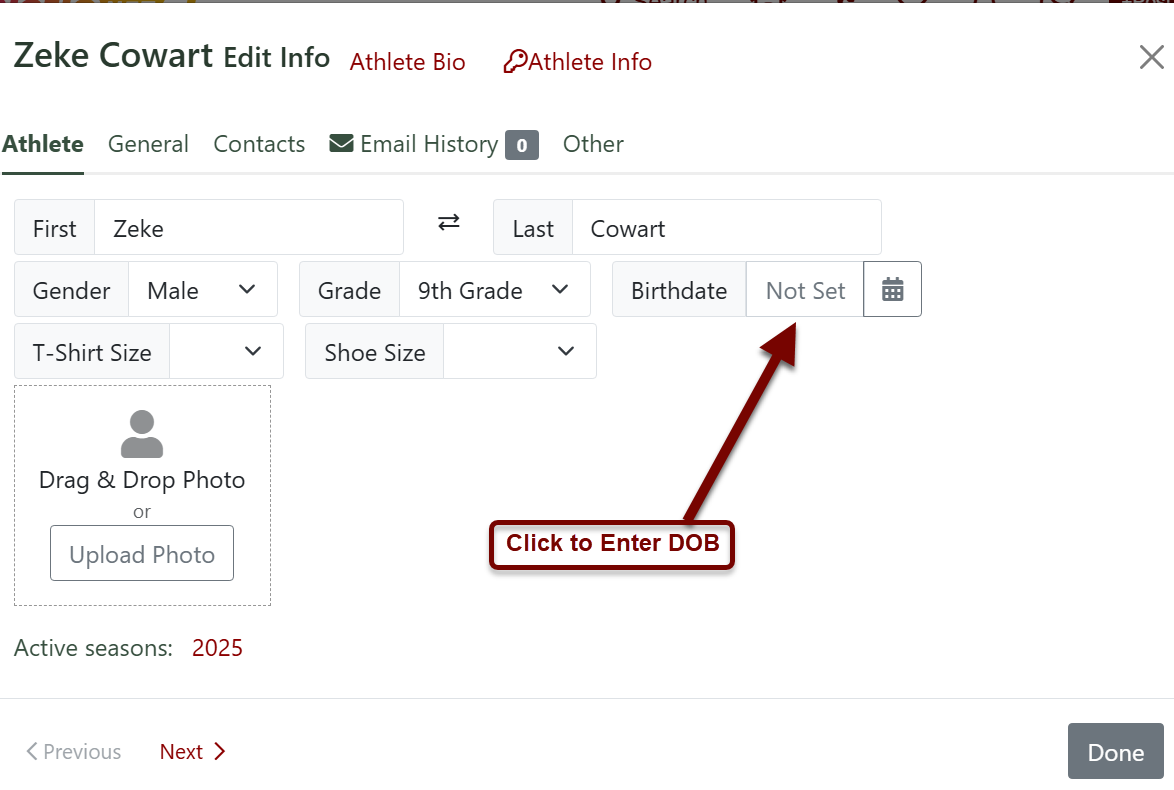
This window shows the minimum information necessary for a complete AthleticNET athlete record. This information is:
- First Name
- Last Name
- Gender
- Grade
- Birthdate
- Team (this is dictated by the roster currently being edited)
Making sure this information is present and up-to-date will ensure that meet results are properly reflected in an athlete's performance history. Other information listed here, such as T-Shirt and Shoe Size, may be useful to the coach, but is not necessary.
Clicking on any of the Active Seasons years will deactivate the athlete from that particular season. Clicking Done will save any changes and return you to the roster screen. Previous and Next will save any changes and take you directly to the previous or next athlete in the list for quick editing.
Date of Birth
If you're going to use AthleticNET to register for meets that have divisions by age, rather than grade, it's very important to make sure the athlete's date of birth is entered. AthleticNET will use the athlete's date of birth to ensure that the athlete is entered into the correct meet division.
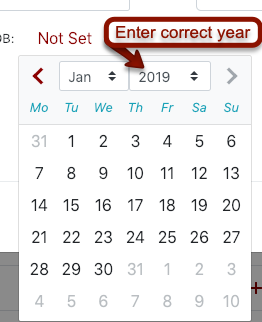
To enter an athlete's date of birth, click on Not Set next to Birthdate in the Edit Info window.
From the calendar that appears, select the correct birth year, then the month and day.
Once you've selected the correct date, the date of birth entered will appear in the Edit Info window. If you made an error, click on the date to re-open the calendar and correct it.
Customizable Fields
AthleticNET has the capability to store custom, user-defined information about each athlete on your roster. In the Edit Info window, the General tab contains a number of fields that can be customized by clicking Edit Custom Fields at the bottom of the window. This will allow you to set information that you'd like to record about each athlete via checkboxes, text fields, and other information. You can display the status of these custom fields using the Customizable Column Header in the main roster screen.
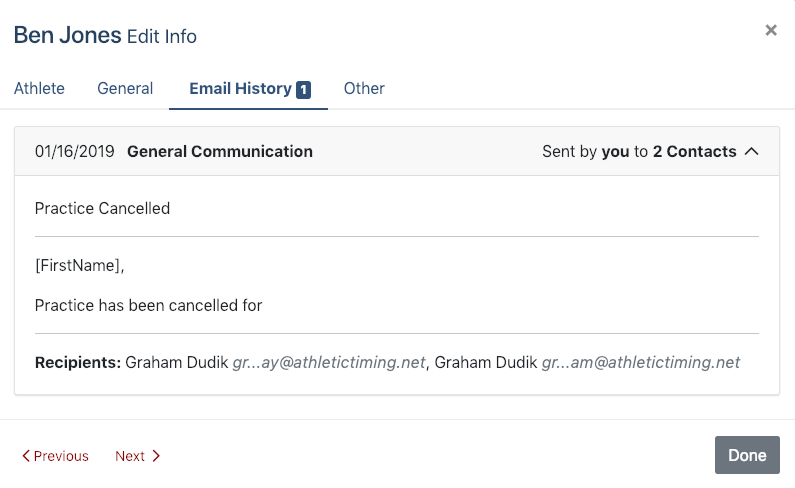
Email History
The Email History tab shows a history of all emails sent to this particular athlete using the AthleticNET communication system. You can see the contents of the email, the subject line, and the recipients.