Track Workouts Using AthleticLOG
AthleticNET offers athletes a full suite of training tools with AthleticLOG. Athletes can track and plan workouts, participate in challenges, view and compare workout statistics, receive assigned workouts from coaches, and share workouts with others.
Getting Started
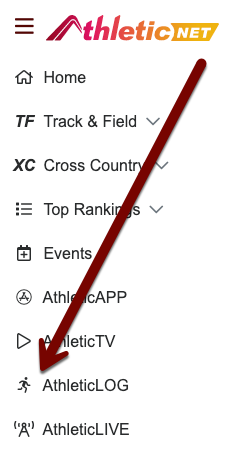
To access your training log, choose the main menu from the top left corner of the screen (), then select AthleticLOG.

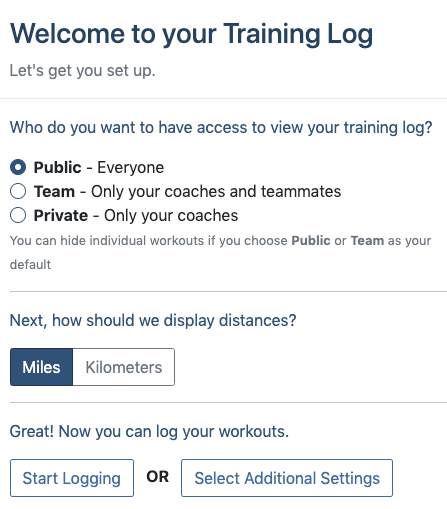
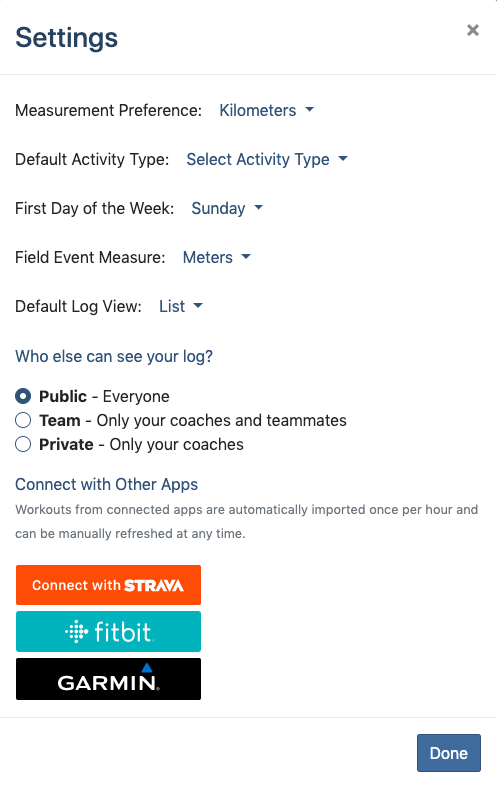
The first time you access your training log, you'll be asked to answer a few brief questions about how you'd like your Training Log to work. First, you'll be asked who should be able to view your training log. You have the following choices:
- Public: Anybody viewing your bio page will be able to see your Training Log
- Team: Only your coaches and teammates will be able to see your Training Log
- Private: Only your team coaches will be able to see your Training Log
You'll also need to select whether you want distances displayed in miles or kilometers. Once you're done, click Start Logging to begin using the Training Log.
Logging a Workout
To enter a completed workout, click Log a workout.

You'll be prompted to enter details for the workout:
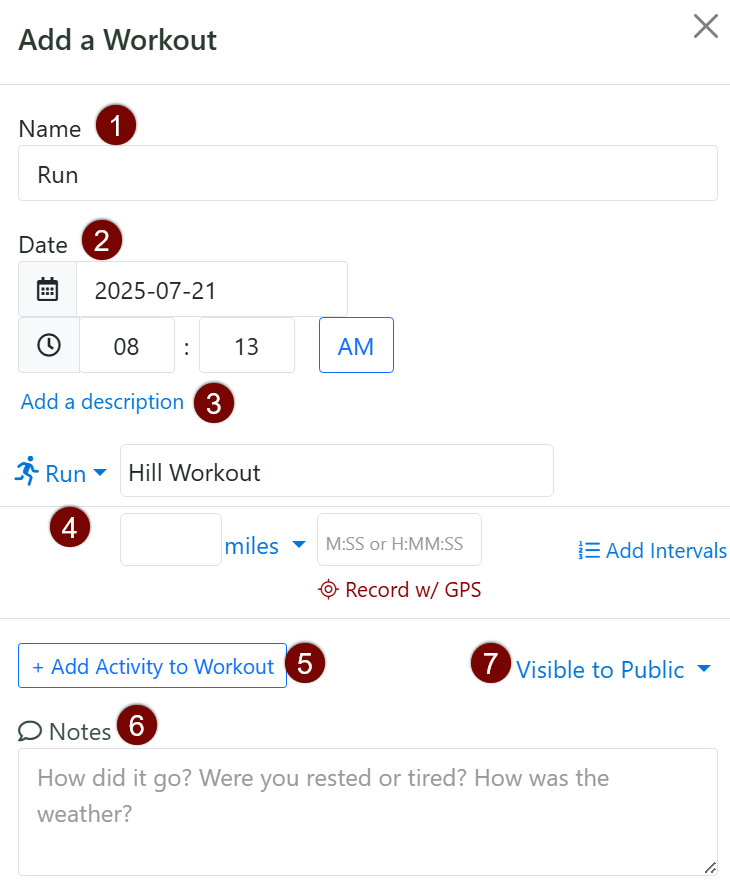
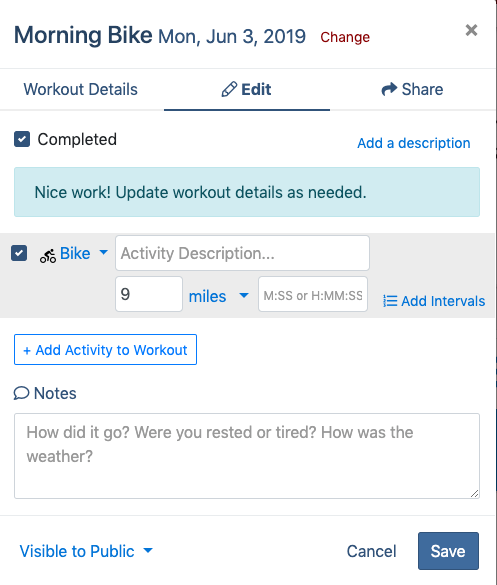
- Name: Give your workout a name (required field)
- Date & Time: Select the date and time that your workout took place (required field)
- Description: Describe what the workout looks like (optional)
- Activity: Select and describe what you did in your workout. You can choose from a number of different activities using the dropdown arrow next to the activity type, including running, swimming, biking, weights, or you can describe your own. Enter the distance and time (if applicable). If you're doing interval training, you can use the Add Intervals button to add intervals of different distances to the workout. You can also Record w/ GPS if you recorded your workout on AthleticAPP.
- Add an Activity: You can use this button to add a second activity to the same workout.
- Notes: The notes field allows you to enter observations about how the workout went.
- Visibility: If you made your Training Log viewable to the public or to teammates, you can use this menu to change who can see this particular workout.
You can either Save Changes or click Mark Workout Complete .
You'll see your workout on the log!

Planning a Workout
You can also add future planned workouts to your calendar in much the same way that you enter a past workout. Click the Plan a workout button and enter the details of your planned workout, as described above. Entering dates in the future will order the log chronologically, or you can also use the Calendar View.
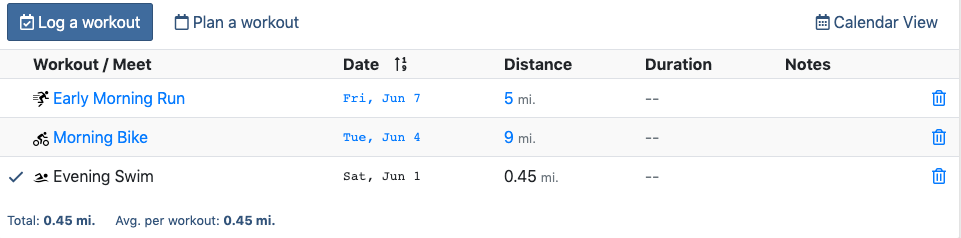
Once the date of the workout arrives, the workout will be shown with a question mark next to it.
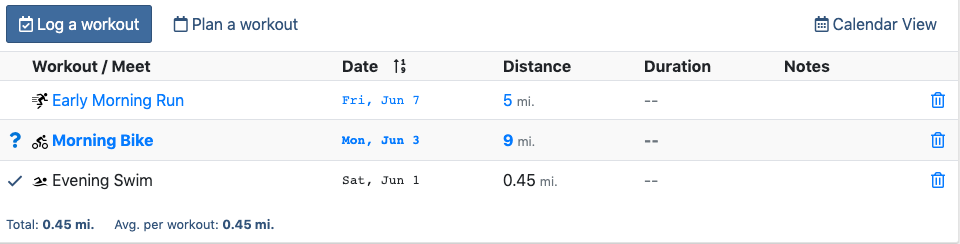
Click on the to mark it as completed and enter any notes or changes.
Sync Your Workouts with a Fitness Device
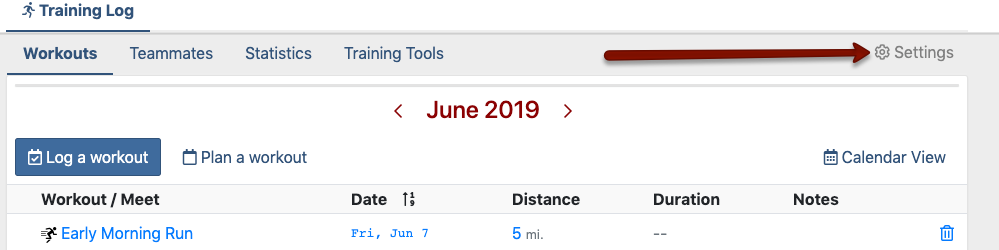
The Training Log interfaces with a number of popular fitness devices from Garmin, Strava, and Fitbit and will automatically retrieve workout data from these devices. To connect your device to the Training Log, click Settings above the workout list.
From the Settings screen, click on the manufacturer of your fitness device. You'll be taken to the manufacturer's website, where you'll be asked to log in and confirm that you want to share your workout data with AthleticNET.
Using AthleticLog with a Managed Athlete
If you're the parent of an athlete under 13 years old, you can add them as managed athlete and make use of AthleticLog to track their workouts. You can even use AthleticLog to view assigned workouts from team coaches and share your managed athlete's workouts with the team's coaches. Before you can access your managed athlete's training log, you'll need to add the athlete to your account. See Adding a Managed Athlete to Your Account for this procedure.
Once you've added the managed athlete to your account, access AthleticLog by choosing the main menu from the top left corner of the screen (), then select AthleticLOG.
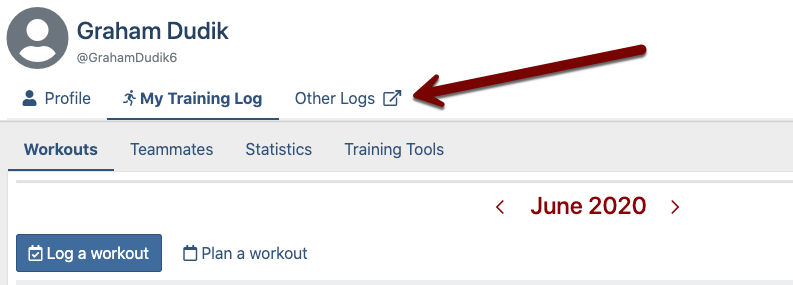
If this is the first time you've accessed your own training log, you'll have to go through the setup sequence as described above. Once you've made your selections, choose Other Logs .
On the subsequent screen, you'll be shown all your managed athletes' training logs. Additionally, if you're a coach, you'll be shown the team training logs for all teams you're a coach for. Select the managed athlete whose training log you'd like to access.
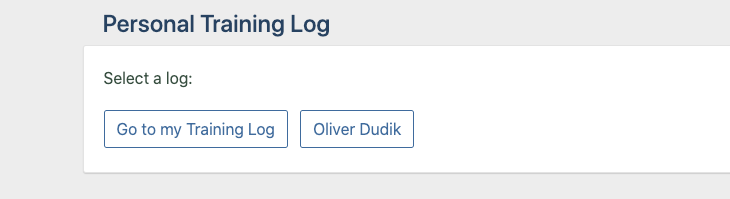
Once you select an athlete, you'll be taken to their log. All the regular features of the AthleticLog are available for managed athletes, as described elsewhere in this article.