Creating a Cross Country Meet #4: Race Divisions
Division Setup
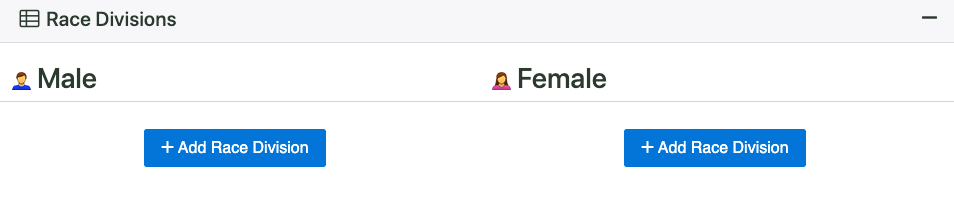
The next step in creating your meet is to tell AthleticNET what races will be run at your meet. For each race that will be run, click Add Race Division under the appropriate gender.
Once add your first race division, you'll be prompted to enter parameters about that race.
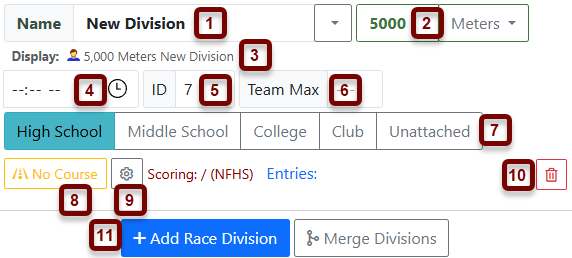
- Name: The division name can be changed with the drop-down arrow. This will display a list of common division names (i.e., Varsity, JV, Frosh/Soph, etc). Alternatively, you can change the name by clicking in the window and typing a custom name.
- Distance: Enter the race distance in the box. Be sure to correctly select meters or miles.
- Display: This is how the race will be displayed on the Meet Info and Results pages.
- Race Time: Enter the time the race will begin.
- ID: The ID number automatically increments every time a Race Division is added. Each division must have a unique ID number. If you configure your meet management software with the same division ID numbers as you use here, your results upload process will be smoother.
- Team Max: Enter the maximum number of participants a team may enter in this race. (For example, if teams may enter no more than 7 athletes in the Varsity race, and all others must run in JV, you would enter
7in this field for the Varsity race.) If there is no maximum, leave the field blank. - Levels Competing: Click on each level to allow athletes in that level to be entered in this race. Each selected level will be highlighted.
- Course: Select the course that the race will be run on. For more information, see Courses below.
- Advanced Settings: Allows you to edit team scoring settings, add a race max, filter a division by grade, by age, or allow lettered teams. For more information, see Advanced Settings below.
- Delete: To delete this race division, click the .
- Add Race Division: Click to add another race division under the current gender.
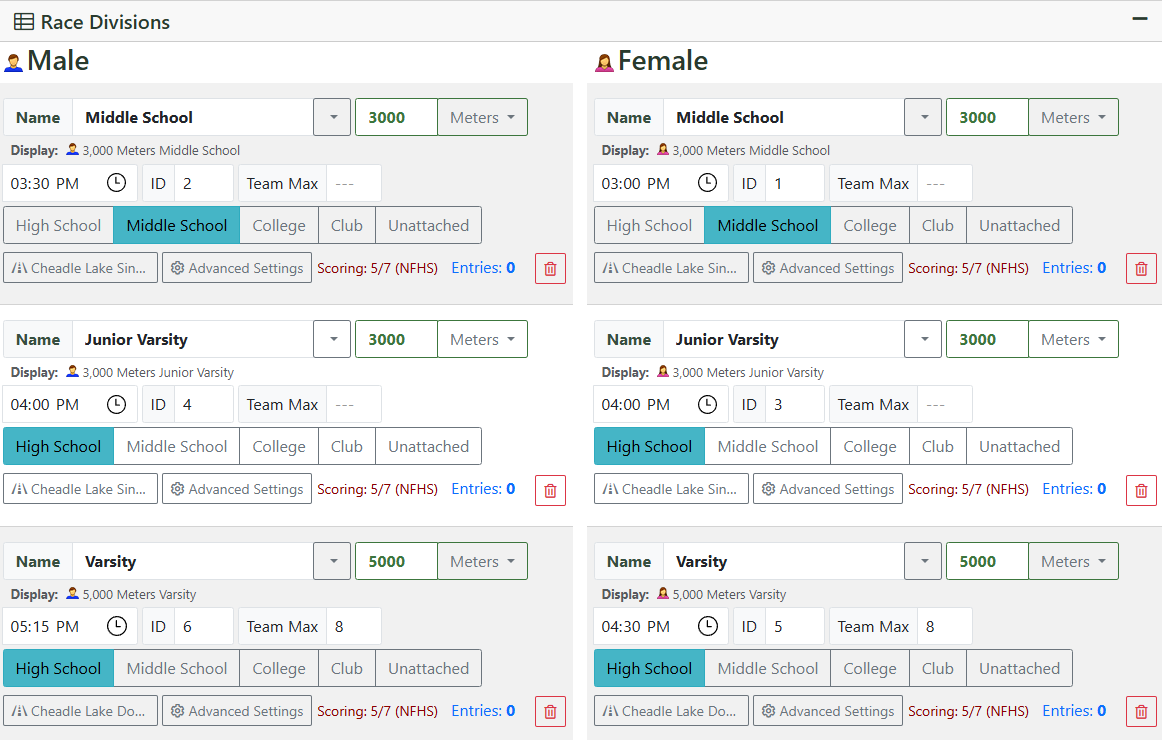
Shown below is a fully configured meet with boys and girls Varsity 5k races, combined (but scored separately) JV 3k and boys and girls middle school 3k races.
Merge Divisions
If you've decided that divisions that were separate now need to be combined, you can use the Merge Divisions button to combine them. Merging divisions will combine all entries in the merged divisions, as well as properly reconfiguring your events to reflect the new division structure.

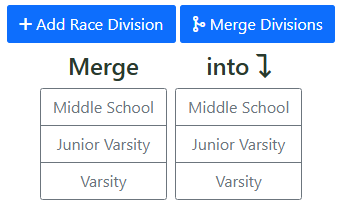
Clicking on Merge Divisions will display the merge options. Click on a division in the left-hand column to select a source division, and then click on a division in the right-hand column to select a destination division. For example, clicking on Junior Varsity in the left-hand column and then clicking on Varsity in the right-hand column will absorb the Junior Varsity division into the Varsity division.
When you've finished configuring your race divisions, click Mark Complete at the bottom of the page.
Courses
AthleticNET has the ability to track a particular course's history over time, and integrate that into the results of your meet. If you'd like to take advantage of this feature, click on No Course under a race division. If the particular location your meet is at does not have any courses defined for the distance you've entered, you will see the following message:

Click Add New [Distance] Course. You'll be asked to name and describe the course.
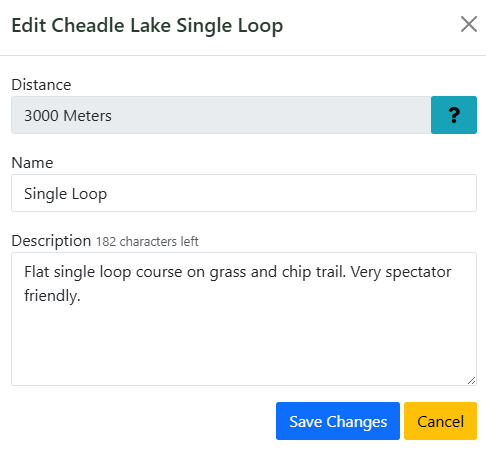
Once you've entered the required information, click Save Changes.
Advanced Settings
The Advanced Settings button will allow you to change scoring settings, set a maximum amount of entries, and restrict entries to a particular race by grade and/or age. In addition, you can allow teams to enter lettered teams (e.g., A-team, B-team, C-team) for scoring purposes. To change the settings, click Advanced Settings.
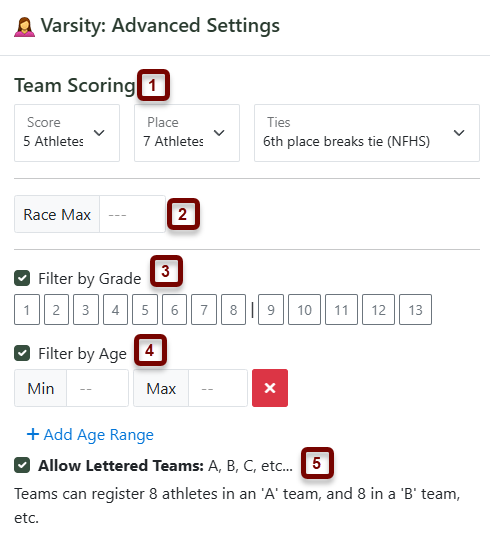
- Team Scoring: If necessary, you can adjust the scoring and placing of each event. There are also three options available for breaking ties in a race (NFHS, USATF, or NCAA).
- Race Max: Enter the maximum total number of participants that may enter in this race. If there is no limit, leave the field blank.
- Filter by Grade: To restrict entries for the current race to particular grades, check the Filter by Grade box. Click to select each grade from which athletes may be entered into this race. Highlighted grades are permissible entries. To remove a grade, click it again.
- Filter by Age: To restrict entries for the current race to a particular age group, check the Filter by Age box and enter the minimum and maximum ages that may compete in this race. If necessary, you may add multiple age ranges by clicking the Add Age Range button again.
- Allow Lettered Teams: To allow teams to enter multiple lettered teams, check the Allow Lettered Teams box. Teams may enter athletes into an A-team, B-team, and so forth. If you've defined a maximum number of athletes that a team may enter in this race, checking this box will allow teams to enter up to that many athletes in each lettered team. For example, if you defined your Team Max as 7, then a team may enter 7 athletes into an A-team, 7 athletes into a B-team, etc.
When you've finished configuring your Advanced Settings, click Close. The Advanced Settings button will now be highlighted to indicate you have made changes.
Once you've completed setting up your Race Divisions, the next step is Creating a Cross Country Meet #5: Additional Options.