The Race Director
If you time cross-country races using The Race Director, there are two methods for uploading results and scores. You can either produce an HTML file or a CSV file to be read by AthleticNET's uploader.
Export HTML File
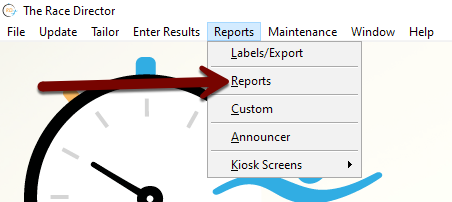
From the Reports menu, choose Reports.
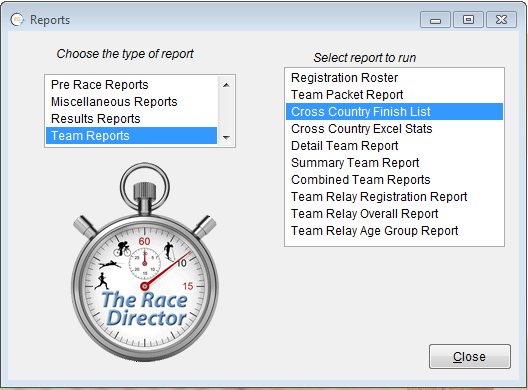
Under Type of Report, choose Team Reports, and then select Cross Country Finish List from Select Report to Run.
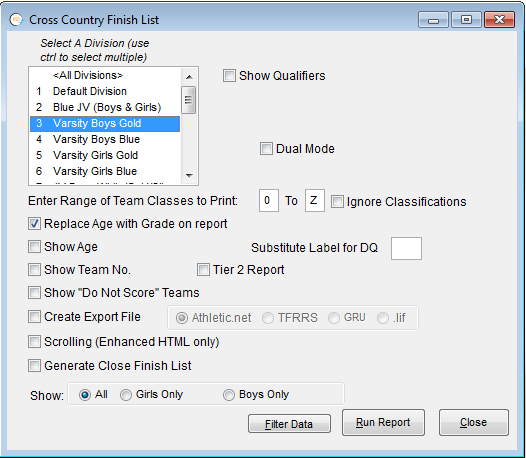
Select the divisions you'd like to export from the list. To select more than one division, hold down CTRL while clicking on each item in the list. Note that Create Export File is unchecked. Next, click Run Report.
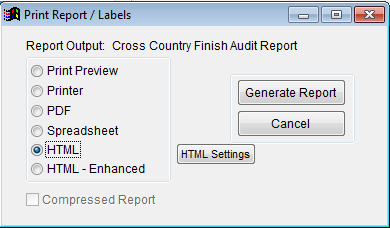
On the next screen, select HTML, and then click Generate Report. Don't choose HTML - Enhanced.
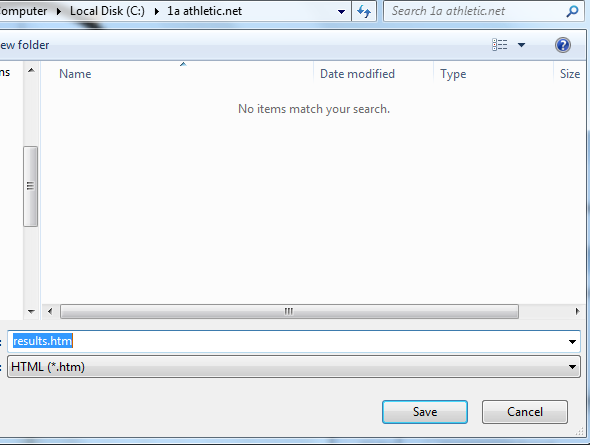
Save the HTML report to an appropriate location.
After you've saved the file you've created, you'll be prompted to view or publish the file you just created. Choose Yes.
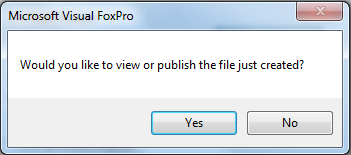
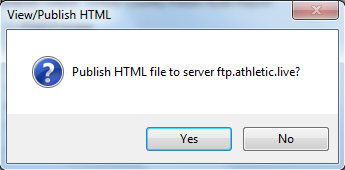
If you are asked if you'd like to publish the file to any kind of remote server, choose No unless you are using such a server to display the results.
The next prompt will ask you if you'd like to view the HTML file. Choose Yes
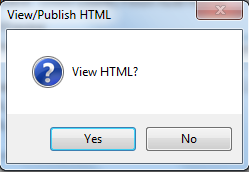
Your computer will open a web browser which will display the results HTML file. Use the Select All (CTRL+A) and then copy the highlighted text into the Paste Results section of the results uploader.
Be sure to use the Preview Matches button in the uploader to ensure that all lines in the file were parsed. Sometimes a long name will not have enough spaces after it and will cause the parser to ignore the line, like in the example below. The gray line indicates an un-parsed result.

If this occurs, simply insert two spaces after the name that causes the problem, and re-paste the results into the uploader. You should end up with something like the following example:

Export CSV File
In order to upload results quickly and easily, you'll want to make sure that the “AthleticNET ID” in The Race Director matches the division ID numbers you've configured on the Athletic.net uploader for each race division.
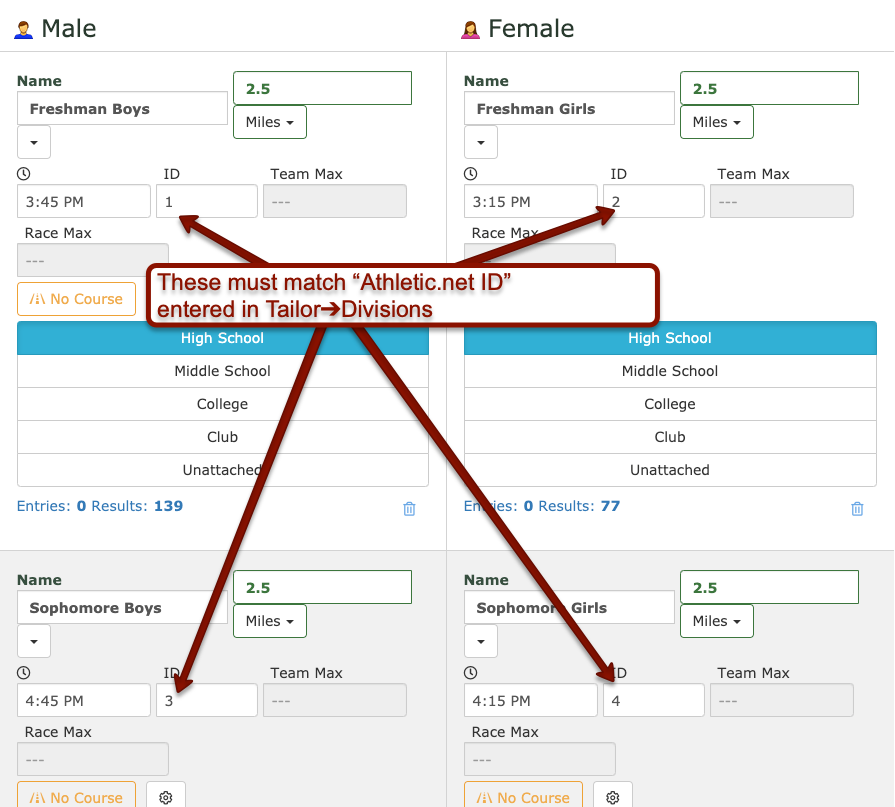
In The Race Director, click on the Tailor menu, then Divisions. For each division configured in The Race Director, enter its corresponding AthleticNET division ID in the AthleticNET ID box.
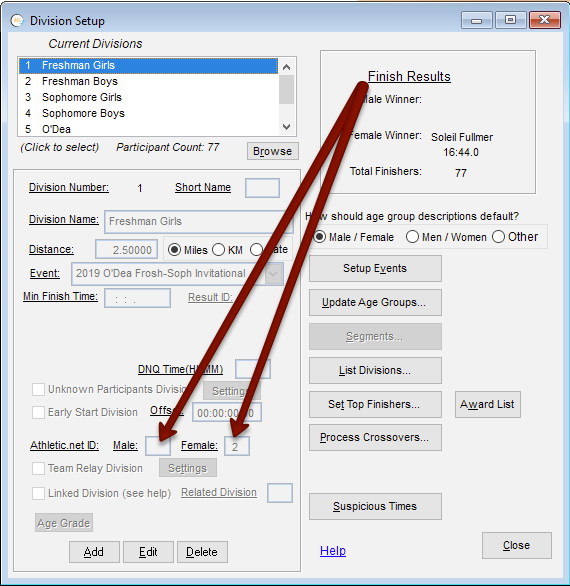
Select the division you're going to enter an ID for, then click Edit and enter the AthleticNET ID number in the indicated boxes. When you're done, click Save at the bottom of the screen. Perform this action for each division you're going to export to AthleticNET. When you're done, click Close at the bottom of the dialog box.
Export the Results File
From the Reports menu, choose Reports.
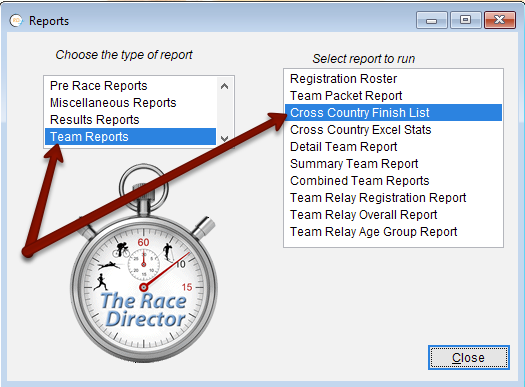
Click on Team Reports and then double-click on Cross Country Finish List.
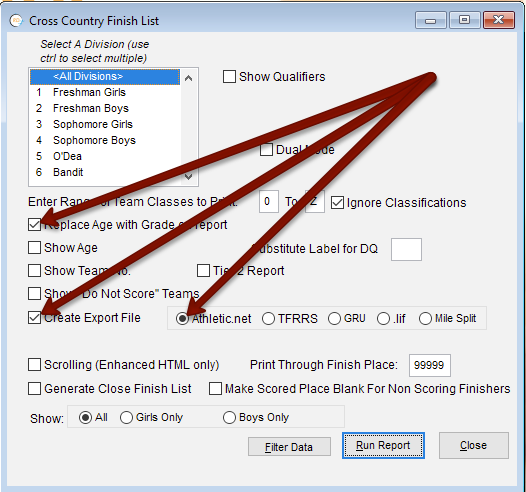
Select the division you want to export (selecting <All Divisions> will export your entire set of results for the meet), and then ensure Create Export File is checked and the AthleticNET radio button is selected. Additionally, ensure Replace Age with Grade on Report is checked. Finally, click on Run Report.
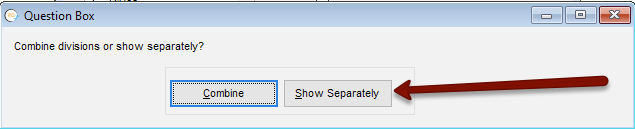
If you selected <All Divisions> above, you'll be asked if you want to combine divisions. Click Show Separately to ensure that your AthleticNET ID's are properly preserved.
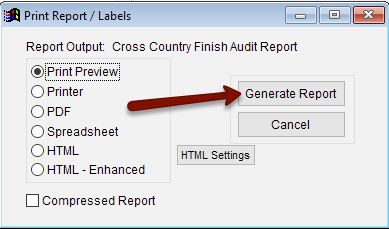
Leave the report output on Print Preview and click Generate Report. If you want to print the report, now is the time to do so. Otherwise, close the print preview window. After you close the print preview window, you'll be prompted to create the AthleticNET extract file. Click Yes, and select a location on your computer you can easily find and give the new file a name. Finally, click Save.
On the AthleticNET upload tab, browse to the location of the text file you just saved, and upload it to AthleticNET.