Many of these additional meet options are only available to Team Site Supporters.
Invite Teams
If you'd like to lock a meet, mark it Invitation Only using the options below.
You just created an event, and now you want to invite other teams to join! First, decide whether this is an invitational or open meet. On the Manage Meet page, choose Settings. Invitation only options are under the Additional Meet Options heading. See Creating a Track & Field Meet #5: Additional Options for more details on this section.
Invitation Only: Checking this restricts the teams that can register for this event. Only those teams invited may add the meet to their calendar or register. If this option is not checked, any team may add this event to their calendar and register.
Allow Requests: Teams can ask to be invited if this option is checked. You will be able to approve or deny invitation requests.
If you have setup your meet to allow Unattached Athletes, you can use both these options to restrict who can join your meet. Click here to see how to Allow Unattached Athlete Registration.
Select Teams to Invite
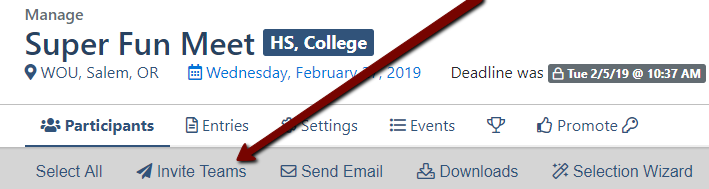
From the Manage Meet page, under Participants, click Invite Teams.
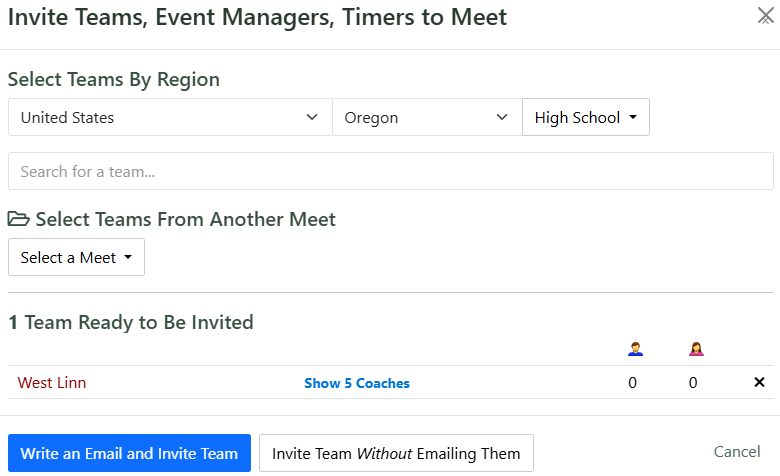
A window will pop up that will allow you to Select Teams By Region. After selecting the Region, you can type the team's name you wish to invite into the Search for a team box. Alternatively, select teams from another meet you have hosted. This is a great option for annual events and league-only events with participants that repeat year after year.
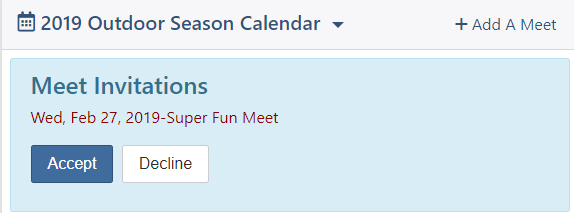
Once you have the list of teams to be invited, you have the choice to Write an Email and Invite Team or Invite Team Without Emailing Them. Whichever choice you make, the recipient's page will show meet invitations at the top of the calendar with options to either accept or decline.
Write an Email and Invite Team
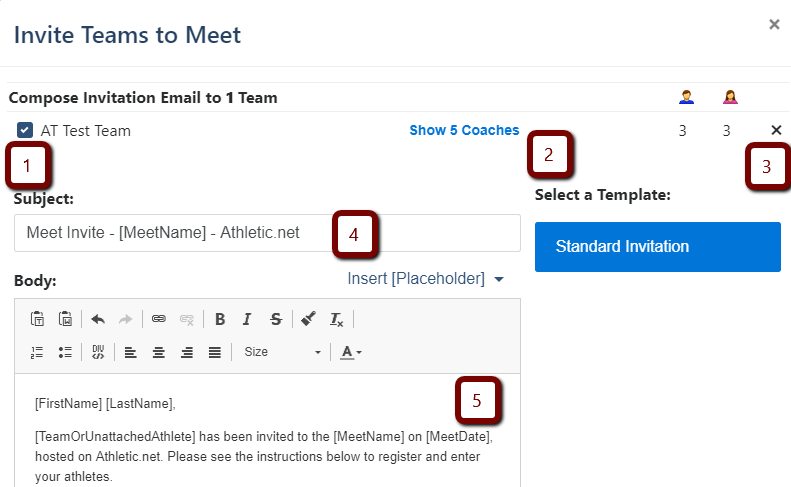
If you choose Write an Email and Invite Team, an email editor will pop up. The main features of this email editor are described below.
List of teams included on the email. The teams will automatically be selected which is indicated by a checked box . Unchecking this box will still invite the team to the meet, but the recipient will NOT receive an email. It may be a good idea to do this for a co-host or meet manager.
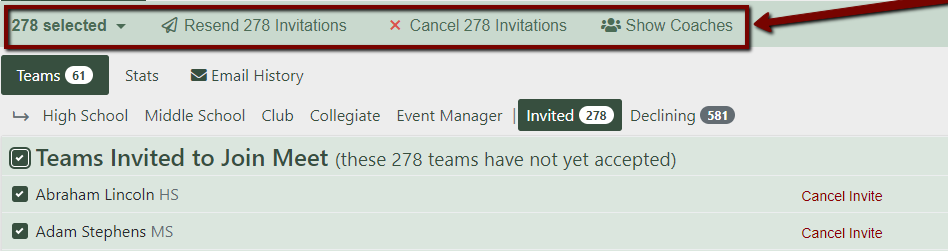
Clicking Show Coaches will show all the coaches listed for that team. You can de-select a coach by clicking the checkbox which will remove that coach for this particular email, or click Exclude from all emails to exclude the recipient from any further emails to the team regarding this particular event.To stop excluding a coach, click Undo, then click the checkbox to select. You can also exclude or stop excluding coaches by going to the Participants tab of the Manage Meet page, and clicking the Show Coaches button, which will appear when you hover your cursor over the team name.
Click to remove team from invited list.
Subject: Edit the text however you would like. [Placeholders] can be used to automatically fill in information about the event, such as [MeetName], [MeetDate], etc. Click on Insert [Placeholder] to see all the options.
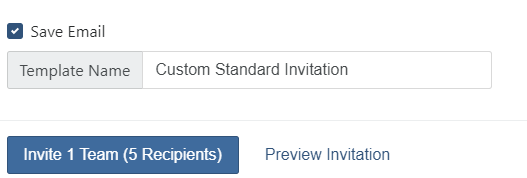
Body: Edit the text however you would like. Below the body of the email will be your email signature, and options to Save Email, Invite # Teams (# Recipients), or Preview Invitation. The Preview Invitation button will allow you to see an example of what the recipient will see.
Email Templates
If you change the invitation email, you may want to consider saving it as a template for future use. You can customize the template names, or AthleticNET will suggest a name for you. Using [Placeholders] when creating templates will help prevent confusing mistakes, like forgetting to change the event date to the current year, or a wrong event name.
Viewing Participants
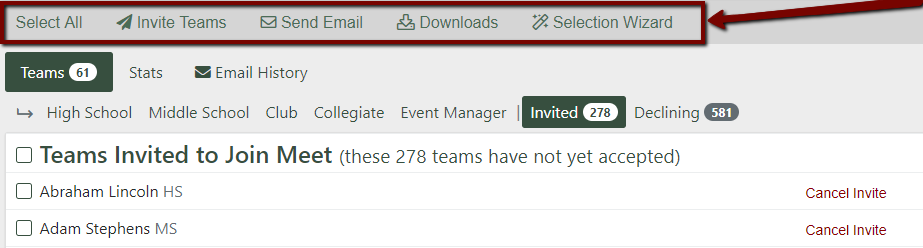
Small events will have all the participants condensed onto one Teams tab.
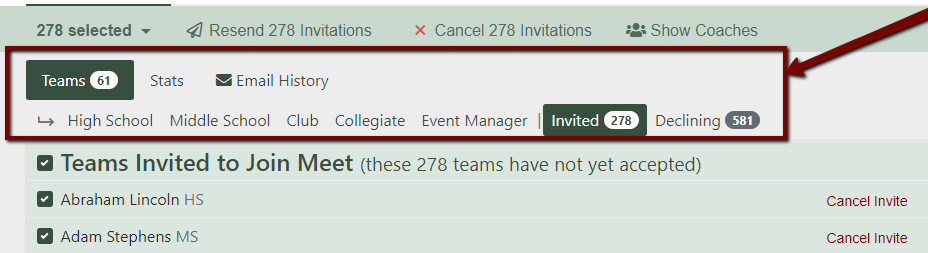
As events grow larger, the participants maybe broken up into sub-categories under the Teams tab.
Resend Invite/Cancel Invite
Have some teams not accepted your invitation yet? You can resend the email invitations or cancel all the invitations. By clicking the checkbox next to each team name, or checking the checkbox next to Teams Invited to Join Meet to select all the pending invitations, the banner above the teams list will change to show options to Resend Invitations or Cancel Invitations. You may also cancel the invite by clicking Cancel Invite next to the team name.
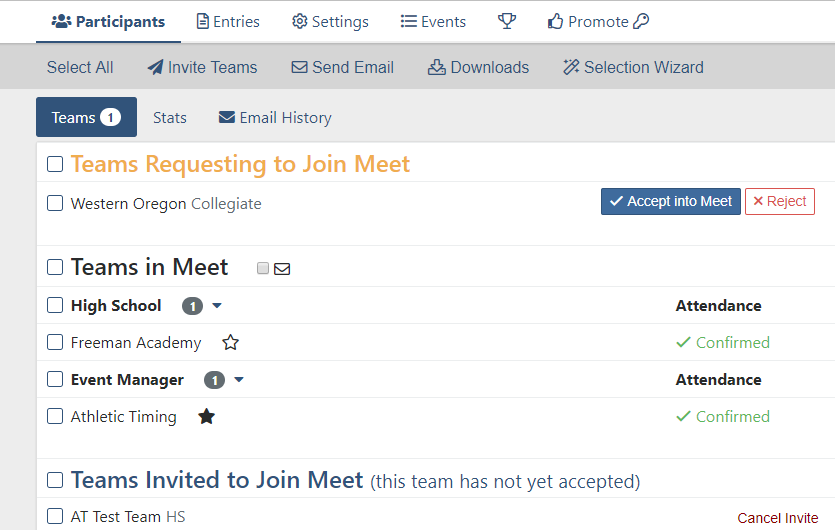
Team Invitation Requests
If you designate your event as Invitation Only and choose Allow Requests in Additional Meet Options, requests will show up on the Participants tab of the Manage Meet page. You can choose to either accept or reject the request.
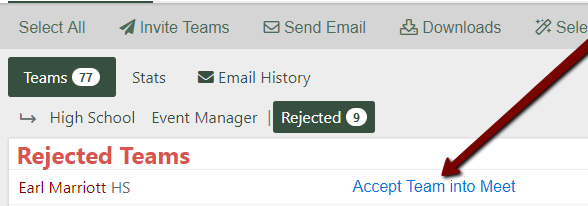
If you Reject a team in error or change your mind, it's very simple to undo the rejection. Locate the list of Rejected Teams under the participants tab and click Accept Team into Meet next to the team name.
Inviting a Timer or Event Manager
Adding a timer or event manager to your meet is very much like inviting any other team to your meet. You must send them an invitation and they must accept it to be added to the meet. For more information, see Add a Timer or Event Manager to Your Meet.