Individual Event Registration: Enter Myself or my Kids
If you are wanting to enter an event as an individual athlete (i.e. your club or team is not entering you) then you are entering as an unattached athlete.
Alternatively, some clubs / teams allow athletes to register themselves instead of requiring an administrator or coach to do it. In this circumstance you might be able to enter under your Club or Team name as an individual.
Before you register yourself for a meet, we suggest you search and see if you already exist in our system. This is called claiming your athlete bio, see Claim Your Athlete Bio for more information on how to do this. You may have done this when you created your AthleticNET account. This will associate your account (we call them Profiles) with your performance history page (we call them Bios). This simply involves finding a meet with your results in it and associating those results with your AthleticNET login.
Once you've claimed your bio, click the Home Button to return to your Dashboard.

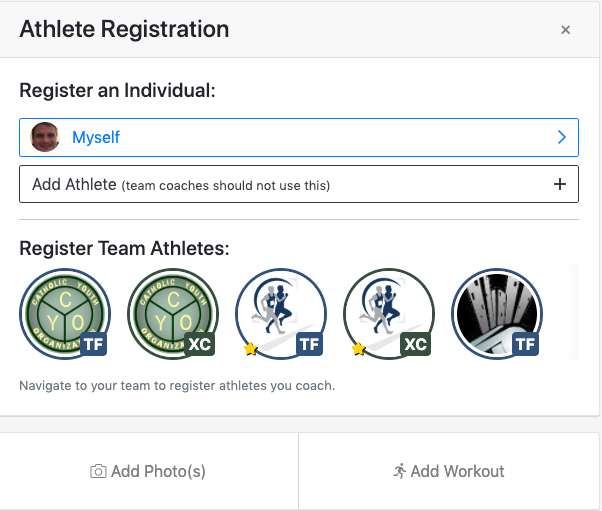
From your dashboard, choose Athlete Registration.

From there you'll either choose Myself or Add Athlete. In most cases, you'll want to choose Myself.
Children under 13 years of age need to be managed by their parents. We call this Managed Athlete. If you're managing another athlete (your children) from your account, choose Add Athlete then follow the instructions for Adding a Managed Athlete to Your Account on how to do this.
ADD A MEET TO YOUR CALENDAR
Meet Already Listed
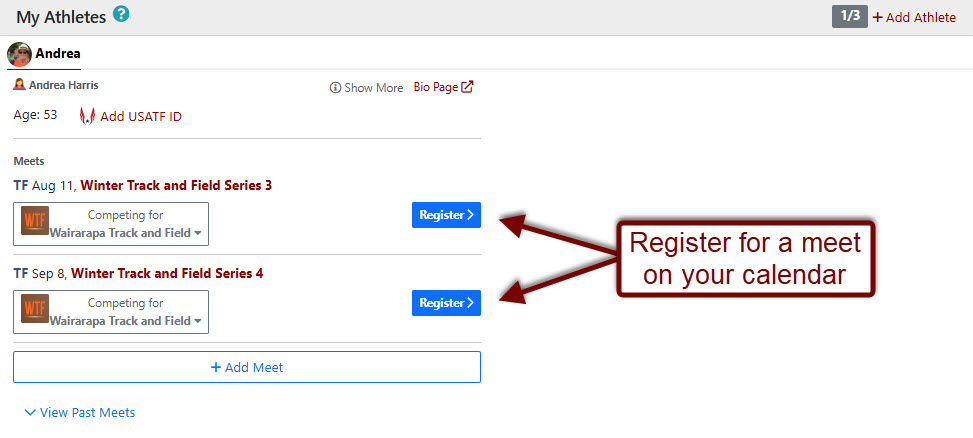
If your club / team has accepted an invite to compete at an event and allowed individuals to enter themselves, then these will show in the following screen. If you click the Register button, you will be directed to the entry system for that event.
Meet Not Listed
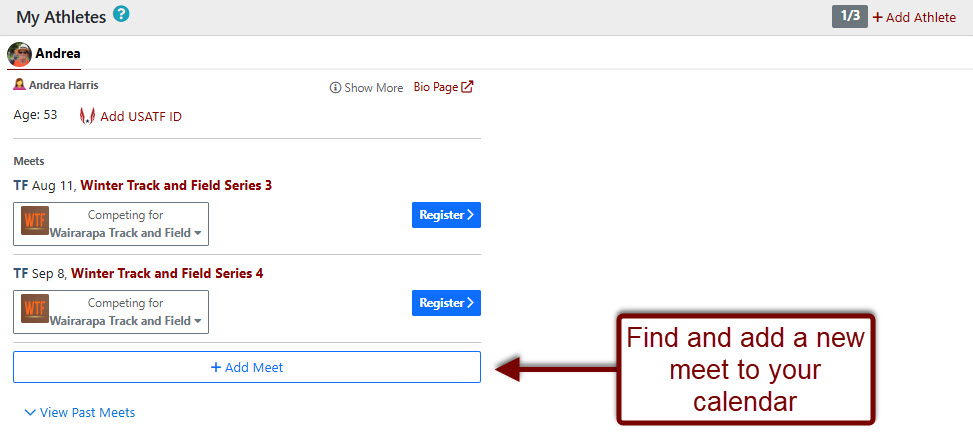
If you don't see the meet you're looking for (this is likely if you're going to compete as unattached), click Add Meet.
Clicking Add Meet will open a calendar screen. Select the month you're looking for, and then click on the day. All meets accepting unattached registrations will be displayed for the given day.
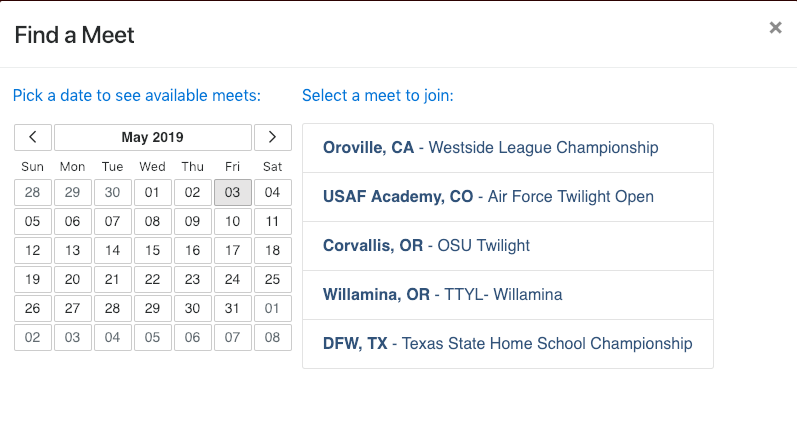
Click on the name of the meet to add it to your calendar. If you were successful, you will see the pop box saying Meet successfully added. Click the Done button. You will now see the meet added to your calendar.
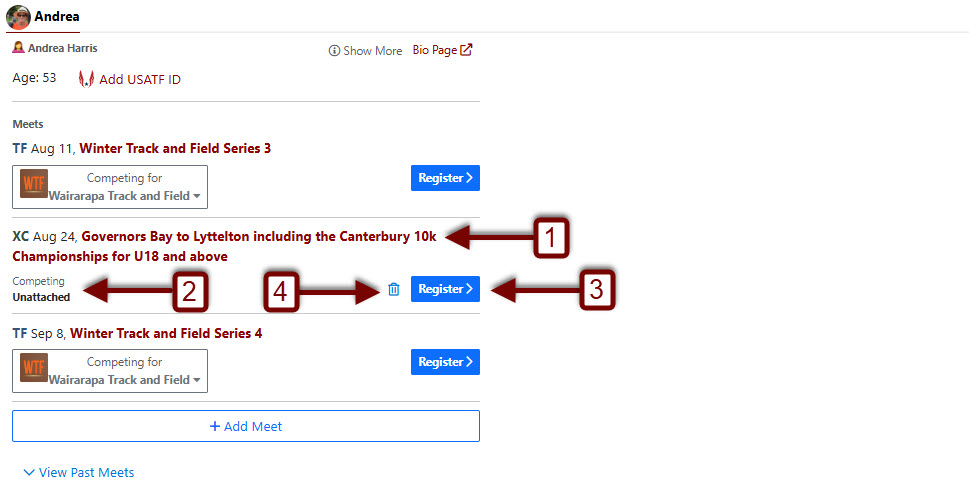
- The new event has been added.
- You are listed as competing as unattached.
- To enter click the Register button.
- If you selected the wrong meet or no longer wish to compete, you can remove a meet from your calendar, click the Trash Can.
Sent a Meet Link
If you were sent a link from a meet host you can add the meet to your calendar and complete registration without searching. On the meet link, select "add meet to [athlete's] calendar. You will be taken to the registration page after that.
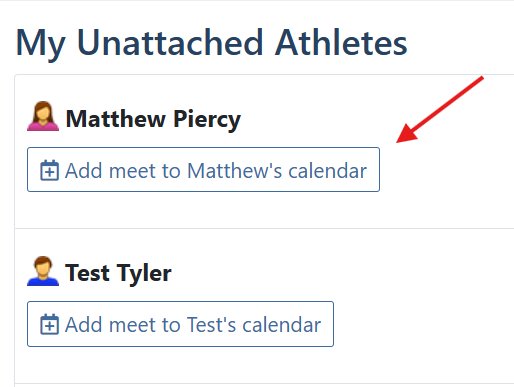
Some meets may have request entry to a meet on. When you click add a meet to your calendar, that will request entry into the meet. Once accepted, you can complete registration from the same meet link.
REGISTER FOR A MEET
Selecting Attached/Unattached
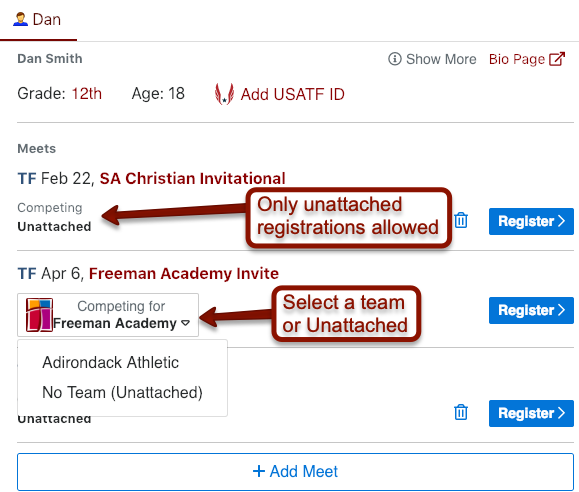
While some meets may only accept unattached registrations, for events your club / team has accepted the invite to enter, you can choose to compete as attached (i.e. under your club / team name) or unattached when registering for a meet. If you compete with multiple clubs / teams, you may need to select the club / team you will be competing for. To select your attached/unattached status, click on Competing for under the meet you're registering for. A drop down will appear and you can choose what option you prefer to enter under.
Once you've selected your attached/unattached status, click Register .
Selecting Events - Track Meet
Once you click Register, you'll be taken to the event selection window.
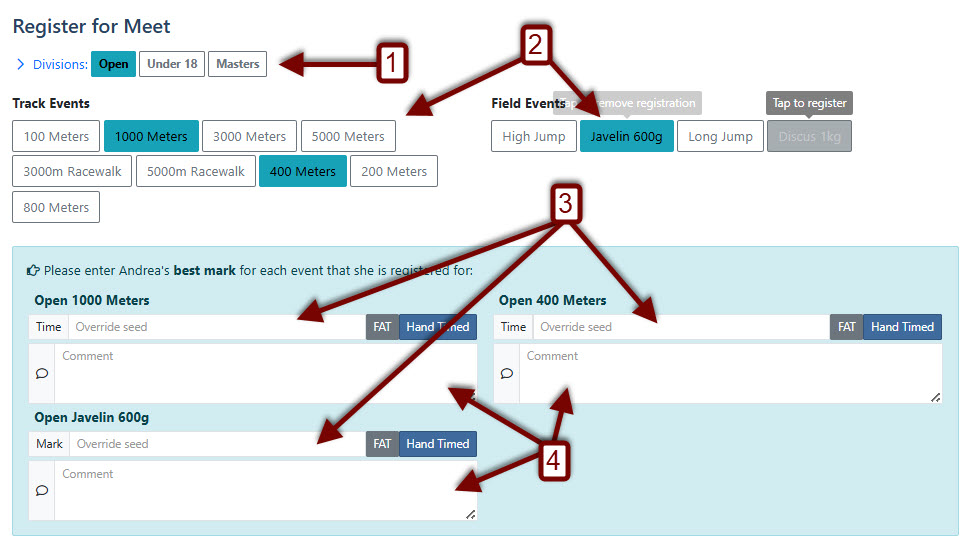
- The first thing you'll do is choose the Division you are competing in (You can choose multiple divisions, but please ensure you choose the correct divsion for the event you are entering). Click on the appropriate division.
- Choose your events.
- Add Seed Times or Seed Marks and chooose if they are FAT (Fully Automatic Timing) or Hand Timed (This is optional). Make sure you enter an accurate seed, since failing to do so could affect your seeding position in the meet.
- Add any comments.
Selecting Events - Cross Country Meet
Once you click Register , you'll be taken to the event selection window.

- You may be asked for some information before you proceed such as a seed time.
- Choose your events.
- There may be some additional purchase items you can buy.
ENTRY FEES
Depending on the configuration of the meet by the meet host and/or your team manager, you may be responsible for your own entry fees. Athletes competing unattached usually are responsible for their own entry fees. If you owe entry fees to the meet host, you will see a message indicating there is a Balance Due for your registration.
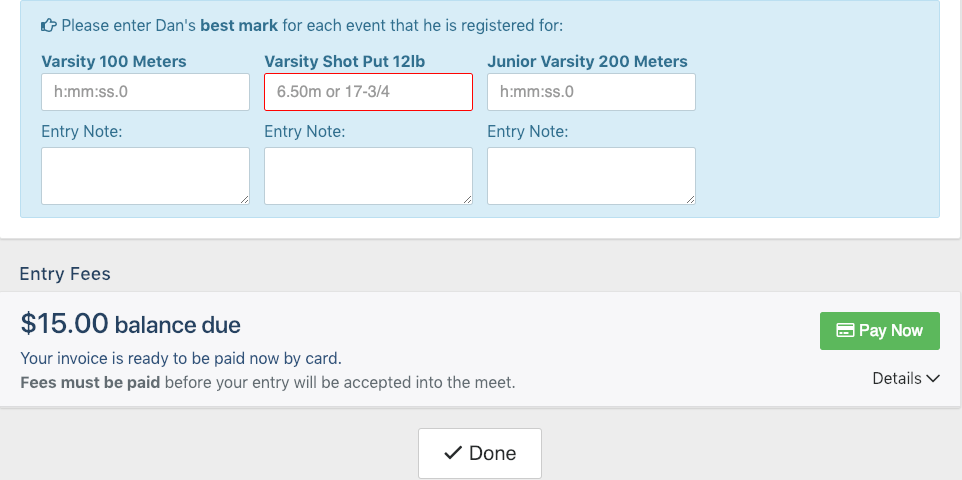
Click Details to see the breakdown of the fees you're being charged.
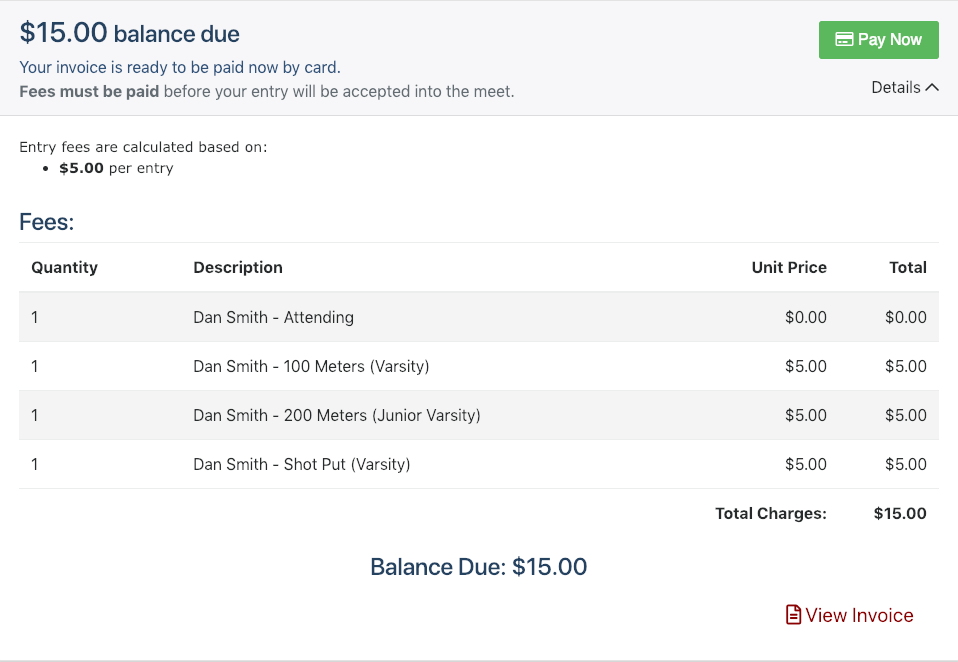
Click Pay Now to pay by credit card, or click View Invoice to view the formal invoice. Once you've paid your entry fees, click Done to return to your dashboard.