Submitting Team Entries for a Track & Field Meet
OVERVIEW
One of the biggest time-savers AthleticNET provides for administrators and coaches is the ability to quickly and easily submit meet entries to meet hosts. AthleticNET allows you to enter participants into meets with just a few clicks and uses a participant's past performances that are listed on AthleticNET as seed marks. In this article, we'll show you how to submit entries for an upcoming meet.
If the meet host has set a deadline for meet entries, it will be listed at the top of the main entries page,

as well as on your team's calendar.
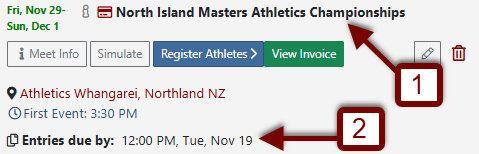
- Click on the Meet Heading to drop down further information.
- You will see the entry deadline listed at the bottom of the event information,
Meet entries may be freely changed until this deadline. After this deadline, registrations will lock. You'll need to contact the meet host to make any changes after the registration deadline.
ACCESSING THE MEET REGISTRATION PAGE
From your Club / School / Team's homepage, scroll down to the calendar and click on the meet name you're registering for. As noted above, this will expand the calendar entry to show details about the event, including the location, time of the first event, entry deadline, Meet Info and Register Athletes. From here, click on Register Athletes .
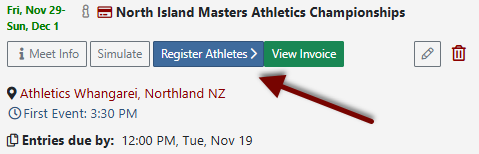
If you dont see the Register Athletes button, then the entries for this event have not opened yet, or they may have closed already.
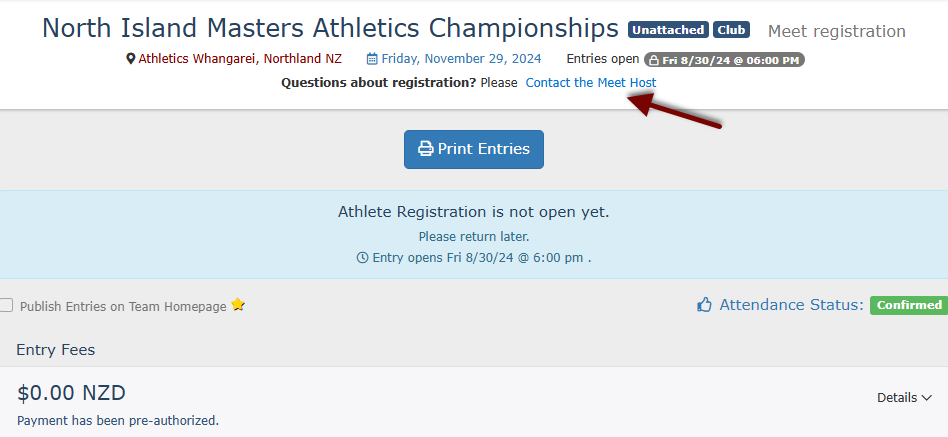
it means that it's too early to register your participants. If the meet host has set the date that the registration opens, it will be listed in the message. If no date and time are listed, (and as long as the meet host has added their contact details) use the Contact the Meet Host link at the top of the page to email the meet host with your questions.
ENTERING YOUR TEAM ATHLETES
There are two different methods by which participants can be entered in their specific events. The first is By Event and the second is By Athlete. In a nutshell, Registering by Event involves selecting an event (e.g., the 200 meters) and then choosing which participants will compete in it. In contrast, Registering by Athlete, involves selecting an athlete and choosing which events he or she will participate in.
By Event
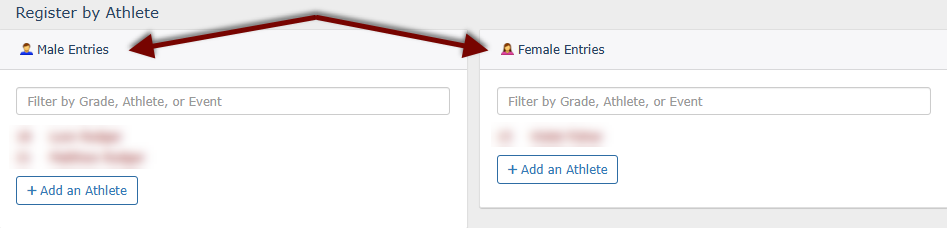
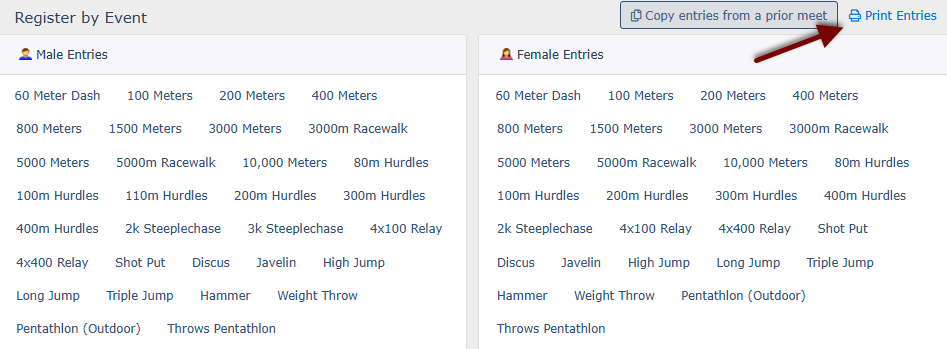
When you choose to register by event, you'll be presented with a list of each event that will occur in the meet you are registering for, grouped by Male Entries and Female Entries.
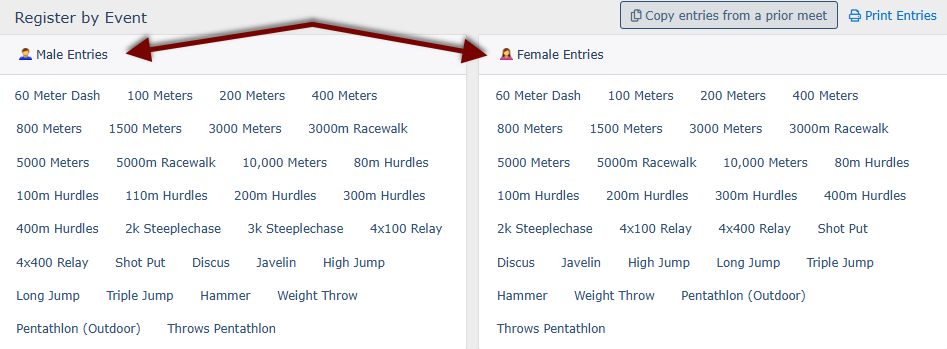
Select an event, and you'll be presented with a list of the participants that can be entered in that event.
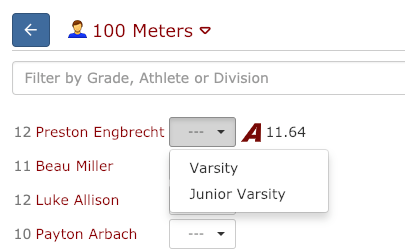
Simply click on the drop-down box next to each athlete's name, and select the appropriate division into which they will be entering. Athletes with existing seeds will be listed first. Once a division is selected, you'll be able to enter an override seed (if the meet host allows) and enter comments regarding the entry that are visible to both you and the meet host.
Register by Event Sample
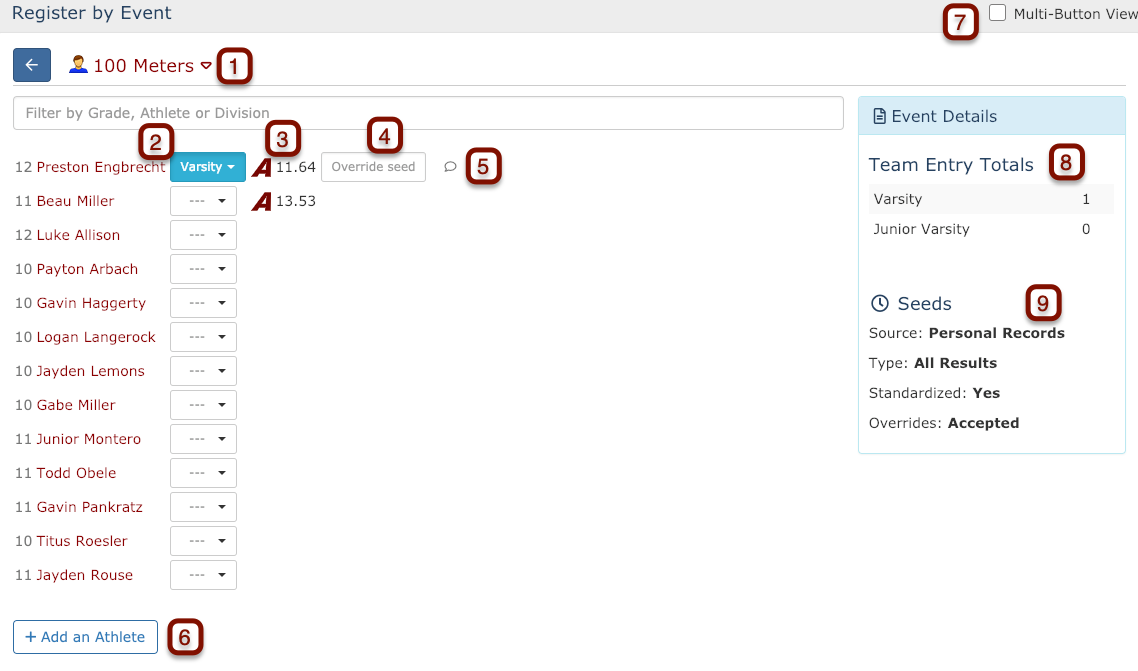
Above is an example of a main Register by Event screen, with the features numbered. They are as follows:
- Event Selection: This displays the event you are currently editing entries for. Click the drop-down arrow to jump to any other event in the meet without needing to return to the preceding screen.
- This athlete has been entered into the Varsity division of this event. You can click on the drop-down arrow to change divisions (When it is highlighted blue, the athlete is entered), or remove the athlete's entry from the meet (When the athletes entry shows white with three dashes).
- This is the athlete's seed time or mark. The A indicates that this seed time is taken from AthleticNET records.
- If the meet host accepts them, you may enter an override seed here.
- Click the speech bubble to enter comments about the entry that will be viewable by both you and the meet host.
- Use the Add an Athlete button to quickly add an athlete to your membership / roster without leaving the entry page.
- Use the Multi-Button View to change the layout slightly so that divisions can be chosen for each athlete with a button, rather than choosing from a drop-down menu. This can reduce the number of clicks required to enter athletes on large teams.
- The Team Entry Totals will show how many athletes you've entered for each gender-division combination (i.e., the Women's Division or the Men's Division). It will also show how many entries are left, if the meet host has configured a maximum number of entries for a given event. In other words, if the meet host has decided that each club / school / team may enter no more than four competitors for the Men's 100 meter dash, this area will show you how close you are to the maximum number of entries. If you reach the maximum number of entries, you will be prevented from making further entries into the event without first removing another athlete. If you attempt to enter an athlete and your mouse shows the “prohibited” () symbol, you have reached your maximum number of entries for the event.
- Data listed in the Seeds section will display the parameters the meet host has set for entry seeds:
- Source indicates what determines an eligible seed. Meet hosts may choose to accept an athlete's personal best, season best, or best mark from a particular meet or set of meets.
- Type indicates whether the meet host is requiring seeds to be pulled from official results only, or whether other results are an acceptable source of seeds. For more information, see Meet Status.
- Standardized indicates the type of conversion the meet host has specified for seed times that are hand timed. Hosts may choose not to accept hand times at all and as such not apply any conversion factor to hand times such as the Track & Field News conversion standard, or the NFHS conversion standard. For more information see Hand Time Conversion Standards.
- Overrides shows whether the meet host has allowed override seeds to be entered.
By Athlete
When you choose to register by Athlete, you'll be presented with a list of each athlete on your membership / roster, grouped by Male Entries and Female Entries.
Select a participant and you'll be presented with a list of events that he or she may be entered into. Any existing eligible seeds (as decided by the meet host's rules) will be displayed.
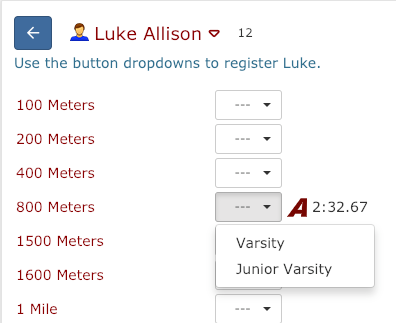
Simply click on the drop-down box next to each athlete's name, and select the appropriate division into which they will be entering. Once a division is selected, you'll be able to enter an override seed (if the meet host allows) and enter comments regarding the entry that are visible to both you and the meet host.
Register by Athlete Sample
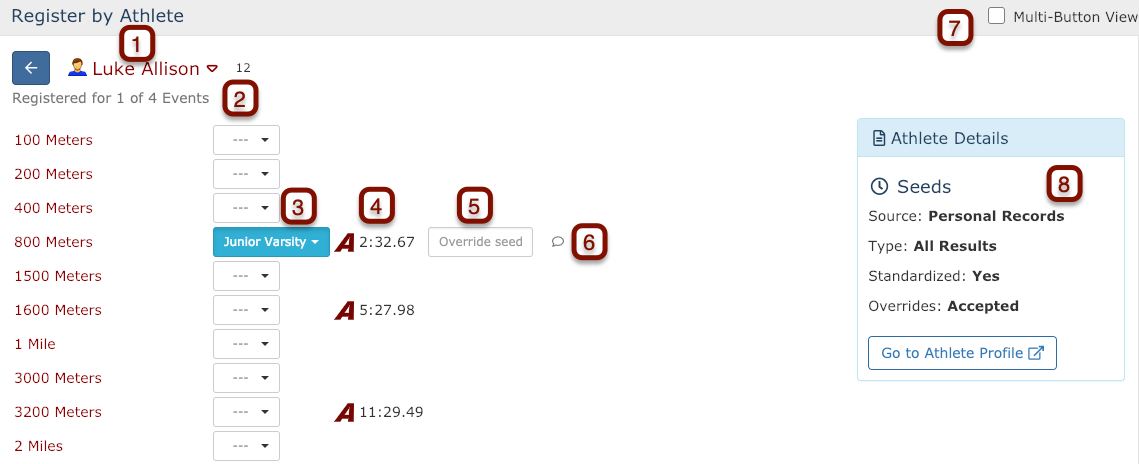
Above is an example of a main Register by Athlete screen, with the features numbered. They are as follows:
- Athlete Selection: This displays the athlete you are currently editing entries for. Click the drop-down arrow to jump to any other athlete in your roster without needing to return to the preceding screen. The small number to the right of the drop-down arrow indicates the athlete's grade.
- Event Counter: If the meet host has configured the meet so that there is a maximum number of events that an athlete may participate in, the number of remaining events will be noted here.
- This athlete has been entered into the Junior Varsity division of this event. You can click on the drop-down arrow to change divisions (When it is highlighted blue, the athlete is entered), or remove the athlete's entry from the meet (When the athletes entry shows white with three dashes).
- This is the athlete's seed time or mark for this event. The A indicates that this seed time is taken from AthleticNET records.
- If the meet host accepts them, you may enter an override seed here.
- Click the speech bubble to enter comments about the entry that will be viewable by both you and the meet host.
- Use the Multi-Button View to change the layout slightly so that divisions can be chosen for each event with a button, rather than choosing from a drop-down menu. This can reduce the number of clicks required to enter athletes on large teams.
- Data listed in the Seeds section will display the parameters the meet host has set for entry seeds:
- Source indicates what determines an eligible seed. Meet hosts may choose to accept an athlete's personal best, season best, or best mark from a particular meet or set of meets.
- Type indicates whether the meet host is requiring seeds to be pulled from official results only, or whether other results are an acceptable source of seeds. For more information, see Meet Status.
- Standardized indicates the type of conversion the meet host has specified for seed times that are hand timed. Hosts may choose not to accept hand times at all and as such not apply any conversion factor to hand times such as the Track & Field News conversion standard, or the NFHS conversion standard. For more information see Hand Time Conversion Standards.
- Overrides shows whether the meet host has allowed override seeds to be entered.
ENTERING RELAY TEAMS
Entering relay teams works similar to entering individuals By Athlete or By Event. If you're working By Event, simply click on the event name (e.g., 4x100 Relay) making sure you have the correct gender selected.

Click on + Enter Relay under the appropriate division to select athletes for the relay team.
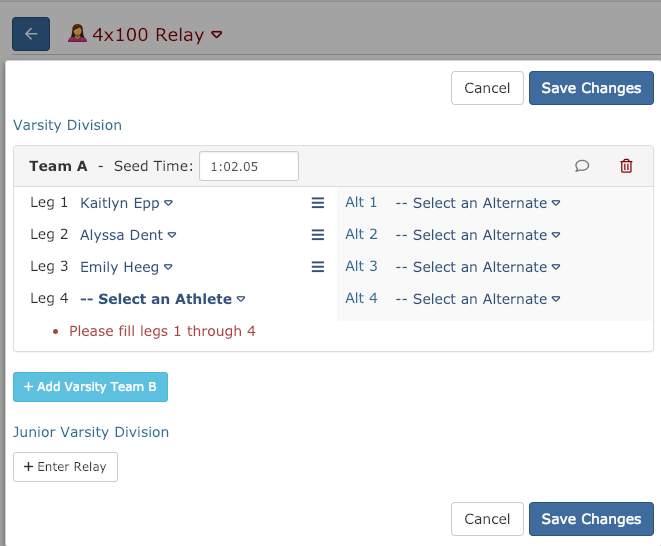
Use the drop-down arrows next to each leg to select athletes and alternates from the list of eligible athletes. You can add a second team (and more) by using the + Add [Division] Team B button, if the meet host allows it.
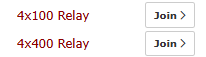
If you're working By Athlete, select an athlete and you'll see Join next to all the relay events.
In either case, you'll be taken to the Register Relay Teams screen.
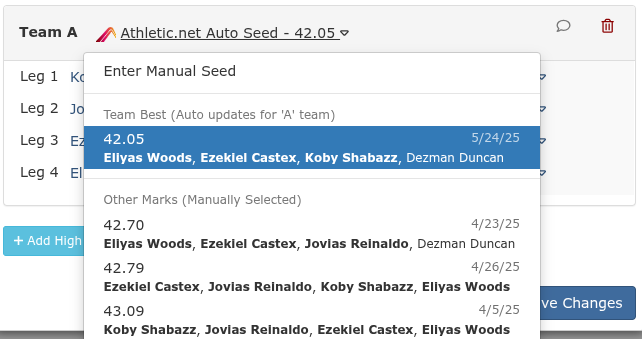
Entering Relay Seed Times - When you register a Team A relay, AthleticNET will Auto Seed using your team's season best. To enter a different seed time, simply click on the seed time and either Enter Manual Seed or choose from the drop-down list of Other Marks achieved by your team during the season. The drop down list of Other Marks will highlight in bold the athletes you have selected for each leg to assist you in deciding the best seed time for that group of athletes. For all Team B (or Team C, etc) relays you will need to Enter Manual Seed or choose from the list of Other Marks.
When you've finished entering your relay team, click Save Changes.
TO VIEW AND PRINT ENTRIES
When you've finished entering athletes, you can double-check your work by viewing a report of your entries as they will be submitted to the meet host. From the main Meet Registration page, click on Print Entries on the right-hand side. Choose By Event or By Athlete depending on the type of report you'd like to view.
If you want to print the entries, just right mouse click in the report that is displayed and choose print.
