HyTek Database Connection
The HyTek Database Connection upload protocol allows users of HyTek's Meet Manager to eliminate FTP uploads for meet schedules, heat sheets, or performance lists, and results. Instead, AthleticLOCAL continuously scans the Meet Manager database for changes and uploads them to AthleticLIVE without any intervention from the operator. Instead of remembering to upload each event's results once it concludes and waiting for FTP uploads to finish before moving onto the next step, you can simply run your meet, resting easy in the knowledge that your fans are receiving up-to-date information.
First Time Setup
Before you use a HyTek Database Connection for the first time, you'll need to download software to enable the connection between Meet Manager and AthleticLOCAL.
Download the Access Database Engine
Download HERE
Once the download is complete, run the program and follow the installation prompts. Once the installation is completed, continue to the next step.
Setup an Access Data Source
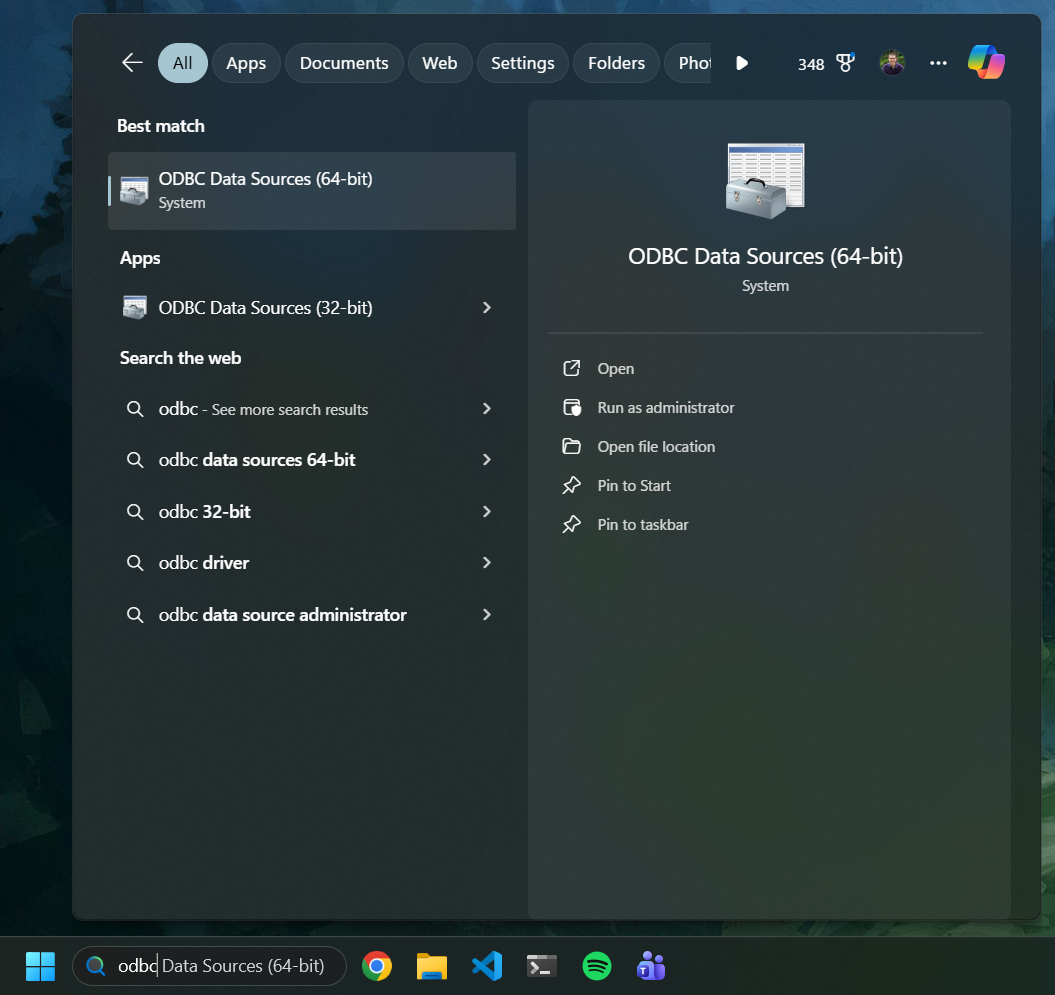
Open the Start menu, and type odbc. Select ODBC Data Sources (64-bit).
From the User DSN tab, click Add.

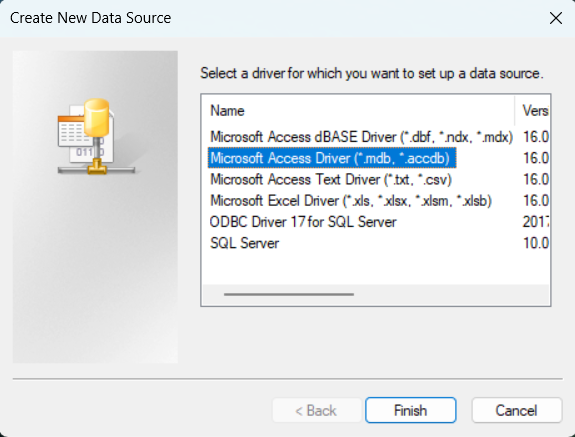
Select Microsoft Access Driver (*.mdb, *accdb), then click Finish.
Set the Data Source Name to AthleticLIVE HyTek, then click OK. No other options need to be configured on this screen.
AthleticLIVE HyTek exactly. There is no space between the Hy and the Tek.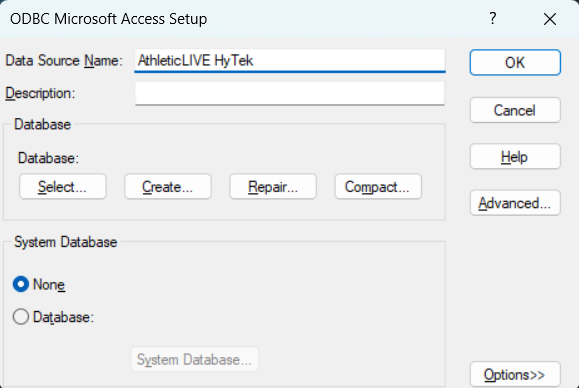
Setting up a Meet
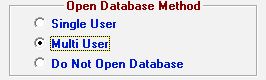
Alternatively, you may select File Open in Multi-User Mode from the menu bar.
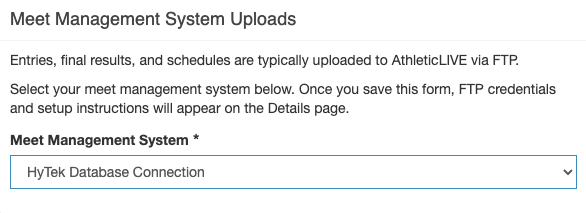
When you create your meet listing on AthleticLIVE, you'll need to select HyTek Database Connection as your meet management system. For further information, see Create a Meet.
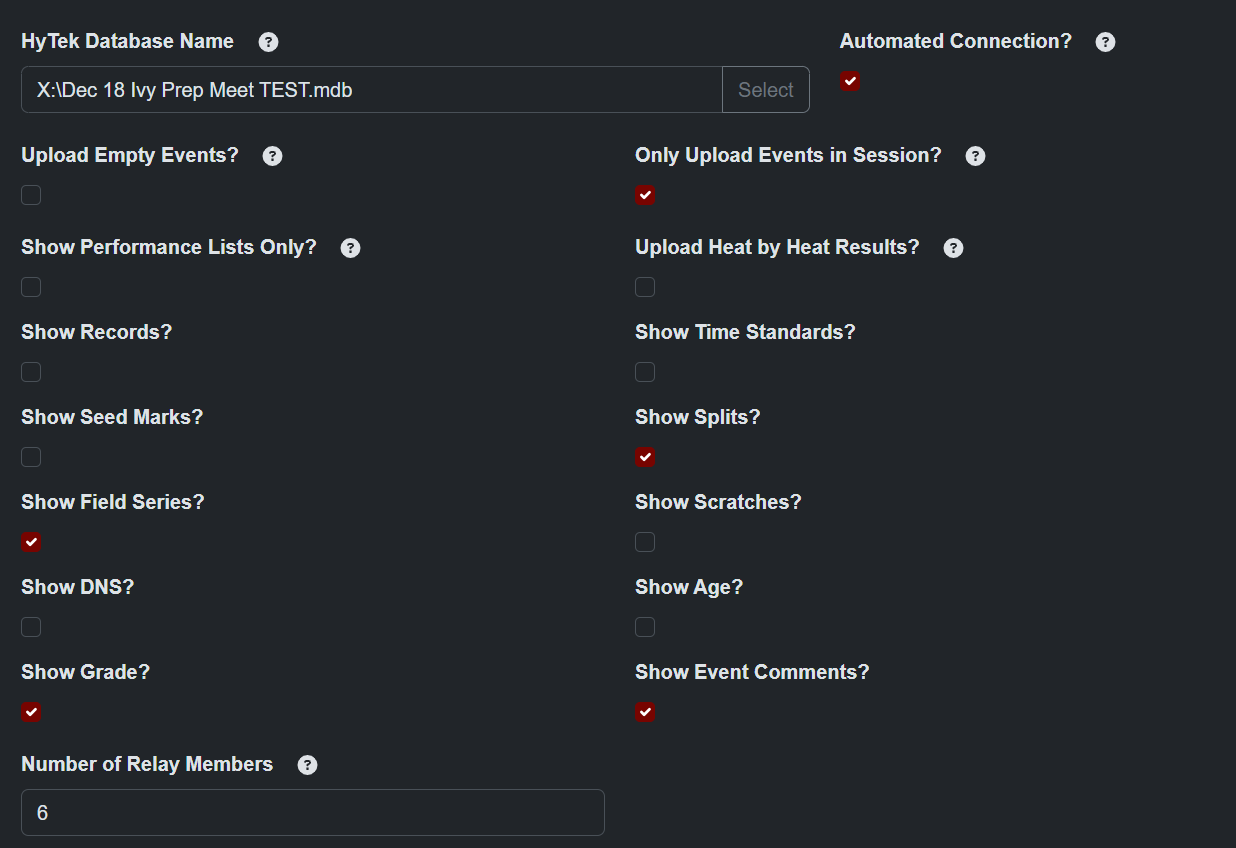
Run AthleticLOCAL, and select the meet you created. For more information, see Install and Operate AthleticLOCAL. Once you select a meet that is configured to use a HyTek Database Connection, you will be prompted to configure the settings necessary.
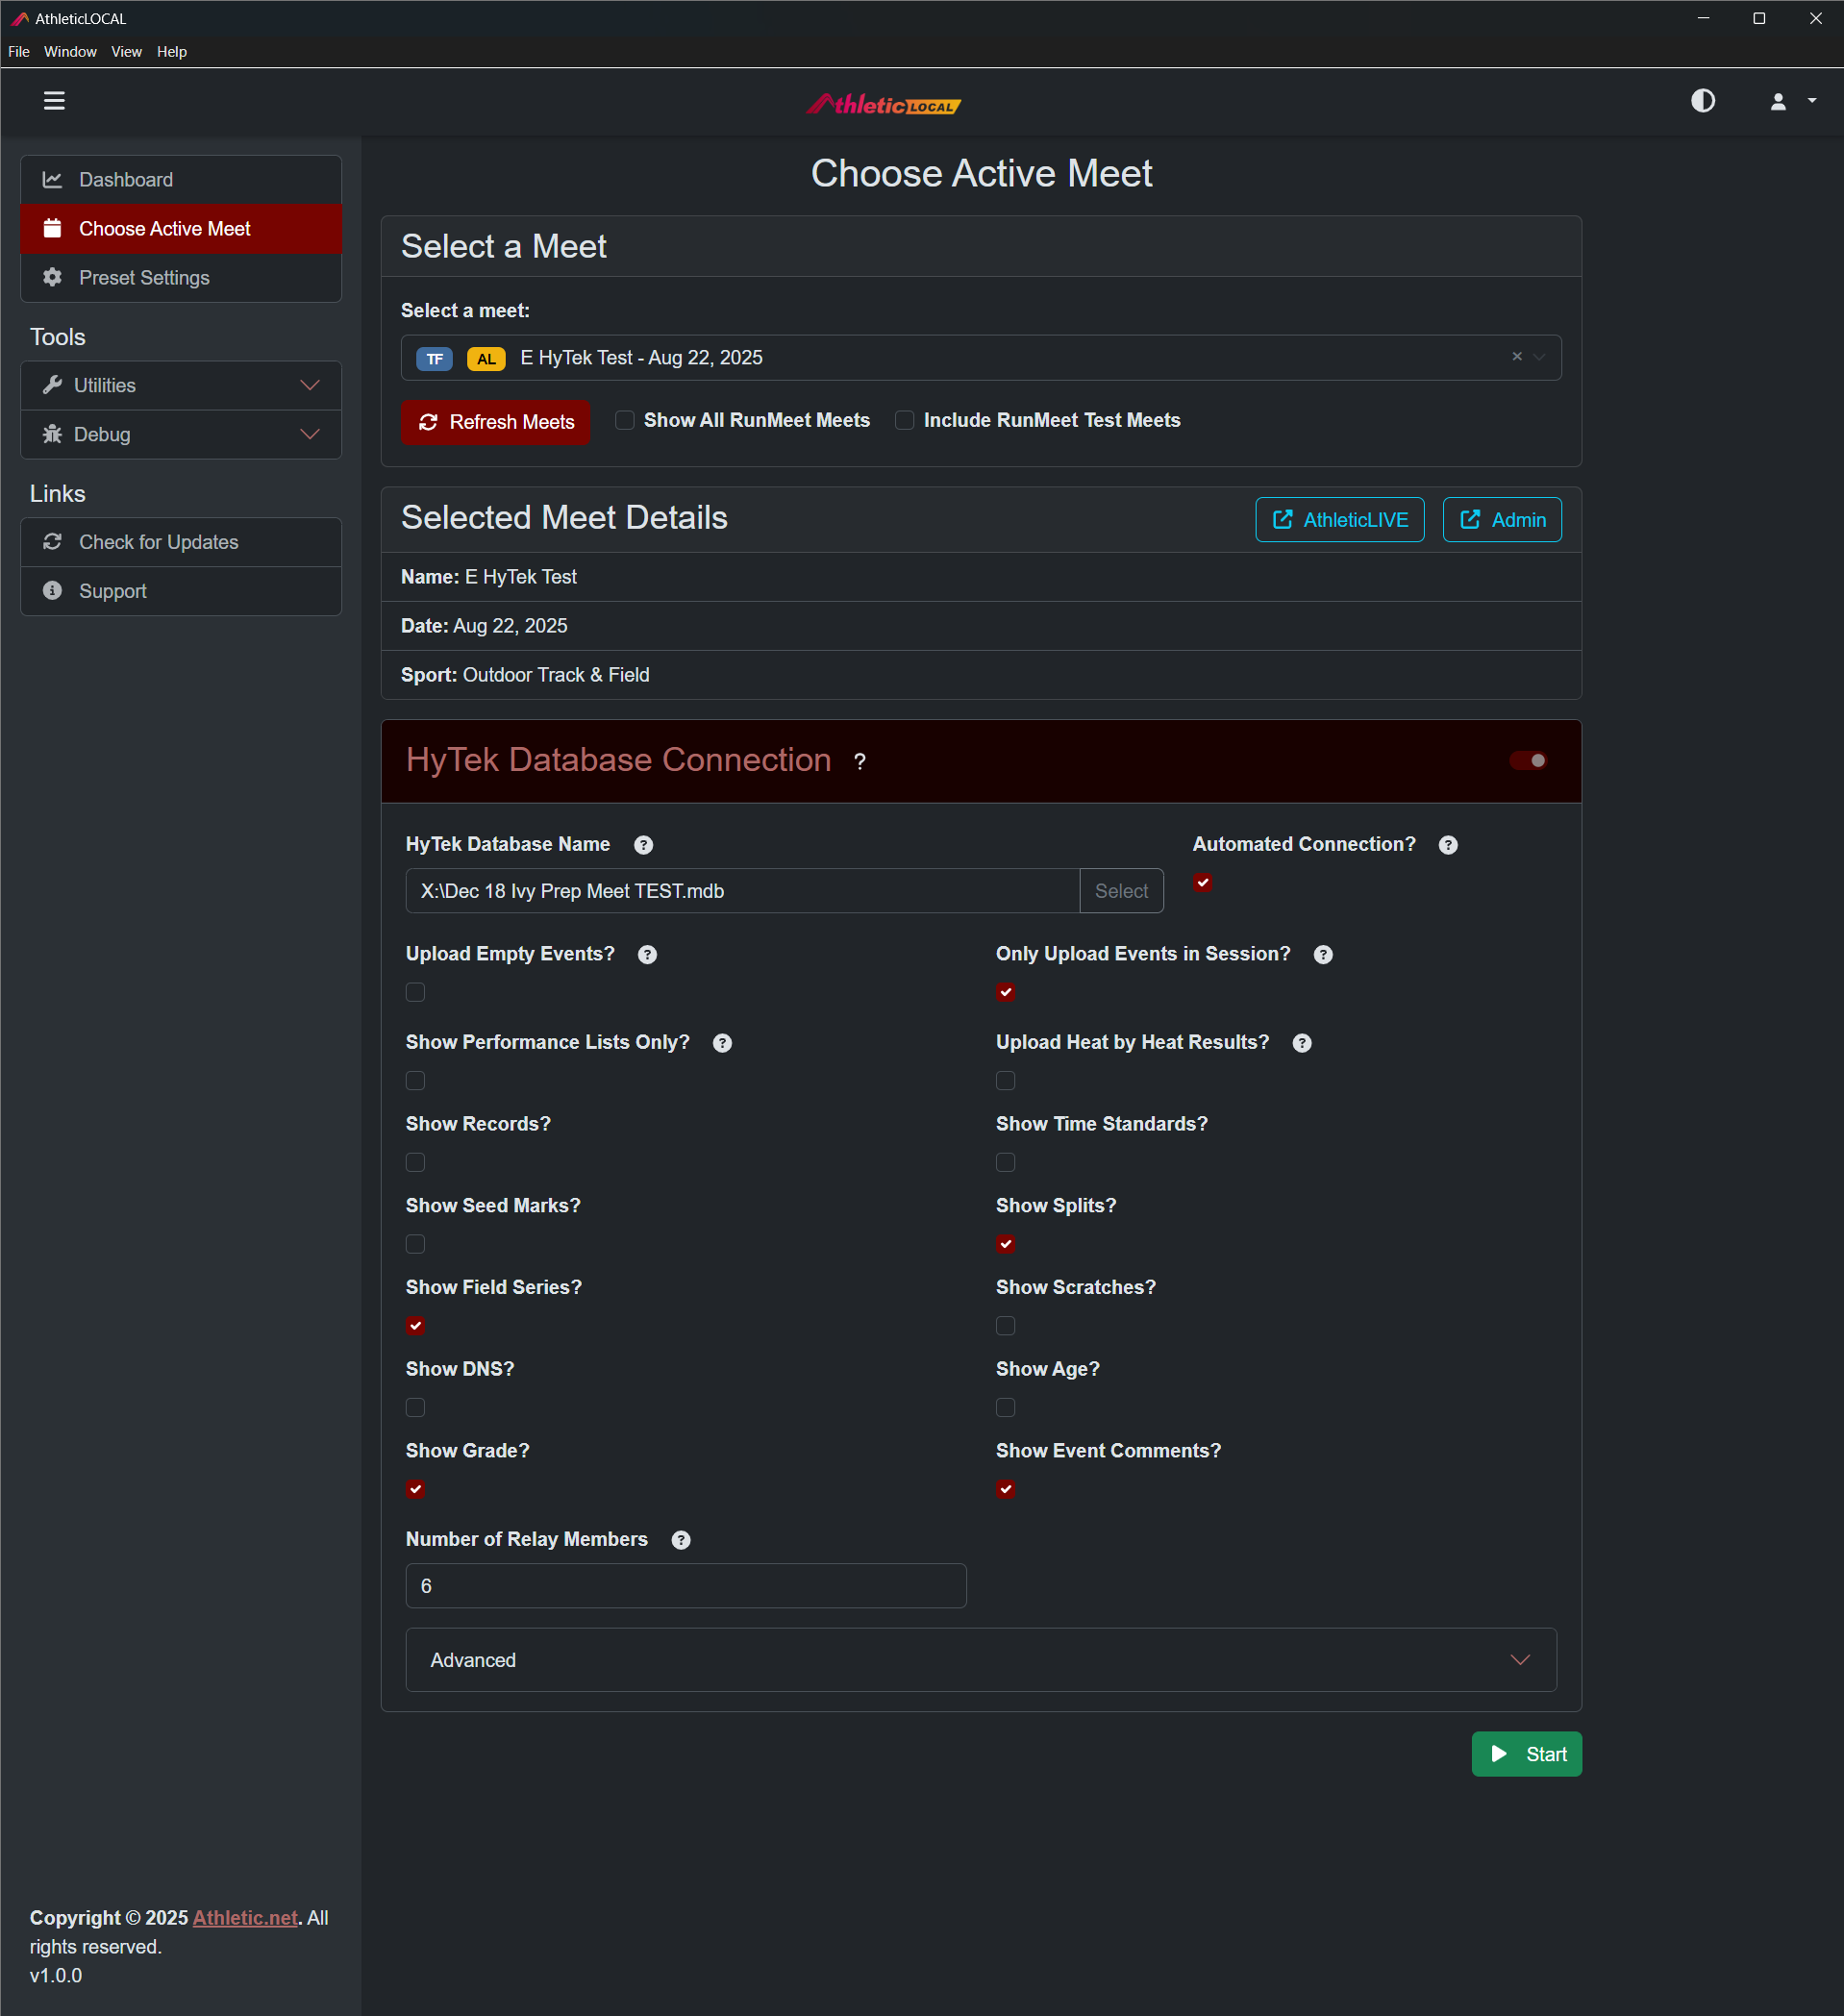
Select the HyTek database by clicking Select next to HyTek Database Name, navigating to the saved HyTek database file in the window that opens up, and clicking Open.
Next, select whether you'd like to enable Automatic Sync with the checkbox. See Automatic Sync and Manual Uploads are discussed below. Additionally, select what items from HyTek you'd like to display on AthleticLIVE using the checkboxes provided. Once you've made your selections, click Start.
Automatic Sync
Automatic Sync is the “hands free” method of using a HyTek Database Connection. The moment you click Start, AthleticLOCAL scans the meet database and uploads all existing data to your AthleticLIVE page. Schedules, heat sheets/performance lists, and results that show in your meet database will all be displayed. As you progress through the meet, changes you make to the database will appear online within one to two minutes, depending upon the amount of data being sent.
If you'd like to see the automatic sync at work, select Debug View Logs from the sidebar, and then select HyTek Database Sync. This log updates every 5 seconds with the most recent events that have been processed by AthleticLOCAL.
Manual Uploads
If you elect not to use Automatic Sync, you can still use the HyTek Database Connection. You have the option to upload data selectively from within AthleticLOCAL.
Select HyTek DB Manual Sync from the sidebar under Meet Settings, and then choose Upload Meet Structure. This section will allow you to upload teams, athletes, and schedules as you see fit.
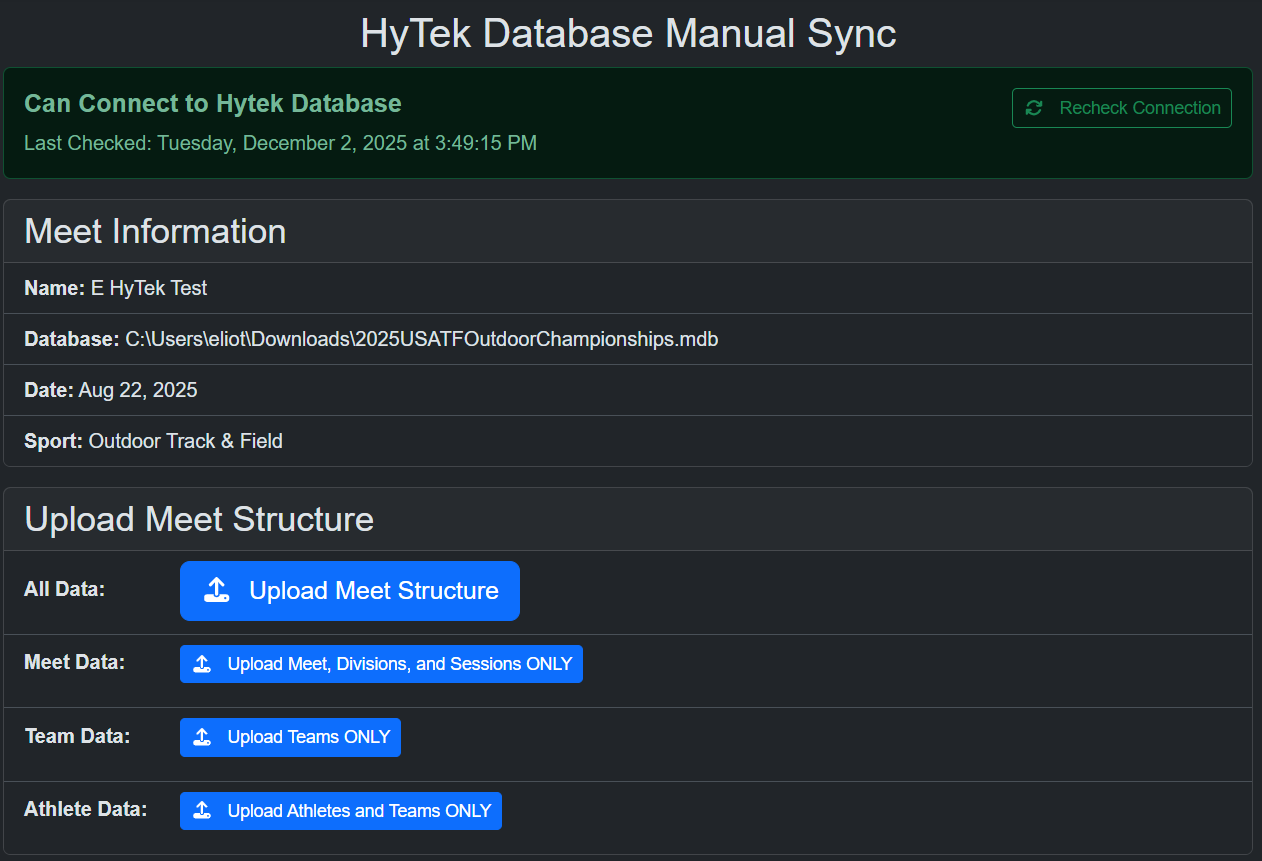
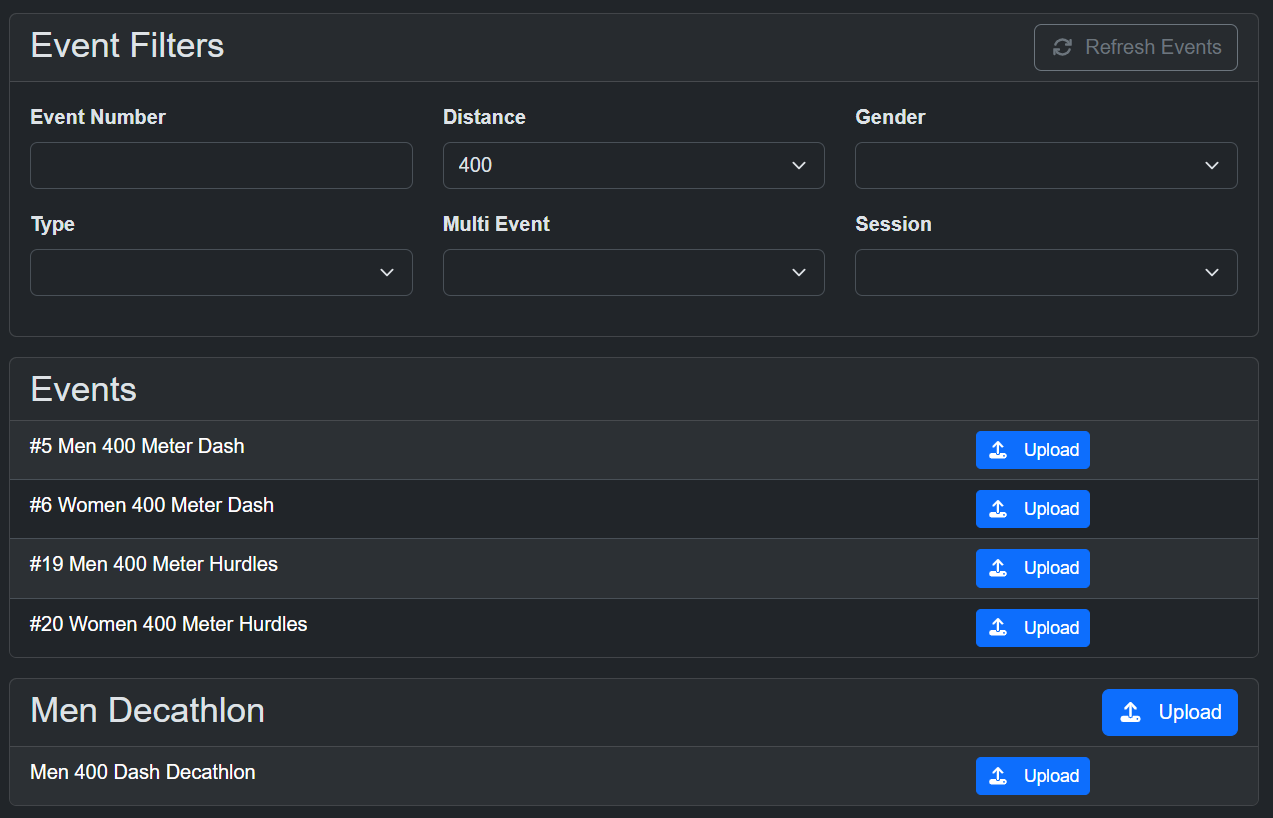
Once you've uploaded all or part of the meet structure, you can then upload events one by one. Events will all be displayed in the Event List on this page, and you can click Upload to upload all data currently available for the event (heat sheets, performance lists, results). Available data for all rounds will be uploaded.
Updating Results in CC/RR Mode
If you use CC/RR Mode for Cross Country Meets, please click the "Update" button in the CC/RR Menu to copy completed results into the track database. This will upload results to AthleticLIVE.
Very Large Meets
For meets over 150 events and/or over multiple days, consider taking these steps to ensure that data syncs in a timely fashion. With either option, be sure to uncheck Automated Connection? when choosing your meet in AthleticLOCAL.
- Sync by Session - When choosing a meet in AthleticLOCAL under Advanced HyTek Database Connection settings, consider syncing only that day's sessions. Results will sync at normal speed. You can always reselect the meet and change sessions if you need to sync, say, the next day's sessions. A few seconds after you select this checkbox, your list of sessions will appear to choose.
- Consider Manual Sync - This gives you full control over when results or start lists get uploaded. This is great if you are syncing only today's session but need to update results from yesterday.
Troubleshooting
Having trouble connecting to your database? Here a some helpful tips.
- Are you on AthleticLOCAL 1.0.0 or later? If not, upgrade.
- Did you install the Access Database Engine and configure the ODBC data source? Click here to learn more.
- Ensure you are pointing to the correct database and not a copy from another directory
- Ensure HyTek is in Multi-User Mode, then reselect your meet in AthleticLOCAL
- Open a new browser window and go to https://api.athletic.live/. Does it say "Interested in using AthleticLIVE for live results? Contact ben@athletic.net."? If not, you have an internet problem. Try another internet connection.
- Restart AthleticLOCAL
- Click the X on the top right corner of the application
- Click the red 'Shutdown' button
- Try to reopen AthleticLOCAL
- Delete and Re-Add your Access Data Source. Sometimes Windows updates cause issues.
If none of the above steps work, please email live@athletic.net