Importing Meet Entries—Hy-Tek Meet Manager
If you're a meet host or event manager, using AthleticNET's meet registration system to collect meet entries is a great time-saving tool. But once those entries are complete, what do we do with them? You'll need to get those entries into your meet management software so that you can seed the meet, produce heat sheets and meet programs, and run the meet! AthleticNET allows you to download the entries in a format that will easily import into the meet management software of your choice.
The first step is to download the entries into a file on your computer. For more information on how to do that, see Downloading Meet Entries.
Configure Meet Manager
Copy an Old Meet
If you have an existing meet in Meet Manager (for example, last year's meet), you can purge the old data from the file and use it to accept the new entries—as long as events and divisions are identical to the old meet.
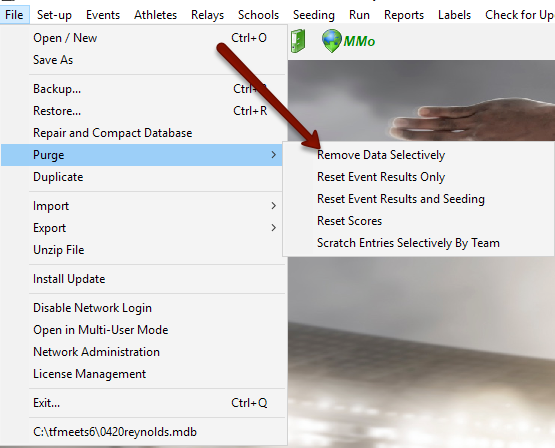
Once you've opened the old meet, click File Purge Remove Data Selectively.
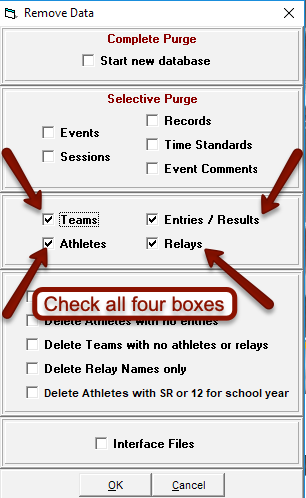
In the Remove Data dialog box, check the box labeled Teams. Athletes, Entries/Results, and Relays will also be checked by default when you select Teams. Leave them checked. Click OK on each warning that appears.
Now you have an empty meet ready to import entries. Continue to Import the Entries, below.
Configure Meet Manager from Scratch
If you don't have an old meet to copy, you'll need to create a new meet database from scratch. See the Meet Manager documentation for more information regarding creating a brand new meet. Specific settings that may be useful:
- If your meet has divisions (e.g., Varsity, JV, Frosh-Soph), you will need to tell Meet Manager you have them.
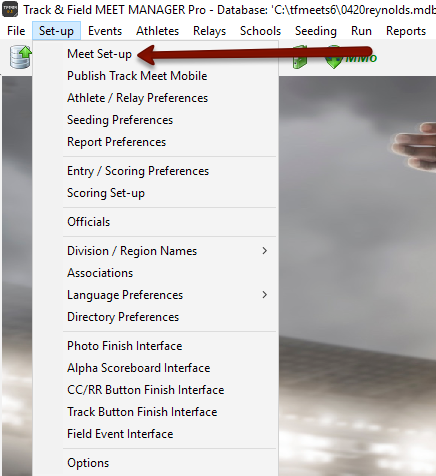
- First, go to the Set-up menu and select Meet Set-up.
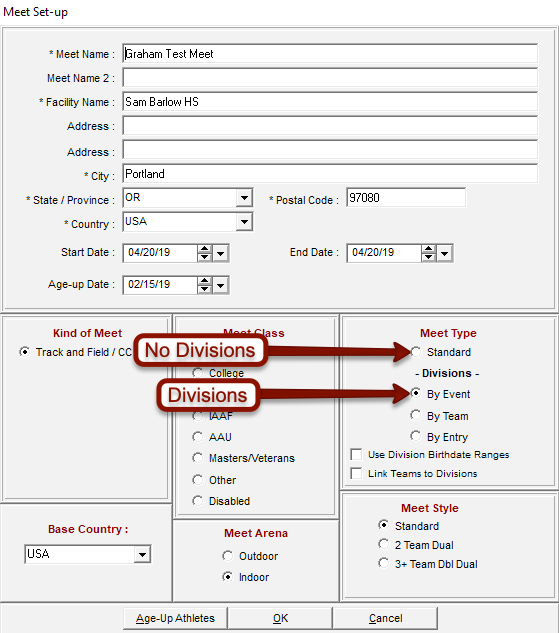
- Under Meet Type, choose By Event if your meet has divisions, or Standard if you have no divisions.
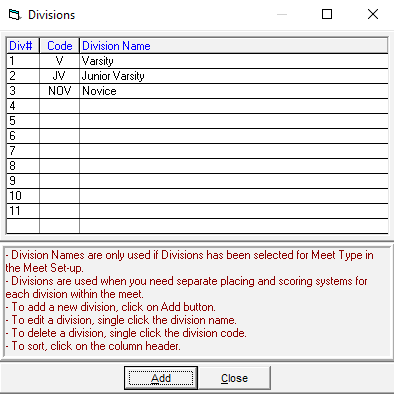
- Next, you'll need to set the names of your divisions. To set the division names, go to Set-up Division/Region Names Divisions.

- Follow the instructions in the Divisions dialog box to set your divisions.The names, abbreviations, and numbering for the divisions set in Meet Manager should be identical to the ones in your meet settings on AthleticNET. For more information, see Creating a Track & Field Meet #4: Divisions.
- First, go to the Set-up menu and select Meet Set-up.
- In your events, configure each event so that it has the appropriate divisions. Your event list should appear similar to the following
- Girls 100m Dash Junior Varsity
- Girls 100m Dash Varsity
- Boys 100m Dash Junior Varsity
- Boys 100m Dash Varsity
- etc
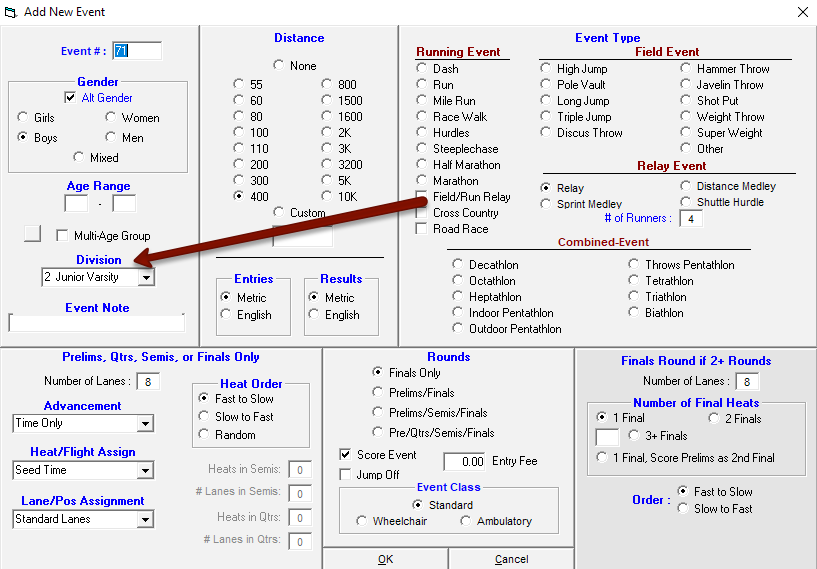
- For running events, make sure you use metric entries and results.
- For field events, make sure you use English entries and results.
- Make sure that you make a separate event for each gender, even if those races are run together (i.e., the girls and boys 3000m run is combined).
Import the Entries
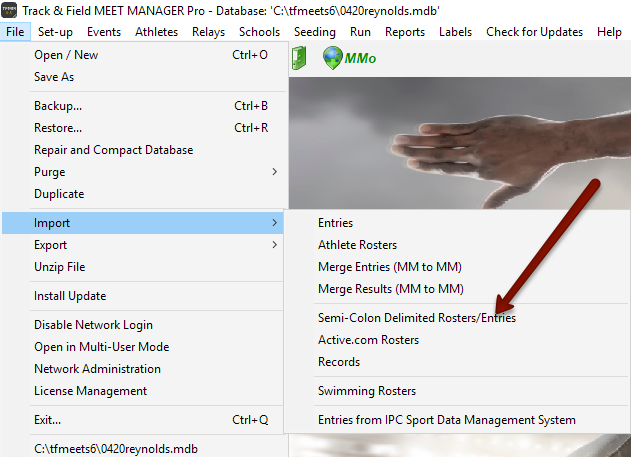
Once you've downloaded the entry file from AthleticNET, note where it was saved on your computer. In Meet Manager, click File Import Semi-Colon Delimited Rosters/Entries.
Browse to the appropriate folder where the downloaded file was saved, and select it.
If Meet Manager displays the message Only Update Seed Time?, click No.
Meet Manager will then attempt to import the file. If there were any errors, an exceptions report will be generated with descriptions of the errors. Otherwise, the import will complete. You can confirm that the entries were imported by clicking on Seeding in the top menu. If the import was successful, you will see numbers listed in the Entries column for each event.
