Creating a Track & Field Meet #4: Divisions
4. DIVISIONS
Set Up Divisions
The next step is to set up divisions for your meet. Divisions are the formal name for the groupings of competitors within a track meet. The most common trio of divisions are Frosh/Soph, Junior Varsity, and Varsity, but club competitions often use divisions to group competitors by age (e.g., 7-8, 9-10).
Unless you selected a template, the divisions section will be blank. Click Add Race Division to create a new division.
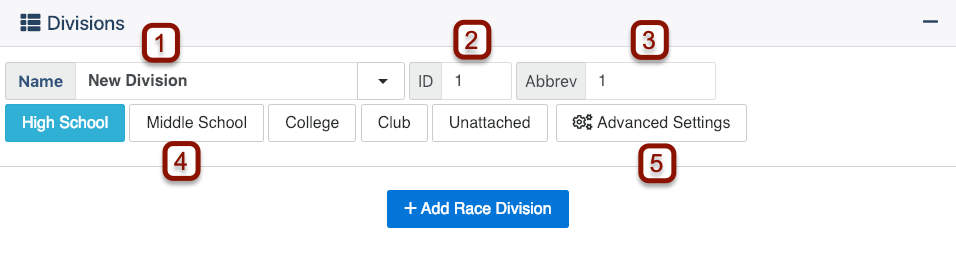
- Name: The division name can be changed by the drop-down arrow. This will display a list of common division names. Alternatively, you can change the name by clicking in the window and typing a custom name.
- The ID number automatically advances every time a Race Division is added. Each division must have a unique ID number. If you configure your meet management software with the same division ID numbers as you use here, your results upload process will be smoother.
- Abbreviation will automatically be updated with the choice of a division from the drop down menu. The abbreviation can also be customized by clicking in the field.
- Levels Competing: Click to select (highlighted in blue when selected) all athlete levels in the current division.
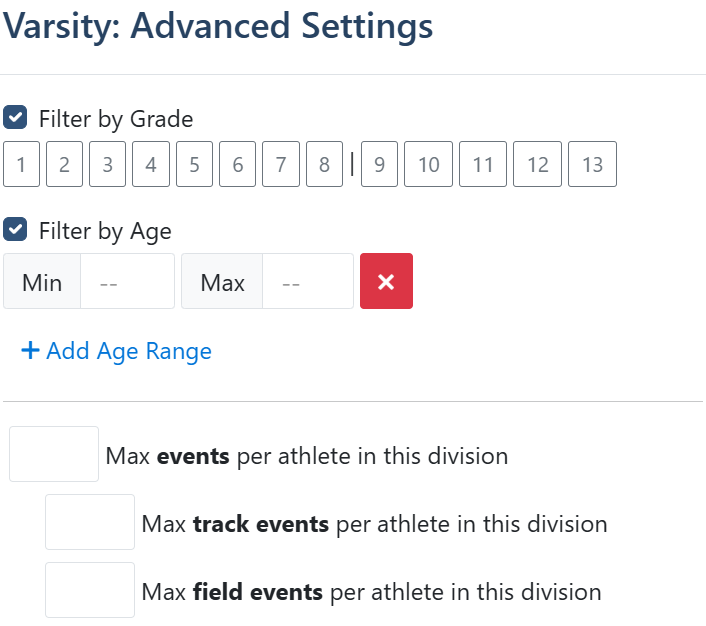
- Advanced Settings allows the host to put some restrictions on registrations, such as a maximum number of events per participant in this division, filter by grade, and filter by age. For example, if there is a division named Freshman, you can filter the participants who are able to register for this division by grade and choose 9. This would allow only 9th graders to submit a meet entry for this division.
Merge Divisions
If you've decided that divisions that were separate now need to be combined, you can use the Merge Divisions button to combine them. Merging divisions will combine all entries in the merged divisions, as well as properly reconfiguring your events to reflect the new division structure.
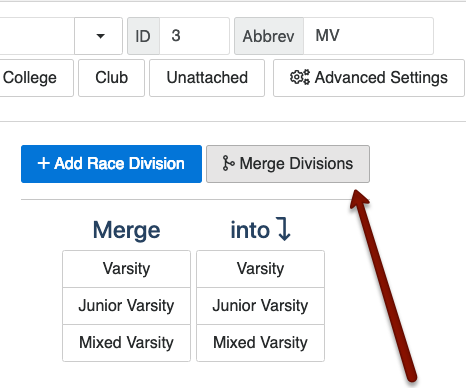
Clicking on Merge Divisions will display the merge options. Click on a division in the left-hand column to select a source division, and then click on a division in the right-hand column to select a destination division. For example, clicking on Junior Varsity in the left-hand column and then clicking on Varsity in the right-hand column will absorb the Junior Varsity division into the Varsity division.
Once you've configured all your divisions, the next step will be to configure additional options.
1. Creating a Track and Field Meet
Click Here for more information.
2. Templates
Click Here for more information.
3. Information
Click Here for more information.
5. Additional Options
Click Here for more information.
6. Seeding
Click Here for more information.
7. Entry Fees and Financial Options
Click Here for more information.
8. Race Bibs
Click Here for more information.
9. Events
Click Here for more information.
10. Activating the Meet
Click Here for more information.