Creating a Track & Field Meet #1: Introduction
AthleticNET has developed some very powerful tools to help you create Track and Field, XC or Indoor Meets. The process for Track and Field has been broken down into 10 steps. While this may sound daunting, it is aimed at making it easier to follow without the need to scroll through a very long page, or needing to scroll through pages to find the help you are looking for.
You can use the menus on the left to navigate from section to section to help make this easier for you.
1. CREATING A TRACK AND FIELD MEET
The most powerful set of tools AthleticNET provides is for teams, clubs, schools, event managers, timers hosting and running meets. AthleticNET allows these meet hosts to post information about an upcoming meet, invite teams, manage meet entries (including reviewing, accepting, rejecting, and enforcing them against a qualifying standard), collect entry fees, collect electronically signed entry waivers or other forms, and communicate with team administrators / coaches who will be attending the event.
The first step in hosting a meet is to add it to the AthleticNET master calendar. In order to do this, you'll need to have the date and location decided, although these are both editable after the meet has been created. To begin, navigate to your team's homepage by clicking on the Menu Icon () in the top left corner and then clicking on your team's name. Once you're on your team's homepage, click Add A Meet at the top of the calendar.

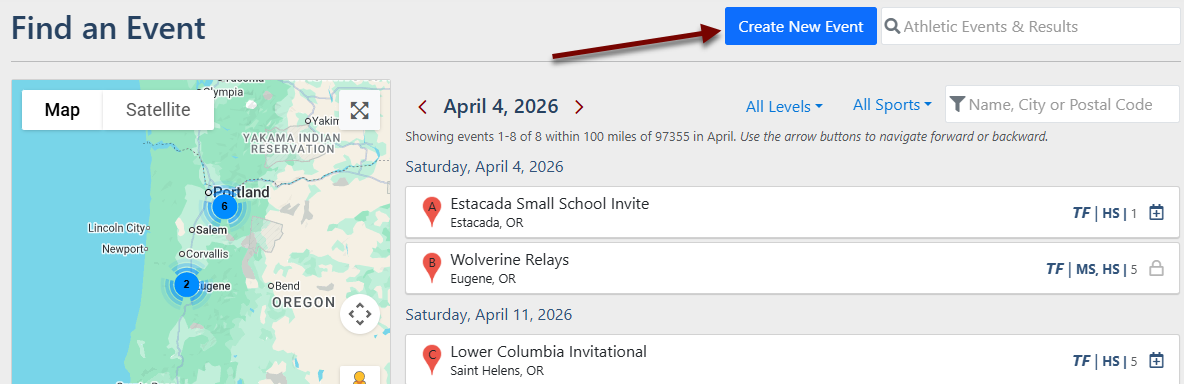
You'll be taken to the Find an Event screen. Click on Create New Event on the top-right of the screen.
It may be that someone else knows about your meet and has added it to the AthleticNET master calendar, even if this person is not the meet host. Before it's created, AthleticNET will walk you through a quick double-check to make sure that your meet isn't already listed. Select the event type, and then select the Date of the meet, Venue Address and Event Name. You must enter a valid venue address before you will be able to enter an Event Name. Check the list on the right hand side to make sure your meet isn't already there.
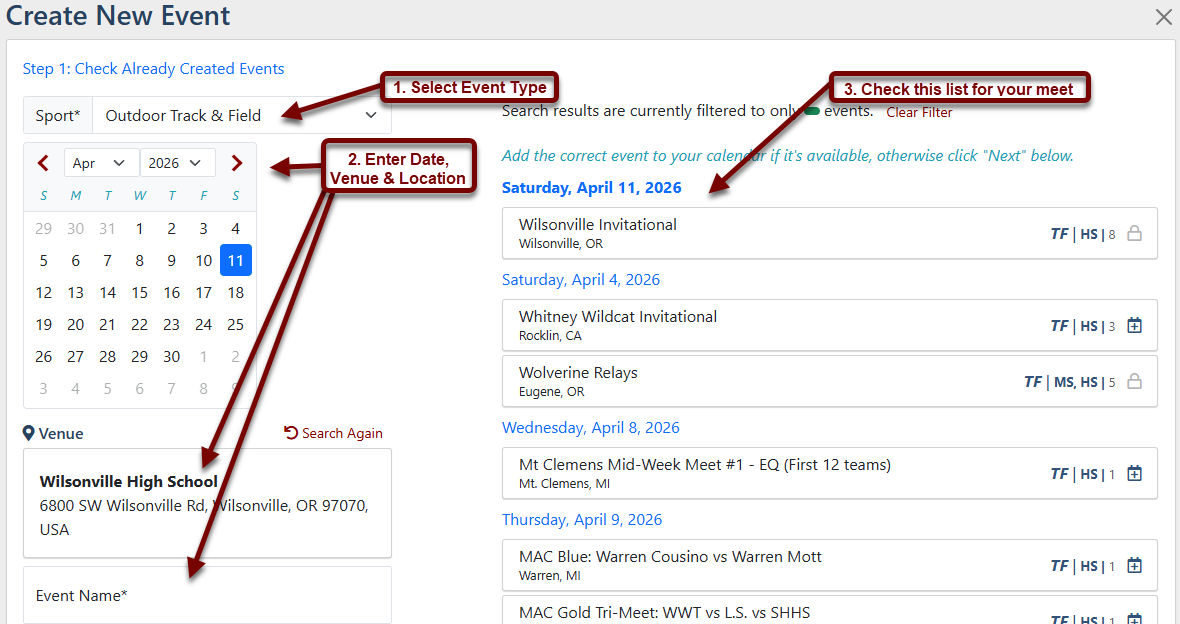
If you don't find your meet, Enter the name of the meet under Event Name and then click Next in the bottom right.
On the next screen, you'll be prompted to add further details about the meet.
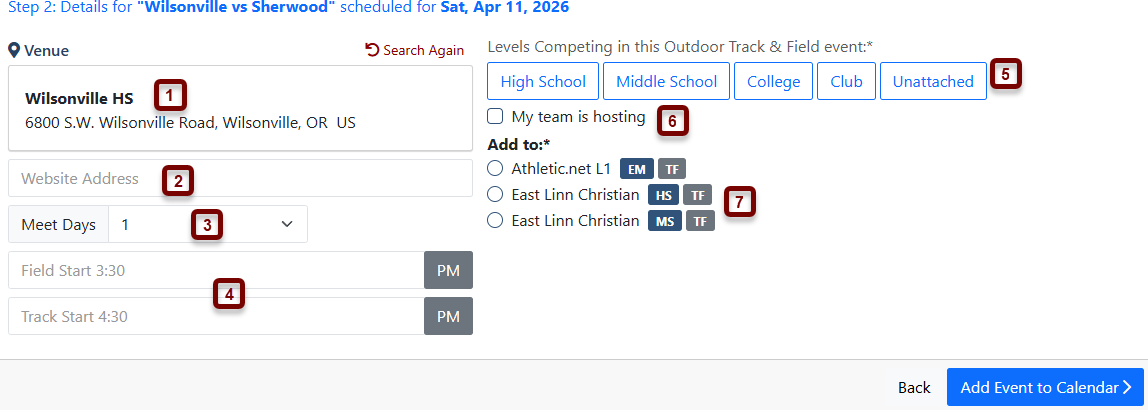
- Venue: Choose from the list of existing nearby venue addresses or click + Add as New Venue.
- Meet Website: If the meet has a separate website, paste the URL here.
- Meet Days: Enter the number of days the meet will run. If you're hosting a multi-day meet, see Creating a Multi-Day Meet.
- Start Times: Enter the start times of track events and field events, if you know them.
- Levels: Click the correct levels for athletes from whom you'd like to accept entries.
- Hosting: Check the box if your team is hosting the meet. This will give you access to meet configuration options.
- Add to Calendar: If you are affiliated with multiple teams, you'll see each team listed here. Select the correct team to add the meet to that team's calendar.
At the bottom right of the screen, you'll see either Add Event to Calendar or Continue to Meet Setup , depending on whether the My team is hosting box is checked. If you've clicked Continue to Meet Setup , you'll be prompted to define your role in the meet and confirm that you are authorized to set up online collection of entries for the meet. Click Agree and Continue .
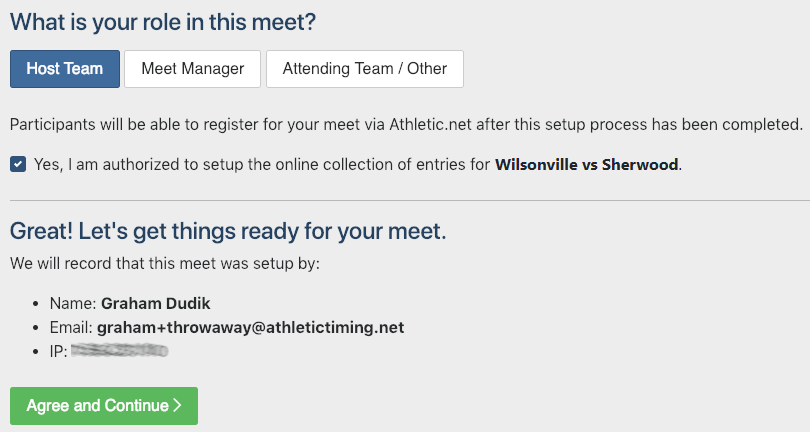
Once you click Agree and Continue , you'll be taken to the next step in the meet setup process, Creating a Track & Field Meet: Templates.
2. Templates
Click Here for more information.
3. Information
Click Here for more information.
4. Divisions
Click Here for more information.
5. Additional Options
Click Here for more information.
6. Seeding
Click Here for more information.
7. Entry Fees and Financial Options
Click Here for more information.
8. Race Bibs
Click Here for more information.
9. Events
Click Here for more information.
10. Activating the Meet
Click Here for more information.