Guide to Entries on AthleticNET for Collegiate Events
Step 1: Create your meet on AthleticNET
- Select "add a meet" from your team calendar or event event manager calendar. Host teams, Event managers and timers can share in meet management using our co-host system.
- If a collegiate team is new to hosting a meet on AthleticNET, please upload a W-9 for tax purposes under the "Entry Fees, E-Ticketing, Merch, and Donation Collection" tab after selecting "Use AthleticNET Stripe." If you would like assistance uploading tax documents or setting your preferred method of payment, please reach out to college@athletic.net.
- Be sure to take a look at advanced seed settings here: College Seed Conversions
- After your event is set up on AthleticNET, please enable the TFRRS Instructions pop-up. This message reminds collegiate coaches to declare their roster for the meet on DirectAthletics. If you are a site admin, you can enable this yourself. If you need assistance, please contact college@athletic.net, and we’ll enable the setting for you.
Step 2: Create your meet on DirectAthletics for NCAA Reporting
Host institutions are responsible for reporting results to DirectAthletics/TFRRS within 24 hours of the event’s completion. Hosts are also required to report results to the AthleticNET for USTFCCCA rankings and awards within the same timeframe. Reporting results to AthleticNET influences weekly rankings for the NCAA, NAIA, and NJCAA.
AthleticLIVE Info
RunMeet Info
Collegiate RunMeet Info
In order for athletes to be matched on DirectAthletics/TFRRS, a unique single-use code is required. As of December 2023, permanent TFRRS IDs no longer exist, and DirectAthletics single-use codes are not publicly available. Hosts will need to create a meet on DirectAthletics for roster declaration and results upload by following the steps below.
The earlier a host creates the roster declaration page, the better. Coaches can declare their rosters for all upcoming meets in a season in as little as two minutes, provided the meets are set up and their DirectAthletics roster is accurate!
- Create the meet on DirectAthletics
- You must select "Roster Registration" as the Registration method. This cannot be changed after you create the meet.

- Invite Mens and Womens teams to your meet, if you selected the 'Invitational' setup. We do suggest you choose 'Open' for the registration method on DirectAthletics, then any team may go add the meet themselves. Use the 'Open' option if you are not limiting your meet to a select group of teams.
- We recommend that you leave your DirectAthletics declaration open for as long as you can, up to your meet date. Let your coaches know they can add the DirectAthletics meet and declaration their rosters as described in the Step 2 section of this document.
- Email this link to your coaches for more information on declaring their roster: DA Roster Declaration and be sure to tell coaches to declare their whole roster and it takes under 1 minute!
Step 3: Hosts/Timers - Import Rosters to AthleticNET
Once the meet entry deadline has passed, the meet host or timer may import declared rosters to match DirectAthletics single-use IDs. While this can be done at any point during the registration process, we recommend completing it at the end.
If you are using RunMeet, you can perform this step while RunMeet is active, it will run in the background. If you are using HyTek or another meet management system that requires entry downloads, we recommend importing declared rosters before downloading entries from AthleticNET.
- From DirectAthletics, you can download the entry file, with the single-meet IDs, just like you would for any other meet.
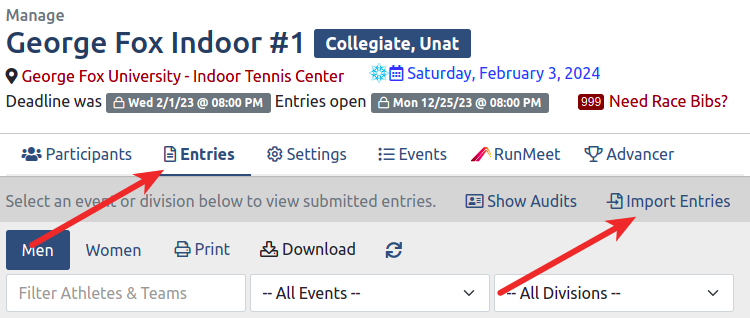
- Go to the AthleticNET Manage Meet page and click the "Entries" tab.
- Click "Import Entries".
- Click "Upload File" and upload the entry file you downloaded from DirectAthletics.
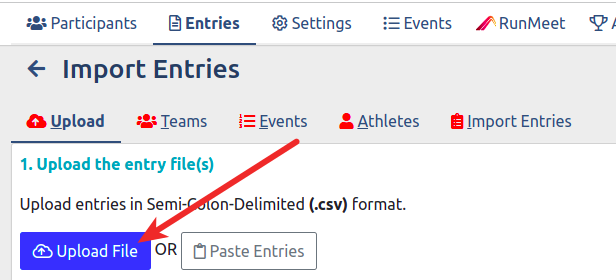
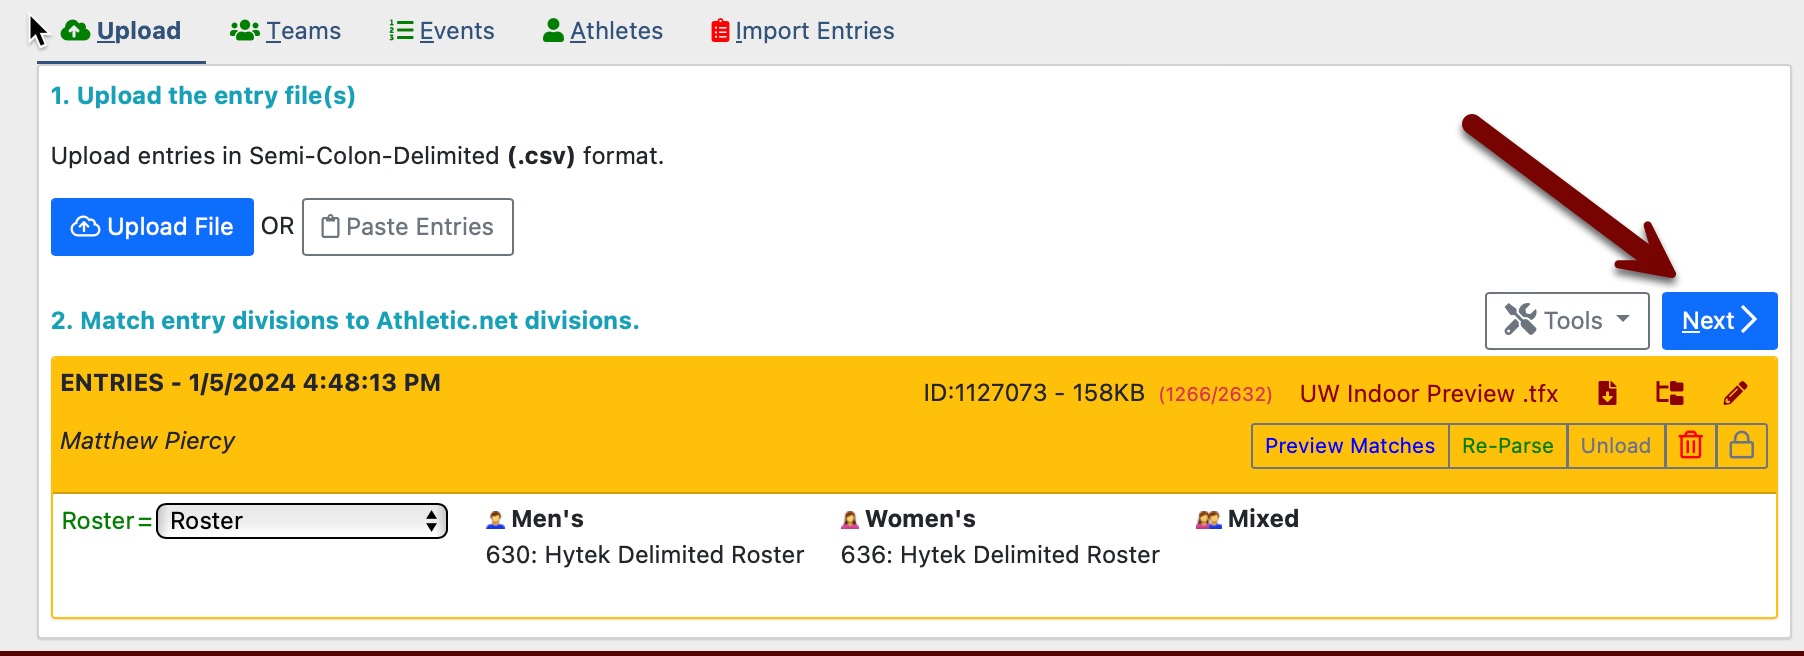
- Once the file is uploaded, click "Next"
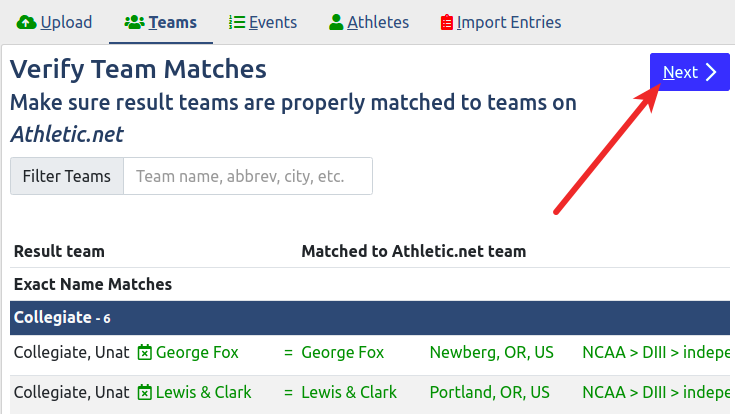
- Match team names in the entry file with AthleticNET teams. Click here for more information on matching teams. When finished, click "Next".
- There is nothing to do on the Events tab. Click "Next".
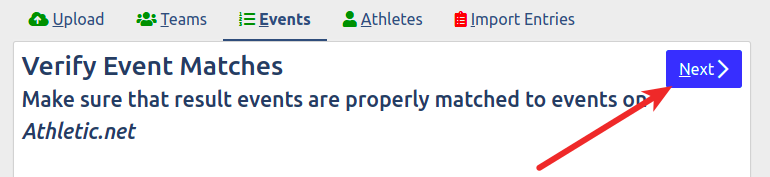
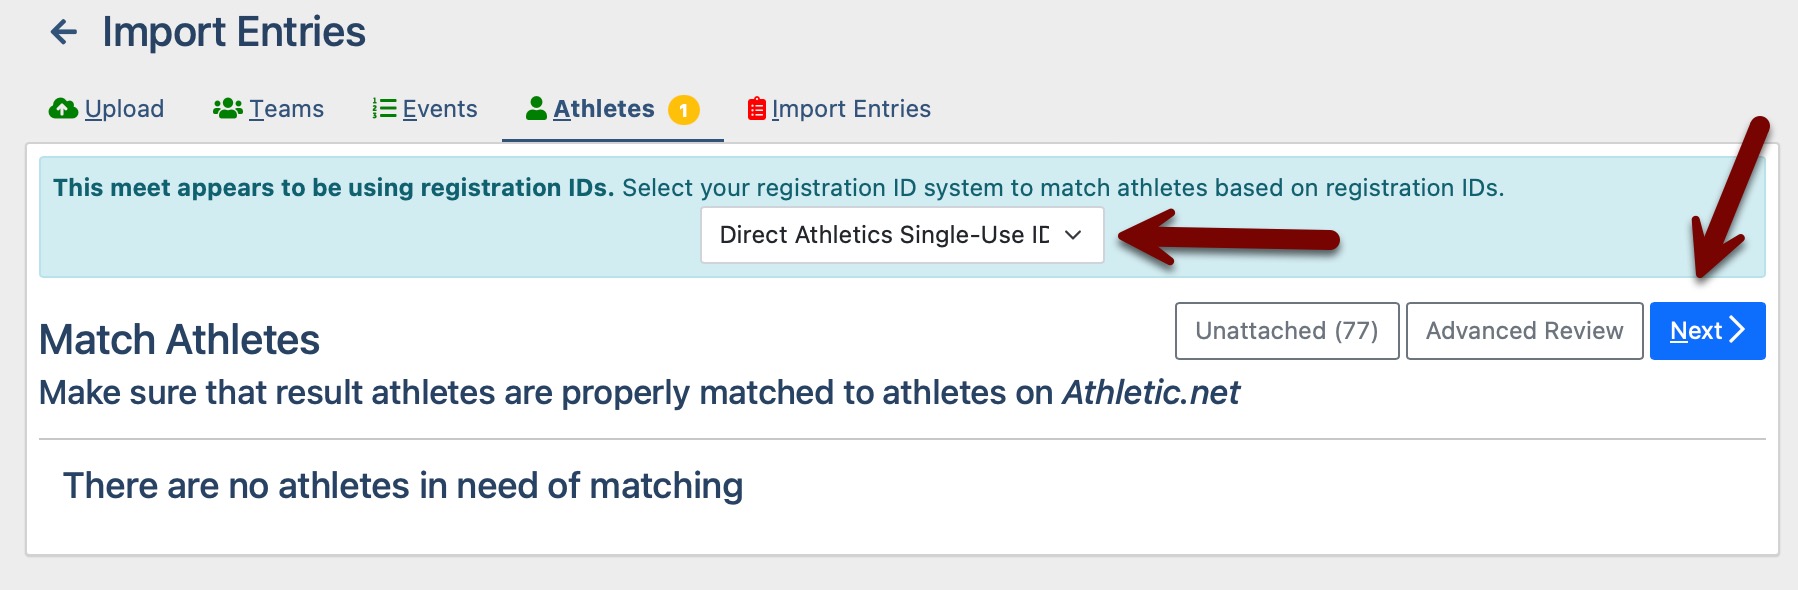
- On the Athletes Tab
- A note states "This meet appears to be using registration IDs.". Make sure 'Direct Athletics Single-Use ID' is selected.
- Match athlete names in the entry file with AthleticNET athletes. Click here for more information on matching athletes. When finished, click "Next"
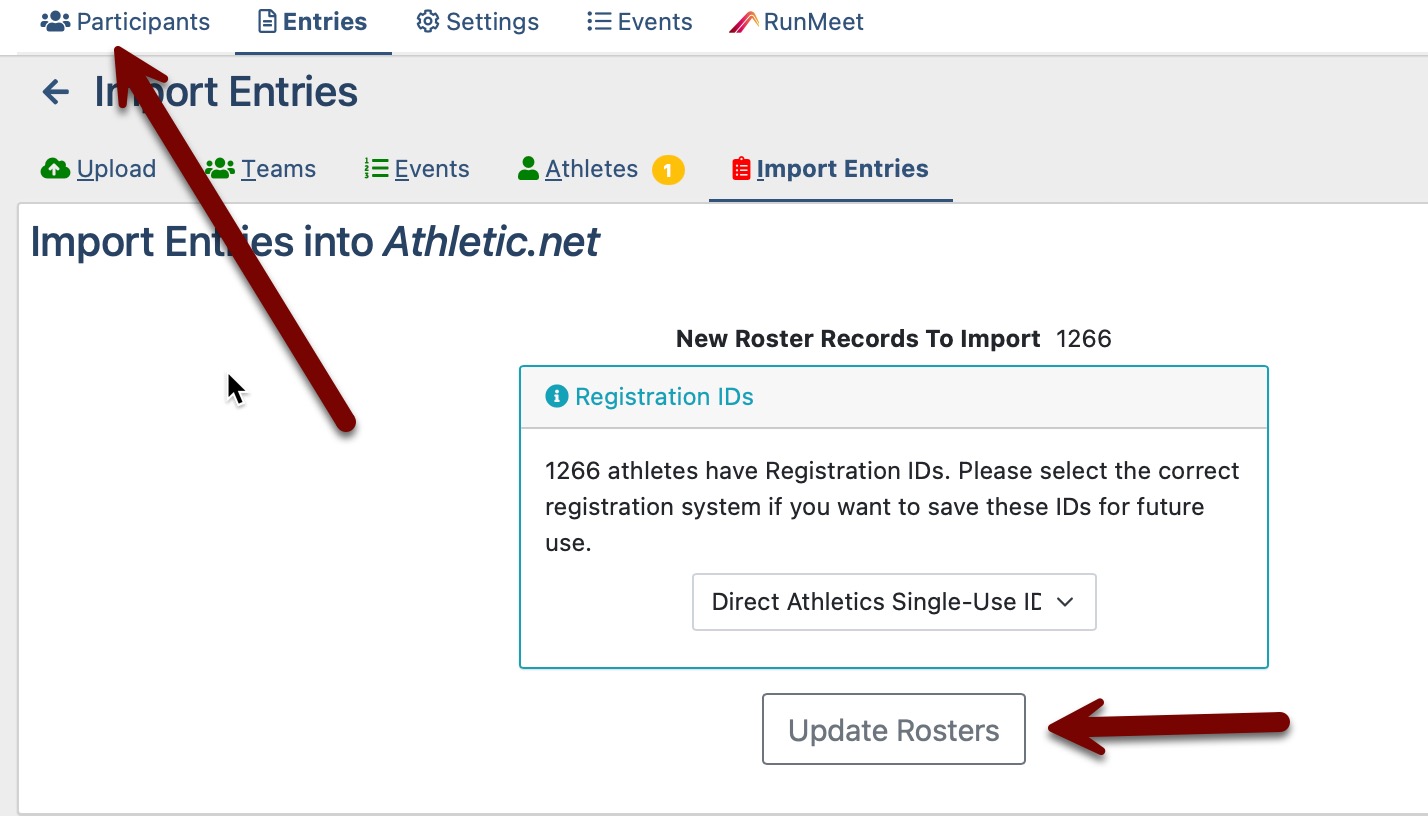
- Click "Update Rosters" on the Import Entries tab.
- You're all set! If you have more work to do, go back to the Participants tab and continue setting up or working on your meet.
Updating Single-Meet IDs
It is okay to upload a new entry file from DirectAthletics, at any time, if you need to update what you have already imported.
Timer Partner Dashboard
Interested in a percentage of your AthleticNET registration fees for college meets, learn more on our Timer Partnership Program