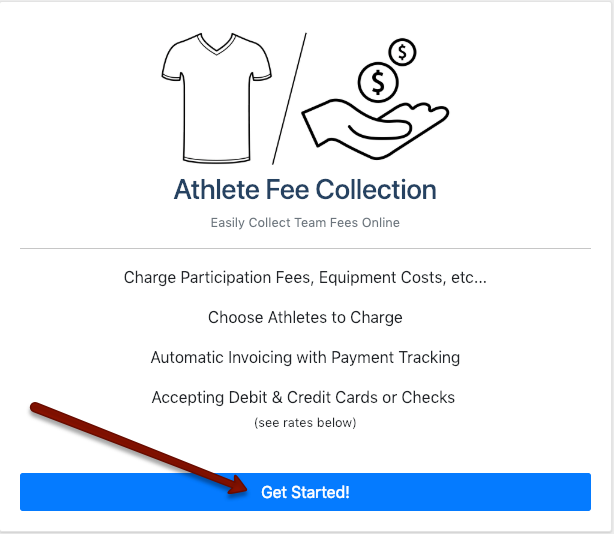
Setting Up a New Athlete Fee
AthleticNET's Athlete Fee Collection feature allows coaches or team administrators to easily collect fees from participants for team dues or participation fees, equipment costs, and more. This feature allows you to collect payments via credit card or check, select which athletes get charged, and keep track of who is paid up and who still owes. Here we'll show you how the initial fee setup works.
You may also be looking for one of the following articles:
- Paying Fees (For Athletes and Parents)
- AthleticNET Financial Feature FAQ
- Managing and Collecting Athlete Fees
- Team Donations and Fundraising
To access your team's roster, navigate to your team's homepage by clicking on the Menu Icon () in the top left corner, and then clicking on your team's name. Then, click on Manage Team in the top menu bar, then Team Fees & Dues. Finally, click on Get Started!
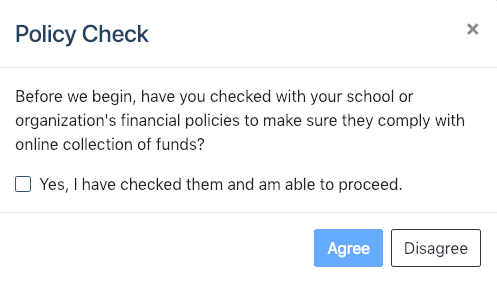
You'll need to confirm with your school or organization that their policies allow the online collection of funds. Once you have done so, check the box and click Agree.
On the Create New Fee screen, you'll be asked to provide basic setup information about the fee you're going to charge.

- Title: This is the fee description that athletes and parents will see on invoices that the system generates. It will also be used to describe the fee in paid/unpaid reports available to coaches and team managers.
- Cost: Enter the amount of the fee in US dollars.
- Due Date: Enter a due date that will be displayed on invoices. This field is optional.
- Note to Athletes & Parents: This note will be displayed in emails to athletes and parents when they are alerted to the fee.
- Who is this fee for?: You can choose to check All Men, All Women, both, or neither. If you don't check a box, then you'll need to select each individual athlete to whom the fee will be charged later on.
Click Next to continue.
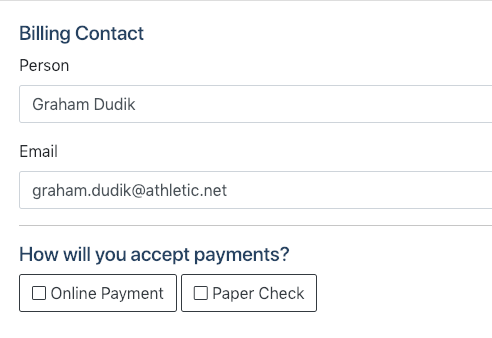
On the next page, you'll be asked to enter contact information for a billing contact. This person will receive notifications of fees paid and inquiries from athletes or parents regarding fees. The billing contact information will appear on all invoices. In addition, you'll be asked how payments will be accepted. Check the appropriate boxes. You can select Online Payment, Paper Check or both. Depending on which options you select, you'll be asked to provide different information.
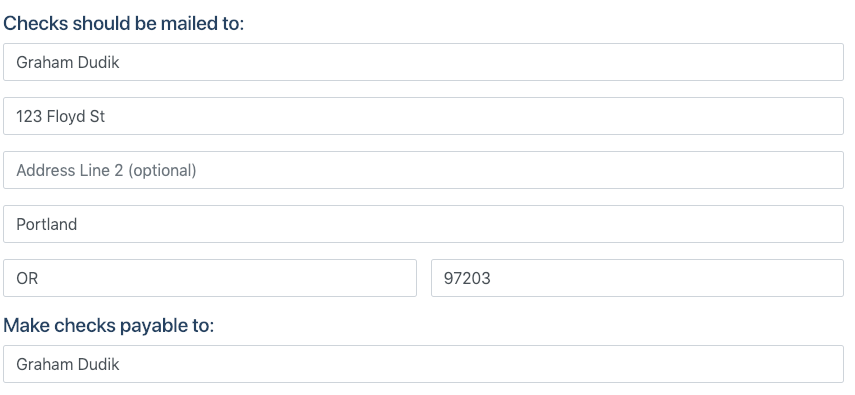
If you select Paper Check, you'll be asked to enter who the checks should be payable and where they should be mailed.
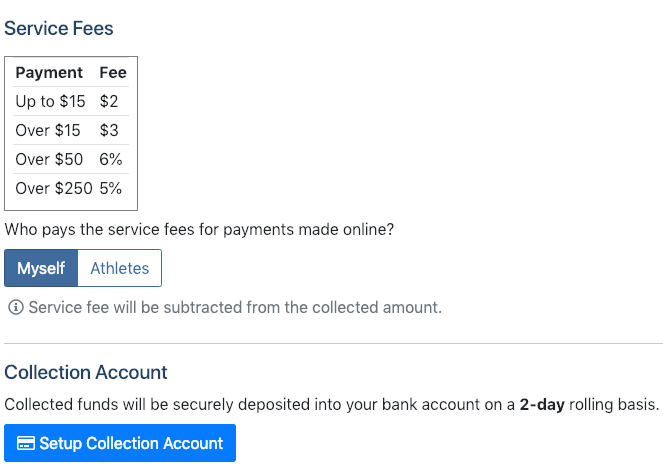
If you select Online Payment, you'll be presented with the fee structure. Additionally, you'll be asked to choose who will pay the service fees for online payments. If you choose Myself, the service fee will be deducted from the amount you collect from each transaction. If you choose Athletes, the service fee will be on the athlete's invoice and added to their total. For more information on service fees, see AthleticNET Financial Feature FAQ.
Next, you'll need to click Setup Collection Account. This will take you to AthleticNET's payment processing partner, Stripe. Stripe will ask for information about the person or business receiving payments. The data required by Stripe varies depending on the type of organization you represent. You'll also need to create a username and password with Stripe, and provide them with a routing number and account number for the bank account where funds should be deposited. When you're done, click Authorize access to this account, and you'll be taken back to AthleticNET. You'll also need to verify your email with Stripe.
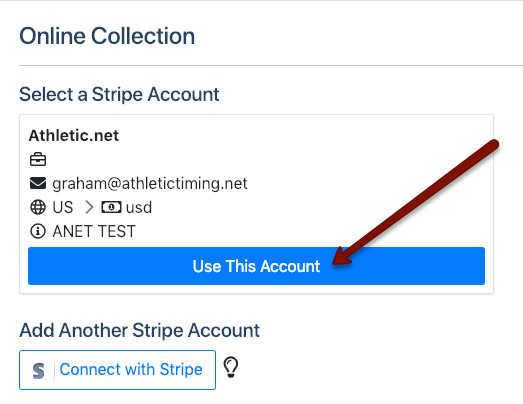
Once your account with Stripe has been created, press the Click to Continue button on AthleticNET. You'll be prompted to select an account. Click Use This Account.
Once you've selected the Stripe account you're going to be collecting fees with, and/or completed the information required for paper checks, click Finish Setup in the bottom right corner.

For information about how to apply a fee to a particular athlete, create invoices, and more, see Managing and Collecting Athlete Fees.