Creating a New Meet
If you know that a particular meet is going to take place, but you can't find it when trying to add it to your team's calendar, you can add it to AthleticNET's database of meets, even if you aren't the meet host. All you need to have is some basic information about when and where the meet is, and what kind of event it is.
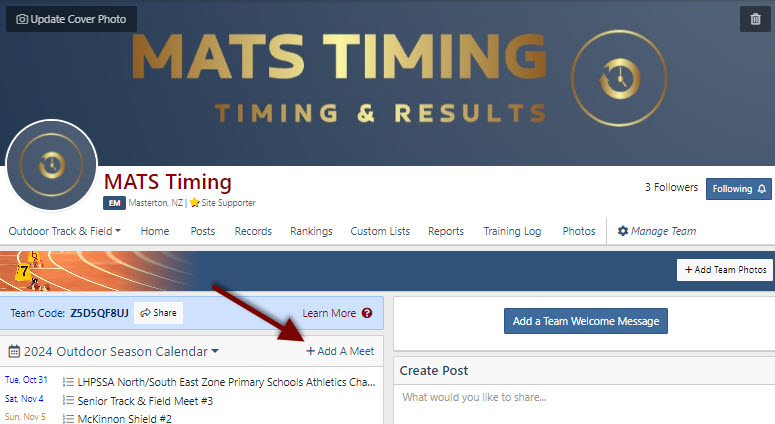
The first step is to try and find the meet on the master AthleticNET database. To do that, choose your club / team you want to add an event to from your home screen.

Once in your club / team page, select Add a Meet
You'll be taken to the Find an Event screen. Click on Create New Event on the top-right of the screen.

Before the new event is created, AthleticNET will walk you through a quick double-check to make sure that your meet isn't already listed.
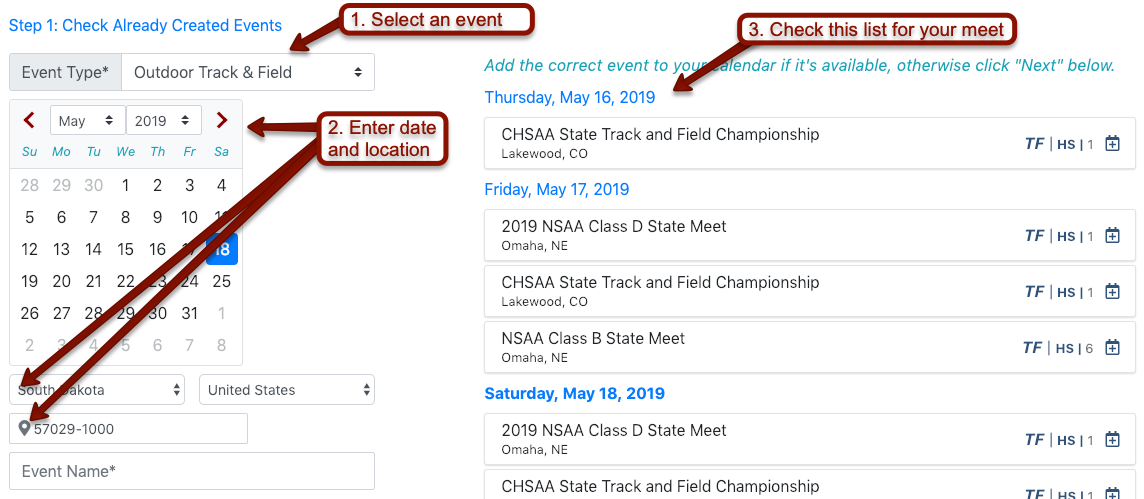
- Select the event type (Outdoor Track and Field, Indoor Track and Field, Cross Country)
- Select the date the meet will take place on, as well as the Country, State and Zip / Post code. You can also add the Event Name, but this is not necessary to see if the event exists already.
- Check the list on the right hand side to make sure your meet isn't already there.
If you don't find your meet, Enter the name of the meet under Event Name and then click Next in the bottom right of the screen.
On the next screen, you'll be prompted to add further details about the meet.
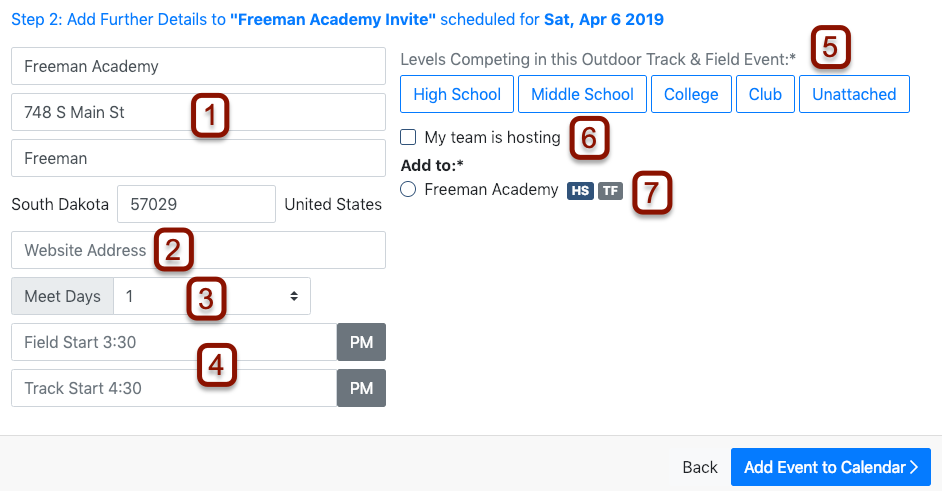
- Venue Location: Enter the venue name, address, city and zip / post code.
- Meet Website: If the meet has a separate website, paste the URL here.
- Meet Days: Enter the number of days the meet will run. If you're hosting a multi-day meet, see Creating a Multi-Day Meet.
- Start Times: Enter the start times of track events and field events, if you know them.
- Levels: Click the correct levels for athletes from whom you'd like to accept entries.
- Hosting: If you're hosting the meet, check this box. If you're just adding this meet to the calendar for informational purposes, leave the box unchecked so the meet host can claim the meet later.
- Add to Calendar: If you are affiliated with multiple clubs / teams, you'll see each club / team listed here. Select the correct club / team to add the meet to that club / team's calendar.
At the bottom right of the screen, you'll see either Add Event to Calendar or Continue to Meet Setup , depending on whether the My team is hosting box is checked. If you're adding a meet that's already taken place, there's no need to continue to check the My team is hosting box. Simply add the event to your team's calendar and then see Uploading Track & Field Results #1: Overview or Uploading Cross Country Results #1: Overview as necessary.