AthleticRUNMEET XC
AthleticRUNMEET XC can greatly simplify the process of preparing for Cross Country competitions. AthleticRUNMEET XC saves you time and integrates with the entry collection functions of an AthleticNET meet, on the Manage Meet page. In AthleticRUNMEET XC you can quickly seed the meet, print entries, results, rosters, and enter results for quick publishing to AthleticNET and AthleticLIVE.
SETUP AND SETTINGS
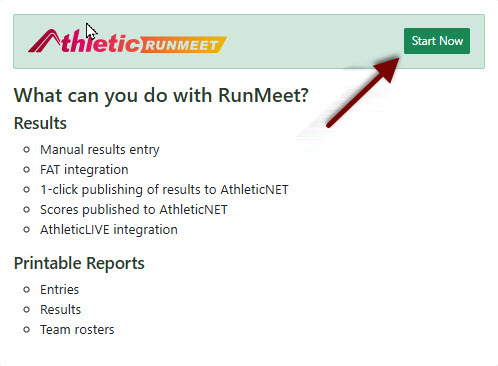
To get started go to your event page and click on AthleticRUNMEET

You will then see the Start Now screen for AthleticRUNMEET XC. Click the Start Now Tab.
This will take you through the setup process for AthleticRUNMEET XC. The first thing you need to decide is whether you are timing your event by Hand or with a Fully Automatic Timing system (FAT) that outputs a LIF file and how you want to import your results. The options are:
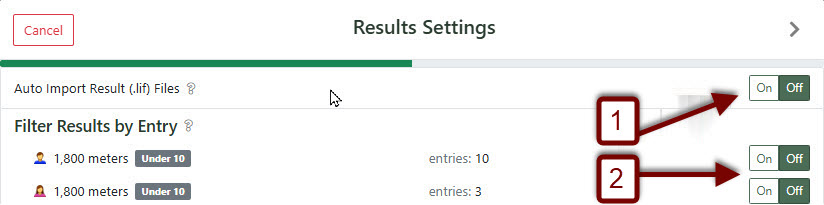
- Toggle the Auto Import Result (.lif) Files to
- ON if you are Chip or FAT Timing.
- OFF if you are Hand Timing.
- Toggle the Filter Results by Entry
- to OFF if you are timing individual races.
- to ON if you are timing a combined race (for example, all the Men or Women divisions start in the one race)
The final step in meet setup is to allocate Bib Numbers to athletes as follows:
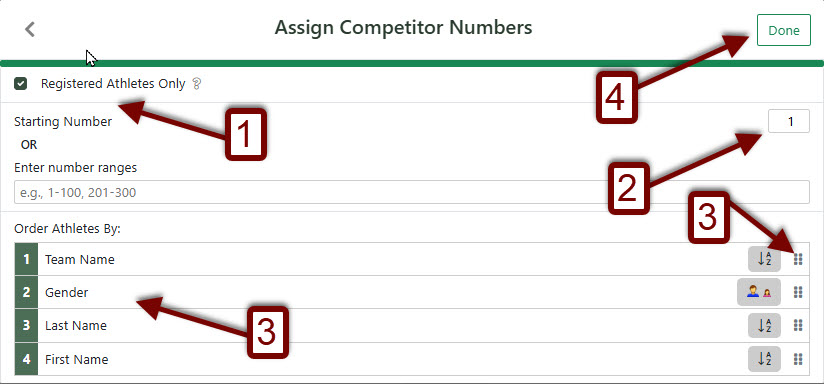
- Leave Registered Athletes Only unchecked if everyone associated with clubs / teams should be allocated a Bib Number or check Registered Athletes Only and only those that entered will be given a Bib Number.
- Decide what number you want the Bibs to start from.
- Determine how you want the Bib numbers to be allocated. You can change the order of priority by clicking the 6 black dots and drag and dropping them to the order you want the bibs to be allocated.
- Once you are happy with your selections, click Done.
ON THE DAY MANAGEMENT
Once you have completed the Meet setup and settings process, you will be able to manage the Meet from AthleticRUNMEET XC without too much difficulty. On the screen will now show:
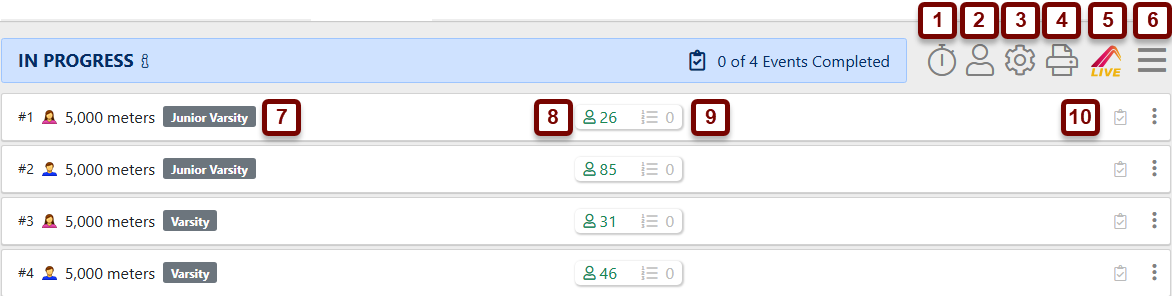
- Hand Timing (): Click here to start hand timing races.
- Athletes (): By clicking this button you will be able to:

- Add Athlete: Quickly add an athlete not in the meet. This will also assign the Athlete back to their Club / Team.
- Refresh Athletes: If an Administrator or Coach adds an Athlete to their Club / Team page, click this button and that Athlete will pull through into your meet. You will need to manually assign a Bib Number to this Athlete by clicking the next to the Athletes name under Comp #.
- Assign Comp #s: If you want to assign competition numbers to a group of new athletes, or reassign competition numbers to everyone, click this button and follow the steps to allocate the competition numbers for the Athletes in the meet.
- Clear Comp #s: Click here if you want to fully remove all competition numbers.
- Settings (): Revisit your meet settings you have just completed.
- Print Reports: More information can be found in the Reports section.
- Events: Your events (Races that are to be held at your Meet).
- Entries (): How many athletes are entered into each event.
- Results (): How many athlete results have been added for each event.
- Mark Complete (): If the event is completed OR not (If this box is green, it has been completed).
- Quick Links: Athletes (), Print Reports (), Make Your Event Live with AthleticLIVE, revisit overall Meet settings (), and the menu to download entries/rosters or reset RUNMEET (). If you are hand timing
- Click the Live button to initiate AthleticLIVE for your Meet. More information can be found further down the page.
- If you want further global Meet options, click the Burger Menu. In here you can fully reset AthleticRUNMEET XC for the current Meet.
Entries and Results
If you click on an Event, the screen will drop down and you will see on the screen your entries, plus the Entries and Results tabs and the +Add Entry on the bottom of each Event.
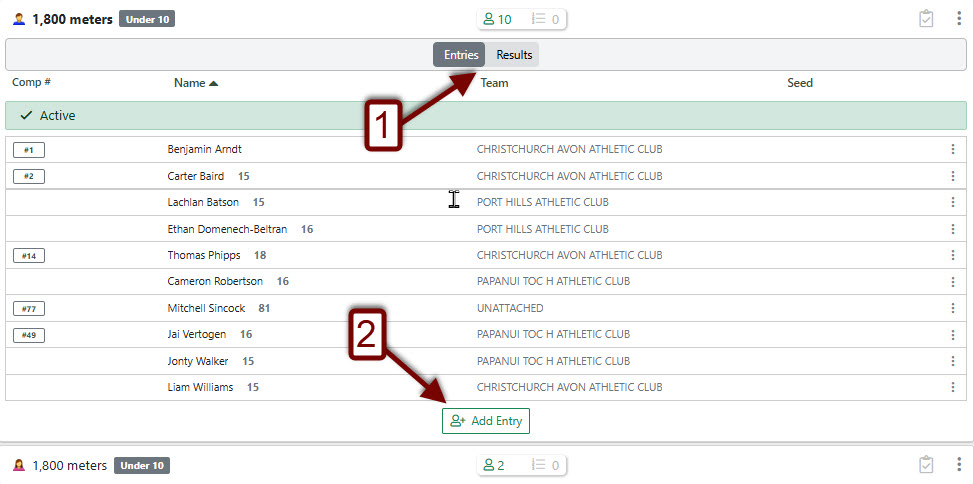
- Click on either of the Entries or Results tabs to manage your race day requirements. Results can be entered either manually (Hand Times) or through a Fully Automatic Timing (FAT) system. More info on FAT Integration below. For Hand Times follow this process:

- Click on the box Enter Name or Bib # and add this detail first.
- Enter the Hand Time recorded for the athlete.
- You will now see that the event has recorded one result (which is highlighted by the blue 1). You will then see the Mark Complete tab appear. Click this to finalize the Event.

- Add an entry by clicking the +Add Entry tab and you can add either the Bib number of the Athlete or search for the Athlete by their name. You will see a list of options appear above the box as you type in the details. Choose the athlete that you want to add. If the Athlete does not exist in the Meet, you will need to click Athletes as per 6(a) above.
Timing System Integration
AthleticRUNMEET XC supports FAT integration with FinishLynx, Flash Timing, and Eagle Eye through AthleticLOCAL. To see how easy this is, click Here
Using a FAT System will auto populate the results into AthleticRUNMEET XC. Once the results have auto populated you just need to click the Mark Complete tab.
Simultaneous Users
AthleticRUNMEET XC does not require complicated networking skills. All you need to do is add an Administrator or Coach to your Club / Team, Event Manager, or Timing page and they can log in and start using AthleticRUNMEET XC from anywhere in the world. To find out how to add an Administrator or Coach:
REPORTS
You have options for Reports that can be printed to help manage your Meet. Click the Report icon to access all the reports available for AthleticRUNMEET XC.

Entries
You can print the Entry Sheets.
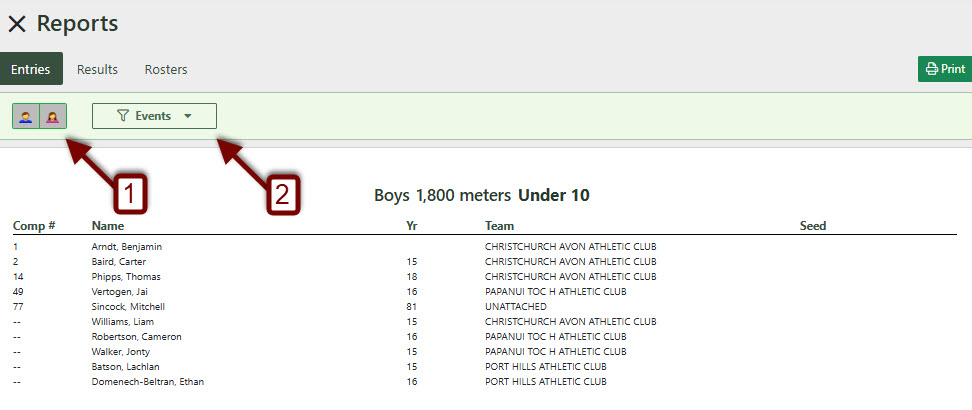
- Choose Men or Women or both Genders to Print.
- Select which Events or other combinations of Events to Print.
Results
You can print the Results Sheets.

- Choose Men or Women or both Genders to Print.
- Select which Events or other combinations of Events to Print.
Rosters / Club / Team Sheets
You can print the Club / Team Rosters / Sheets.
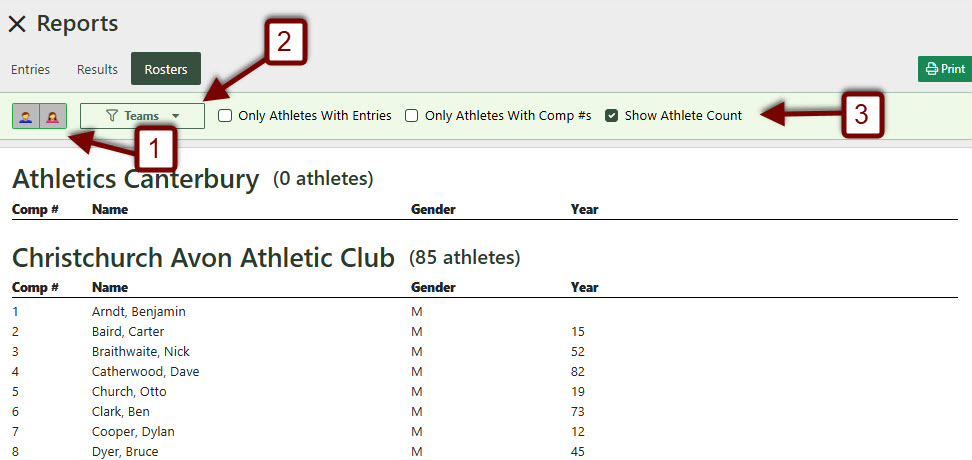
- Choose Men or Women or both Genders to Print.
- Select All Clubs / Teams, or other combinations of Clubs / Teams to Print.
- Determine if you want to Show Athlete Count on the report, Print Only Athletes with Comp #s and Print Only Athletes with Entries. You can choose all or none of these options.
AthleticLIVE
To display your results on AthleticLIVE, click the AthleticLIVE icon. For more help check Here

AthleticNET's AthletIcRUNMEET TRACK FEATURES
You may be interested in the following articles explaining the setup and usage of AthleticNET's AthleticRUNMEET TRACK features: